A patio that drains correctly does one specific thing: it moves water away from the house foundation at a rate fast enough to prevent pooling but slow enough to avoid creating a sloped surface that destabilizes furniture or becomes a fall hazard in freezing conditions. That is a narrower target than most DIY articles acknowledge. The math is simple. The failure modes are not.
This patio slope calculator takes three inputs (length, slope ratio, and starting elevation) and returns the total drainage drop in inches plus the final elevation at the far edge. It applies deterministic safety checks based on industry thresholds: below 1/8 inch per foot, above 1/2 inch per foot, and conditions that push the far edge below grade. What it does not do is account for sub-base settling, frost heave, or surface texture variations that affect real-world drainage performance.
After running your numbers, you will know whether your planned slope falls in the safe drainage window, whether you need to regrade, and precisely how far your far edge drops below the starting elevation at the house.
Use the Tool
Patio & Walkway Slope Calculator
Calculate proper drainage grade drop to prevent standing water & ice hazards
Warnings & Standards
Calculation Breakdown
| Parameter | Value |
|---|
Quick Reference: Drop by Length
| Length (ft) | 1/8″ /ft | 1/4″ /ft | 3/8″ /ft | 1/2″ /ft |
|---|
Recommended Tools for This Job
- 4-foot Stabila Aluminum Box Level
- String Line Level (mason’s line)
- Laser Distance Measure
- Marking / Grade Stakes
- Patio Table Leveling Shims
Assumptions & Limits
This patio slope calculator assumes a uniform, consistent slope across the full length. Real-world conditions (settling, frost heave, tree roots) can alter grade over time.
Recommended slope for residential patios and walkways: 1/4 inch per foot (IRC / industry standard). Minimum acceptable slope for drainage: 1/8 inch per foot.
Maximum safe slope before trip/furniture hazard: 1/2 inch per foot. Slopes above this can cause chairs to slide, tables to rock, and ice sheets to form ramps in winter.
This calculator does not account for sub-base compaction, soil permeability, or local code variations. Always verify with your local building authority for specific code requirements.
Length limited to 200 ft. Elevation limited to 600 inches (50 ft). For larger projects, consult a civil engineer.
How This Calculator Works
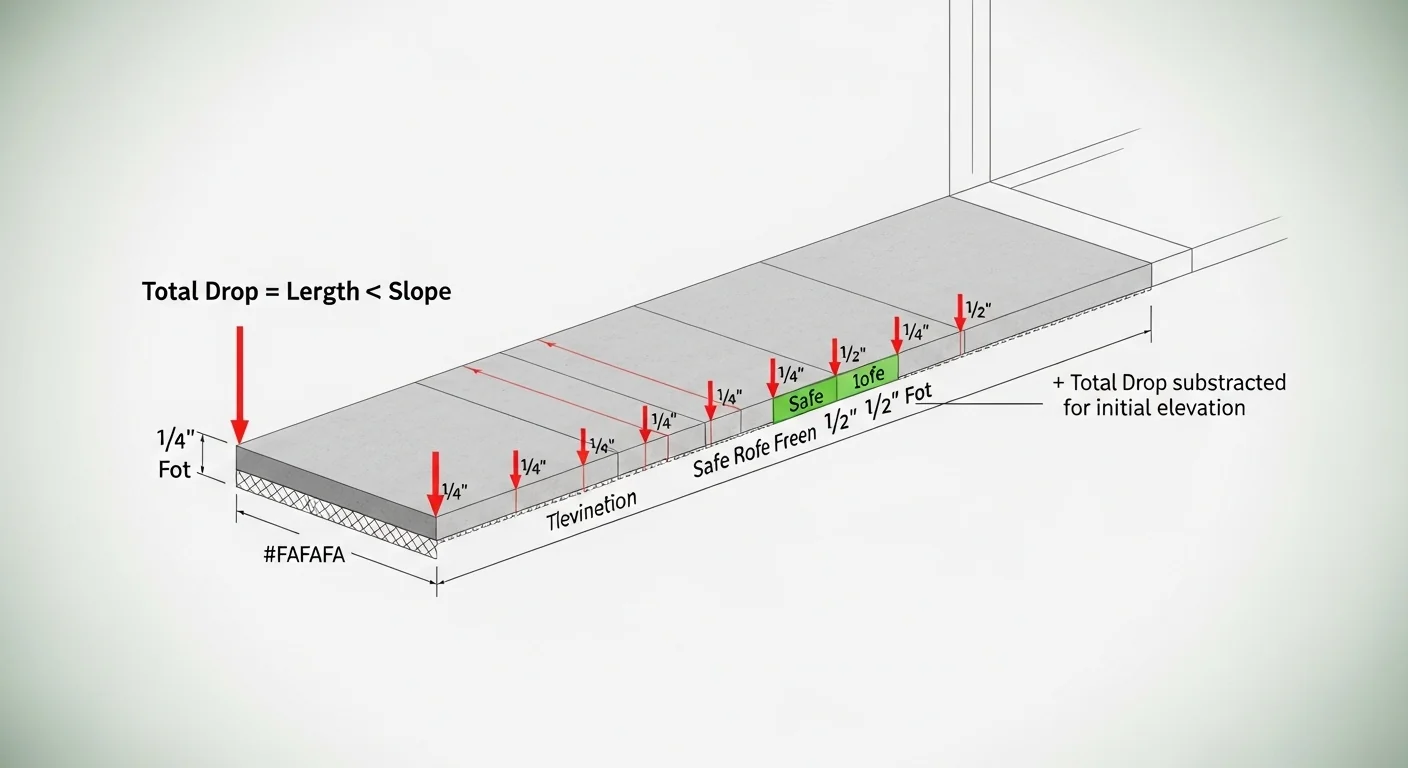
Step 1: Multiply patio length (in feet) by the slope ratio (inches per foot) to get the total drop.
Total Drop (inches) = Length (ft) × Slope (in/ft)
Step 2: Subtract the total drop from the initial elevation at the house foundation.
Final Elevation (inches) = Initial Elevation − Total Drop
Step 3: Safety checks are applied. If slope is below 1/8″ per foot, a “Bird-Bath” ponding warning is triggered. If slope exceeds 1/2″ per foot, a trip hazard / ice rink warning is triggered.
The industry-recommended slope for residential patios is 1/4 inch per foot, which provides reliable drainage without creating noticeable tilt for furniture or foot traffic.
Before calculating, have three measurements ready: the total length of the patio or walkway running away from the house (not the width), your target slope ratio in inches per foot, and the current or planned elevation at the house foundation side in inches. If you are working from a paver installation plan, check whether your paver base depth affects the starting elevation before entering numbers here.
Measure length along the drainage direction, not diagonally. If your patio has an irregular shape, use the longest run in the drainage direction.
Quick Start (60 Seconds)
- Patio/Walkway Length: Enter the distance the surface extends away from the house, in feet. This is the run over which the slope is applied. Do not enter the width parallel to the house wall.
- Desired Slope Ratio: Select from the dropdown. The industry-recommended standard is 1/4 inch per foot. The absolute minimum for drainage is 1/8 inch per foot. Anything below 1/8 inch per foot will trigger a ponding warning.
- Initial Elevation at House Foundation: Enter the elevation of the surface at the house-side edge in inches. If the concrete slab sits 6 inches above surrounding grade, enter 6. This anchors where the drop calculation begins.
- All three fields are required. The calculator will not run until valid numbers are entered in every field.
- Unit reminder: Length is in feet; elevation is in inches. Do not mix units. A common mistake is entering elevation in feet (e.g., 0.5 instead of 6).
- After calculating: Review the traffic-light status and the warnings box before accepting the result. A green status at 1/4 inch per foot on a 30-foot patio still produces a 7.5-inch total drop, which may require a step or retaining edge at the far end.
Inputs and Outputs (What Each Field Means)
| Field | Unit | What It Means | Common Mistake | Safe Entry Guidance |
|---|---|---|---|---|
| Patio / Walkway Length | Feet | The horizontal distance the surface extends away from the house, measured along the direction water is intended to drain | Entering the width of the patio instead of the drainage-direction length | Measure from the house foundation face to the outer edge; use 1 to 200 ft |
| Desired Slope Ratio | Inches per foot | The vertical drop per horizontal foot of run; controls drainage speed and surface feel underfoot | Selecting 1/8 inch per foot as "safe" without accounting for real-world settling that can reduce effective slope further over time | Use 1/4 inch per foot as the default; only go to 1/8 if structural constraints prevent 1/4 |
| Initial Elevation at House Foundation | Inches | The height of the patio surface at the house-side edge above a reference datum, used to compute the absolute elevation at the far edge | Entering feet instead of inches (e.g., 0.5 ft instead of 6 in) | Measure with a tape from finished surface to grade or slab reference; enter 0 to 600 in |
| Total Drainage Drop (output) | Inches | The vertical distance the surface descends from house to far edge; the key number for grading and forming work | Treating this as an approximate guide and not staking it during installation | Stake and string-line this dimension during installation to verify before concrete or base is set |
| Final Elevation at Far Edge (output) | Inches | The elevation of the surface at the outermost edge after the full slope is applied; if negative, the far edge is below the reference grade | Ignoring a negative final elevation, which can mean the patio terminates into a low trench that collects rather than disperses water | If the result is negative or near zero, add a drain channel or replan the grade; consider where collected runoff goes using a rain garden sizing approach |
Worked Examples (Real Numbers)
Scenario 1: Standard Backyard Patio at Recommended Slope
- Length: 20 feet
- Slope ratio: 1/4 inch per foot
- Initial elevation at house foundation: 6 inches
Result: Total drop = 20 x 0.25 = 5.00 inches. Final elevation = 6.00 - 5.00 = 1.00 inch above reference grade.
This is the textbook scenario. A 20-foot patio at 1/4 inch per foot drops 5 inches and terminates 1 inch above surrounding grade, providing a small positive lip that prevents backflow. No warnings are triggered.
Scenario 2: Narrow Side Walkway at Minimum Slope
- Length: 8 feet
- Slope ratio: 1/8 inch per foot
- Initial elevation at house foundation: 4 inches
Result: Total drop = 8 x 0.125 = 1.00 inch. Final elevation = 4.00 - 1.00 = 3.00 inches above reference grade.
The calculator flags a caution status. A drop of only 1 inch over 8 feet meets the absolute minimum threshold, but it leaves no margin for settling or minor forming errors. Any sub-grade compaction shift over time can push effective slope below 1/8 inch per foot.
Scenario 3: Long Walkway with Excessive Slope
- Length: 30 feet
- Slope ratio: 3/4 inch per foot
- Initial elevation at house foundation: 12 inches
Result: Total drop = 30 x 0.75 = 22.50 inches. Final elevation = 12.00 - 22.50 = -10.50 inches (below reference grade).
Two danger flags fire here: the slope exceeds the 1/2-inch-per-foot trip hazard threshold, and the far edge terminates 10.5 inches below the reference point. This configuration creates a drainage channel problem at the far end and an ice-sheet hazard in cold climates. This slope requires a structural redesign, likely with intermediate steps or a retaining edge.
Reference Table (Fast Lookup)
All values show total drop in inches. The "Drainage Status" column applies to the slope at 1/4 inch per foot, the standard recommended pitch.
| Length (ft) | Drop at 1/8"/ft | Drop at 3/16"/ft | Drop at 1/4"/ft | Drop at 3/8"/ft | Drop at 1/2"/ft | Drainage Status (at 1/4") |
|---|---|---|---|---|---|---|
| 6 | 0.75" | 1.13" | 1.50" | 2.25" | 3.00" | Safe |
| 8 | 1.00" | 1.50" | 2.00" | 3.00" | 4.00" | Safe |
| 10 | 1.25" | 1.88" | 2.50" | 3.75" | 5.00" | Safe |
| 12 | 1.50" | 2.25" | 3.00" | 4.50" | 6.00" | Safe |
| 16 | 2.00" | 3.00" | 4.00" | 6.00" | 8.00" | Safe |
| 20 | 2.50" | 3.75" | 5.00" | 7.50" | 10.00" | Safe |
| 24 | 3.00" | 4.50" | 6.00" | 9.00" | 12.00" | Safe; consider step at far edge |
| 30 | 3.75" | 5.63" | 7.50" | 11.25" | 15.00" | Safe; verify far-edge termination |
| 40 | 5.00" | 7.50" | 10.00" | 15.00" | 20.00" | Safe; stepped grade or retaining edge recommended |
How the Calculation Works (Formula + Assumptions)

Show the calculation steps
Step 1: Calculate total drainage drop.
Multiply the patio length (in feet) by the slope ratio (in inches per foot).
Total Drop (in) = Length (ft) x Slope (in/ft)
Example: 20 ft x 0.25 in/ft = 5.00 inches.
Step 2: Calculate final elevation.
Subtract the total drop from the initial elevation at the house foundation.
Final Elevation (in) = Initial Elevation (in) - Total Drop (in)
Example: 6.00 - 5.00 = 1.00 inch.
Step 3: Apply safety thresholds.
If slope is below 1/8 inch per foot: Bird-Bath ponding warning fires.
If slope is above 1/2 inch per foot: Trip hazard and ice-ramp warning fires.
If slope is above 3/4 inch per foot: Extreme slope danger, ADA non-compliant for accessible routes.
If final elevation is negative: Below-grade warning fires.
If total drop exceeds 12 inches: Step-or-retaining-edge advisory fires.
Rounding: Results are displayed to two decimal places. For installation purposes, round to the nearest 1/16 inch when marking string-line elevations.
Unit conversion note: Slope is entered and displayed in inches per foot. To convert to a percentage grade, divide by 12 and multiply by 100. A 1/4-inch-per-foot slope equals approximately 2.083 grade by that method.
Assumptions and Limits
- The calculator assumes a perfectly uniform slope across the full length. Real surfaces have forming tolerances, aggregate variations, and potential crowning or cupping that alter effective drainage.
- Sub-base compaction is not modeled. A properly compacted base is required for the designed slope to hold over time; uncompacted fill can settle unevenly and reduce effective pitch.
- Frost heave is not accounted for. In freeze-thaw climates, seasonal ground movement can alter a correctly installed slope by fractions of an inch per cycle, accumulating over years.
- The tool accepts lengths from 1 to 200 feet and elevations from 0 to 600 inches. Projects outside these ranges should be reviewed by a licensed civil engineer or grading contractor.
- Local building codes vary. Some jurisdictions specify minimum patio slopes that differ from the IRC-referenced 1/4-inch-per-foot industry standard. Always verify with your local authority having jurisdiction.
- The tool does not calculate lateral slope (cross-slope across the patio width), only the longitudinal slope away from the house. Wide patios may need both directions evaluated.
- Surface texture matters. Exposed aggregate or rough-broomed concrete drains more forgivingly at lower slopes than smooth-troweled or sealed surfaces, where micro-ponding forms more easily.
Standards, Safety Checks, and "Secret Sauce" Warnings
Critical Warnings
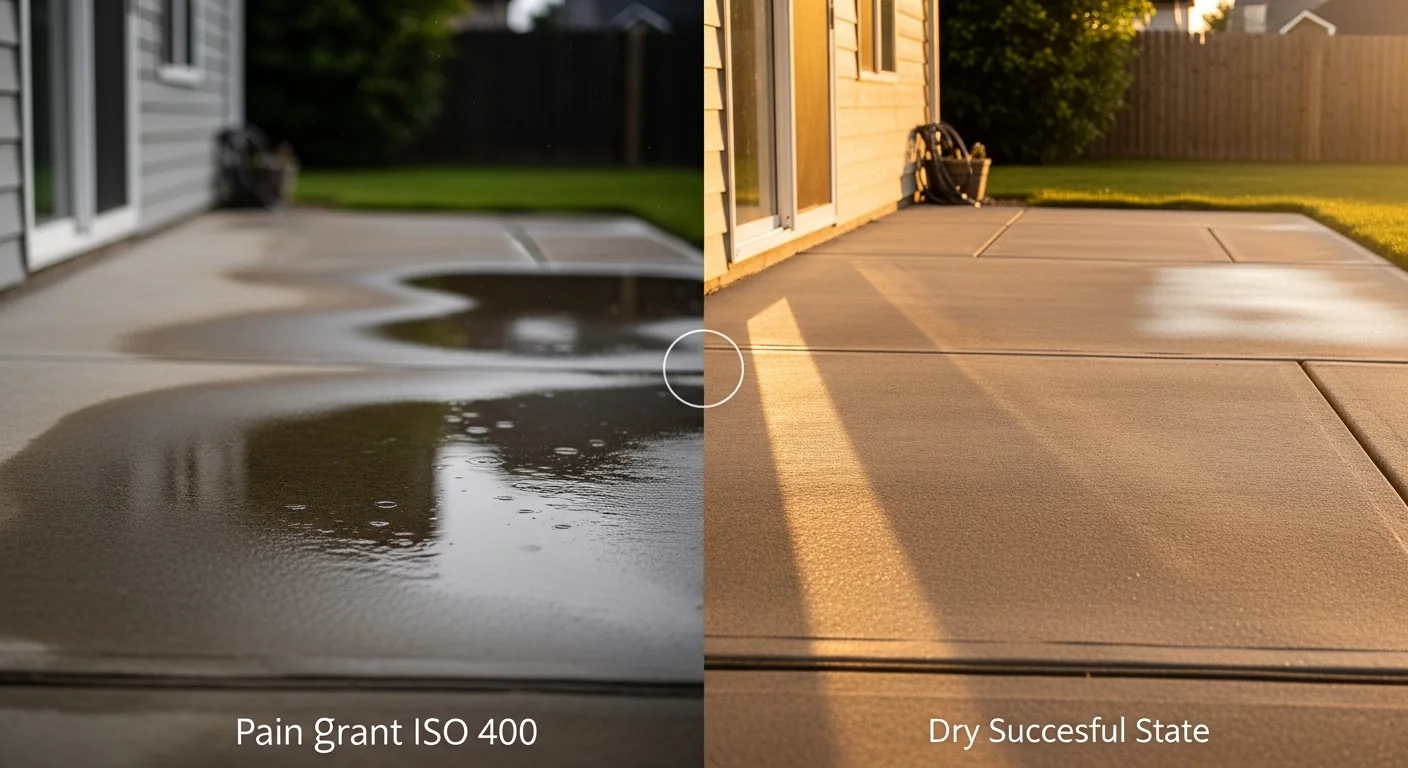
- The Bird-Bath Ice Hazard: A patio set perfectly level (zero slope) or below 1/8 inch per foot traps micro-puddles of water in low spots. Surface tension holds these puddles in place long after rainfall stops. In below-freezing conditions, these become invisible black ice patches directly outside the back door, where foot traffic is heaviest and the transition from indoor warmth to outdoor cold is most abrupt. This is not a cosmetic drainage problem; it is a slip-and-fall liability positioned at the most-used exit of the home.
- The Ice Ramp at Steep Slopes: Aggressive slopes above 1/2 inch per foot drain quickly, which sounds beneficial until temperatures drop. Water flowing across the surface reaches the far edge and beyond, where it contacts cold ground or a cold retaining edge and freezes. The result is an ice sheet that forms on a slope, functioning as a ramp rather than a flat patch. Unlike flat black ice, sloped ice accelerates a fall.
- Furniture Stability Starts at 3/8 Inches Per Foot: Standard four-legged patio furniture begins to feel noticeably unlevel on slopes above 3/8 inch per foot. At 1/2 inch per foot, chairs slide on smooth surfaces. Slopes at or above 3/4 inch per foot make most patio furniture functionally unusable without leveling shims.
- Negative Final Elevation: When the computed final elevation drops below zero, the far edge of the patio sits below surrounding grade. Water that drains off the surface has nowhere to go and pools at the low end, reversing the drainage intent entirely.
Minimum Standards
- The industry-standard minimum slope for residential hardscape drainage is 1/8 inch per foot. This is the floor, not the target.
- The recommended design slope for residential patios and walkways is 1/4 inch per foot. This provides reliable drainage with acceptable furniture stability and pedestrian comfort.
- The practical maximum for general-use patios without special design accommodations is 1/2 inch per foot. Above this threshold, trip hazard considerations and furniture usability become primary concerns.
- ADA accessibility guidelines set a maximum running slope of 1:20 (approximately 0.6 inches per foot) for accessible routes, with a maximum cross-slope of 1:48. Patios serving as accessible paths must stay below these limits.
Competitor Trap
Most patio drainage guides stop at "slope it away from the house." The missing detail is the upper bound. A contractor or DIYer who reads that guidance and then builds a 25-foot patio at 3/4 inch per foot has technically followed the advice and created a surface that drops nearly 19 inches over its length, presents a trip and ice hazard, violates ADA accessible route criteria, and likely places the far edge below surrounding grade. Grading advice without a defined safe range is incomplete advice. The safe zone for residential hardscape drainage is a specific corridor: 1/8 inch per foot at minimum, 1/2 inch per foot at maximum, with 1/4 inch per foot as the practical target. A useful comparison for sloped-surface drainage logic also applies to driveways; the gravel driveway slope calculator addresses similar grade constraints for unpaved surfaces. For cases where the total drop exceeds comfortable pedestrian step height, an outdoor stair riser calculator helps determine whether a step transition is needed at the far edge.
Common Mistakes and Fixes
Mistake: Setting the Patio Level to Stabilize Outdoor Furniture
This is the single most common grading error on residential projects. A level patio feels intuitive because level tables and chairs seem like the goal. The problem is that "level" on a horizontal hardscape surface means zero drainage slope, which means every rainfall leaves standing water in micro-depressions that are invisible before water arrives. On smooth concrete or sealed pavers, surface tension holds these puddles long after surrounding surfaces dry.
Fix: Set the design slope at 1/4 inch per foot from the start. Use leveling shims or adjustable-leg furniture bases to compensate for the incline at the table rather than removing the slope from the ground.
Mistake: Measuring Total Patio Area Instead of Drainage Run Length
Homeowners often describe a patio as "20 by 30 feet" and enter 30 feet into the length field when 30 feet is the dimension running parallel to the house wall, not away from it. The drainage-direction run is the measurement perpendicular to the house foundation. Entering the wrong dimension produces an incorrectly calculated drop that either under-slopes (too little drop calculated) or over-slopes (too much).
Fix: Stand at the house wall and walk straight toward the far edge of the patio. That walking distance is the drainage-direction length to enter.
Mistake: Ignoring the Far-Edge Termination Point
Calculating slope without evaluating where water goes after it leaves the patio is an incomplete plan. A correctly sloped patio that terminates at a fence line, a sunken planting bed, or a low-point against a retaining structure simply relocates the ponding problem. The total drop calculation tells you how much the surface descends; it does not tell you whether that destination is appropriate.
Fix: Map the water's path to the final discharge point before finalizing slope. On projects with significant grade change, a retaining wall calculation may be needed at the far edge to manage the grade transition safely.
Mistake: Applying the Same Slope to Both the Patio and an Adjacent Walkway
Patios and walkways have different user expectations. A patio is a gathering space where level comfort matters more; a walkway is a transit path where drainage is more critical and furniture stability is irrelevant. Applying patio-appropriate slopes (1/4 inch per foot) to a long walkway running 40 feet from the house produces a total 10-inch drop that may require a step or grade break. Applying walkway-tolerant slopes (3/8 inch per foot) to a patio creates furniture instability.
Fix: Calculate each surface separately with its function in mind. Enter each run individually into the calculator and compare results before committing to a single slope across both surfaces.
Mistake: Assuming Synthetic Turf Drains Itself and Skipping Slope Calculation
Artificial turf installations are sometimes planned without a slope calculation because the backing material is marketed as permeable. Permeability addresses vertical water movement through the turf layer; it does not prevent horizontal surface pooling on a poorly graded base. The base grade determines where water collects before it infiltrates, and a flat or reverse-sloped base creates standing water under the turf even when the turf surface appears dry. For installations using alternative surfaces, the artificial turf drainage calculator addresses this base-grade relationship specifically.
Fix: Apply the same 1/4-inch-per-foot minimum slope standard to the compacted base course under synthetic turf as to any other hardscape surface.
Next Steps in Your Workflow
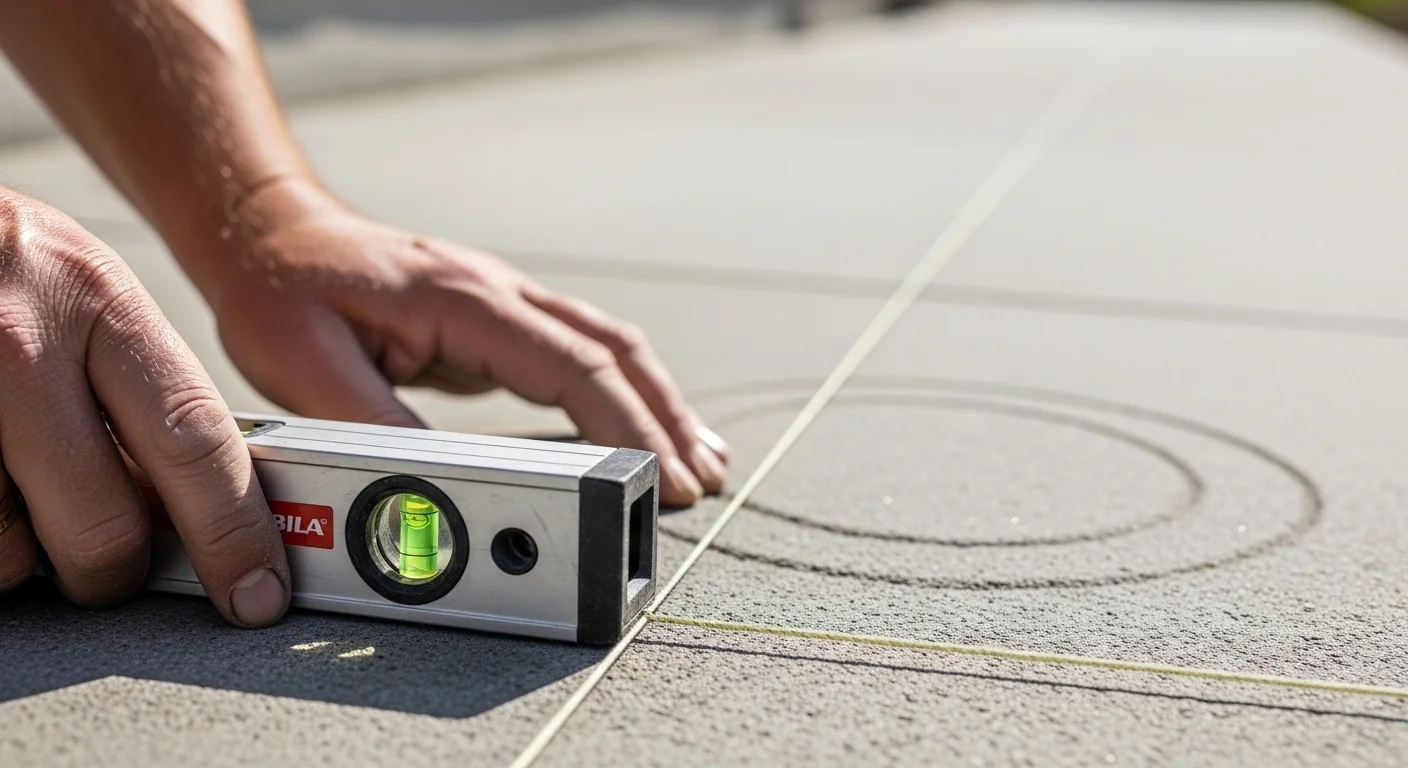
Once you have a confirmed slope and total drop, the next physical step is transferring that number to the ground using stakes and string line. Drive a stake at the house-foundation edge at the planned surface height, then calculate the string height at each intermediate stake by applying your slope ratio incrementally. A 4-foot box level or a string-line level confirms pitch between stakes. Do not rely on eye estimation for this step; a 1/4-inch variance over a 4-foot section accumulates to a 1-inch error over a 16-foot run, pushing an installation out of the safe drainage window. If the base material for your surface is gravel or crushed stone, a gravel volume calculation should be run before ordering material so depth adjustments at the far edge are factored into the total quantity.
After the base is graded and compacted to the calculated slope, the finishing layer installation follows. For paver projects, joint sand selection and application is the next critical step. Calculating polymeric sand coverage before installation prevents mid-project shortages on large patio areas. For concrete pours, slope verification should happen at the screed stage, before the concrete sets, using a 4-foot level checked against the string-line at multiple points across the slab width, not just the centerline.
FAQ
What is the minimum slope for a patio to drain properly?
The industry-accepted minimum slope for residential patio drainage is 1/8 inch per foot (approximately a 1.04 grade). This is the floor for acceptable drainage, not the recommended target. At this minimum, any settling, forming imprecision, or surface irregularity can push actual drainage below the functional threshold. The recommended design slope is 1/4 inch per foot, which provides a safety margin above the minimum.
How much drop does a 20-foot patio need?
At the recommended slope of 1/4 inch per foot, a 20-foot patio requires exactly 5 inches of total drop from house to far edge. At the minimum slope of 1/8 inch per foot, that same patio requires 2.5 inches. The recommended 5-inch drop is the standard starting point for planning forming and base preparation on a 20-foot residential patio.
Is a 1/4-inch-per-foot slope noticeable when walking on a patio?
A 1/4-inch-per-foot slope is generally not perceptible underfoot during normal walking. It becomes noticeable on very long runs (over 30 feet) and is detectable when furniture placed on the surface sits at an angle. For reference, a 20-foot patio at 1/4 inch per foot drops 5 inches total; the tilt is subtle but visible when looking at the surface from the side.
Can a patio have too much slope?
Yes. Slopes above 1/2 inch per foot create trip hazards for pedestrians and cause standard patio furniture to slide on smooth surfaces. Above 3/4 inch per foot, the surface becomes difficult to use for its intended purpose and in cold climates, angled ice sheets form instead of flat patches. ADA guidelines set an upper limit of approximately 0.6 inches per foot for accessible exterior surfaces.
What happens if a patio has zero slope?
A perfectly level patio traps micro-pools of standing water in any surface depression, no matter how shallow. These pools evaporate slowly on warm days but freeze overnight in cold weather, creating invisible black ice at the point of highest foot traffic. Over time, standing water also accelerates joint erosion on pavers and promotes moss and algae growth on concrete surfaces.
Does slope direction matter, or just slope amount?
Direction matters significantly. Slope must run away from the house foundation. Slope running parallel to the house (across the patio width) helps cross-drainage but does not protect the foundation. Slope running toward the house channels water directly against the foundation wall, which is the primary cause of basement water infiltration on patios and walkways installed without proper grading review.
Conclusion
The patio slope calculator resolves the grading question to a specific number rather than a vague directional instruction. The total drop figure and final elevation output are the two numbers that transfer directly to stake-and-string installation work, base preparation depth adjustments, and far-edge termination planning. Every other aspect of patio construction tolerates approximation; slope does not. A forming error of 1/2 inch across a 24-foot patio is the difference between the safe drainage zone and the ponding zone.
The one mistake worth repeating: setting a patio level to keep furniture stable creates an ice hazard, not a design asset. Furniture can be shimmed. A re-sloped patio cannot be fixed without significant demolition. Calculate the drop before any concrete is poured or any base course is compacted. For projects where the patio connects to a stepping stone path at the far edge, calculating the correct number of stones relative to the graded run with a stepping stone calculator ensures the path materials account for the grade change rather than working against it.
Lead Data Architect
Umer Hayiat
Founder & Lead Data Architect at TheYieldGrid. I bridge the gap between complex agronomic data and practical growing, transforming verified agricultural science into accessible, mathematically precise tools and guides for serious growers.
View all tools & guides by Umer Hayiat →