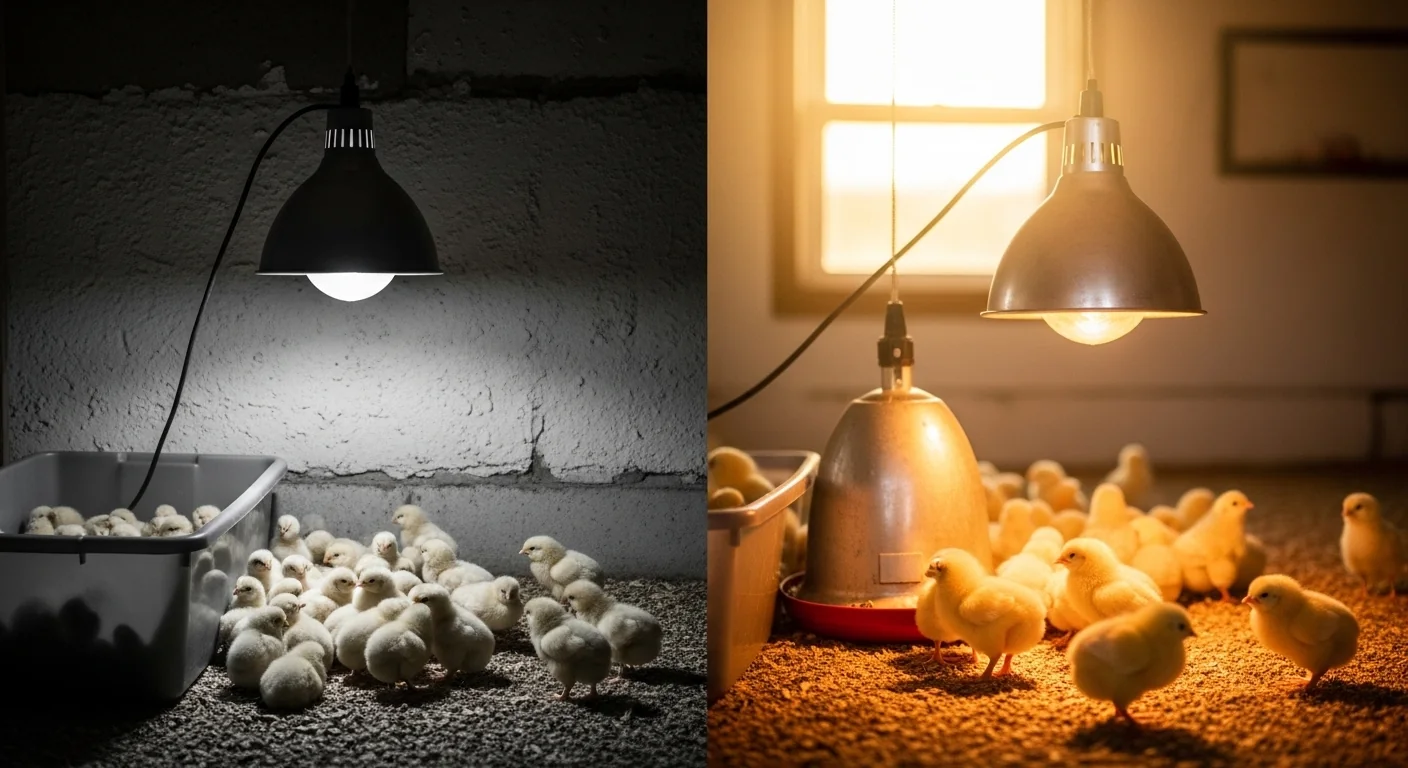
Chick deaths in the first week of brooding almost always trace back to one of two thermal failures: the brooder is too cold and chicks pile into a corner until the ones on the bottom suffocate, or the brooder runs too hot and chicks develop pasty butt, a fatal fecal blockage. Neither failure announces itself loudly. A beginner’s brooder can look calm while a thermal crisis is already underway beneath the surface. Getting the wattage right for your specific box size, flock count, and room temperature is the difference between a thriving batch and a catastrophic loss.
This calculator takes your brooder dimensions, the number of chicks, your ambient room temperature, and your heat source type, then outputs the required wattage, estimated BTU output, number of heat sources, and a direct temperature safety verdict. It does not replace a physical thermometer placed at chick level inside your brooder. It is a pre-setup planning tool that tells you whether your intended configuration has a reasonable chance of hitting the Week 1 target of 90 to 95 degrees Fahrenheit before you put a single chick at risk. If you are still in the incubation phase, the hatch date calculator can help you plan exactly when your brooder needs to be ready.
After running this calculator, you will know whether your current or planned heat source is adequately sized for your brooder box and room conditions, or whether you need to add a second lamp, switch to a radiant plate, or reduce your flock size before brooding begins.
Use the Tool
| Parameter | Value |
|---|
Reference: Week-by-Week Temperature Guide
| Week | Target Temp (°F) | Min Space (sq in/chick) | Risk if Below |
|---|
How This Calculator Works
Step 2: Convert to square feet: Area (sq ft) = Area (sq in) ÷ 144.
Step 3: Check minimum space: Each chick needs at least 6 sq in in Week 1 (increases weekly). If total area ÷ number of chicks < minimum, overcrowding is flagged.
Step 4: Determine wattage multiplier based on ambient room temperature. Colder rooms require more watts per square foot. The multiplier ranges from 15 (very cold, <40°F) down to 5 (warm, >80°F) watts per sq ft.
Step 5: Watts Required = Area (sq ft) × Multiplier.
Step 6: Estimate achievable brooder temperature from heat source. A 250W lamp heats approx. 2–4 sq ft effectively. Radiant plates cover the rated area more evenly.
Step 7: Safety checks: If estimated temp < 90°F in Week 1 → FATAL PILE-UP risk. If estimated temp > 95°F → PASTY BUTT risk. If space per chick < 6 sq in → overcrowding/smothering risk.
Step 8: Recommend number of heat sources and additional gear.
Assumptions & Limits
• Minimum space: 6 sq in/chick (Week 1), increasing to 12 sq in by Week 4+.
• 250W heat lamp effective coverage: ~2–4 sq ft depending on height.
• Radiant heat plates sized to cover 12×12 in per rated chick capacity.
• Wattage multiplier assumes standard insulated indoor brooder, no drafts.
• Ambient temps below 40°F greatly increase heat loss and pile-up danger.
• This calculator is for Week 1 chicks by default. Adjust targets as chicks grow.
• Always use a thermostat controller for precise temperature regulation.
Before entering values, measure the interior floor dimensions of your brooder box in inches, not feet. Have your ambient room temperature handy from a thermometer at the level where the brooder will sit, not from a wall thermostat that may read several degrees warmer. Count your actual chick order, not an estimate. Select your heat source type based on what you physically have or plan to purchase. For broader housing planning once chicks graduate from the brooder, the chicken coop calculator covers space and ventilation requirements for the next growth stage.
Quick Start (60 Seconds)
- Number of Chicks: Enter the exact count from your order. Resist the urge to round down. A batch of 27 entered as 25 skews the space-per-chick calculation and can push an overcrowded result into a false "safe" reading.
- Brooder Length (inches): Measure the interior floor length, not the outside box dimension. Walls and insulation material take space. Measure in inches; do not convert to feet before entering.
- Brooder Width (inches): Same rule: interior measurement in inches. A stock tank or plastic tote has slightly tapered walls; measure at the widest usable floor point.
- Ambient Room Temp (degrees F): Read from a thermometer at the brooder's floor level in the actual room, not from a climate control display. Garages and barns often run 20 to 30 degrees colder than adjacent living spaces in early spring.
- Heat Source Type: Choose 250W Heat Lamp if you are using a standard incandescent or ceramic heat emitter bulb in a lamp fixture. Choose Radiant Heat Plate if you are using a contact-type plate that chicks walk under. These have fundamentally different heat distribution profiles, and the calculator applies different efficiency coefficients for each.
- Hit Calculate only when all fields are filled. The calculator will not run with any empty input and will display inline error messages for missing or out-of-range values.
- Read the color-coded verdict first. A green result means the estimated temperature falls in the safe 90 to 95 degree range. Red means a pile-up or pasty butt risk is present. Address warnings before proceeding.
Inputs and Outputs (What Each Field Means)
| Field | Unit | What It Means | Common Mistake | Safe Entry Guidance |
|---|---|---|---|---|
| Number of Chicks | Count (whole number) | Total live chicks placed in the brooder at one time | Entering planned order size when actual delivery count differs | 1 to 500; use the count on your shipping confirmation |
| Brooder Length | Inches | Interior floor length of the brooder box | Measuring the outside of the box, or entering feet instead of inches | 6 to 240 in; measure the usable floor space, not exterior walls |
| Brooder Width | Inches | Interior floor width of the brooder box | Same as above; using exterior dimensions meaningfully inflates the calculated area on thick-walled totes | 6 to 240 in; for round stock tanks, use the widest interior measurement |
| Ambient Room Temp | Degrees Fahrenheit | Baseline air temperature of the room where the brooder is located | Reading from a house thermostat instead of measuring at brooder location in the garage or barn | 20 to 110 degrees F; measure at brooder floor level, not ceiling level |
| Heat Source Type | Category | Determines the watt-to-heat efficiency coefficient applied in the formula | Selecting 250W Lamp when using a radiant plate, or vice versa | 250W Lamp for overhead bulb fixtures; Radiant Plate for contact-type panel heaters |
| Watts Required (output) | Watts | Minimum electrical power needed to heat the brooder area given ambient conditions | Treating this as the final answer rather than the minimum threshold | Use this to confirm your heat source exceeds the minimum; add a buffer in very cold rooms |
| Estimated Brooder Temp (output) | Degrees Fahrenheit | Modeled temperature inside the brooder based on heat source output and room conditions | Treating the modeled value as a substitute for a physical thermometer reading | Always verify with a digital thermometer at chick level before placing birds |
| BTU Output (output) | BTU/hr | Heat energy output per hour from the selected configuration (watts x 3.412) | Not relevant to most setups; used when coordinating with HVAC or barn heating systems | Informational; primary decision metric is the temperature verdict and watt comparison |
| Space Per Chick (output) | Square inches | Floor area divided by chick count; compared against the 6 sq in minimum for Week 1 | Assuming more space is always safer; extreme oversizing with insufficient heat is equally dangerous | Week 1 minimum: 6 sq in per chick. Week 3 to 4: 8 to 10 sq in. Aim for growth headroom |
Worked Examples (Real Numbers)
Scenario 1: Small Indoor Batch, Radiant Heat Plate
- Chicks: 15
- Brooder: 24 in x 18 in (interior)
- Ambient Room Temp: 78 degrees F
- Heat Source: Radiant Heat Plate
Area = 24 x 18 = 432 sq in = 3.0 sq ft. Space per chick = 28.8 sq in (above the 6 sq in minimum). Wattage multiplier for 78 degrees F = 7. Watts required = 3.0 x 7 = 21W. One radiant heat plate (75W rated). Temperature rise = (75 x 0.18) / 3.0 = 4.5 degrees F. Estimated brooder temp = 78 + 4.5 = 82.5 degrees F.
Result: 82.5 degrees F estimated, 75W total, 1 radiant plate. Pile-up warning triggered: estimated temp falls below the 90-degree Week 1 minimum.
Even in a warm 78-degree room, a single radiant plate in a 3 sq ft brooder underperforms the Week 1 threshold for this model. Raising the ambient to 85 degrees F or adding supplemental heat would clear the warning. A digital thermostat controller is essential for fine-tuning.
Scenario 2: Cold Garage, Large Flock, Single Lamp
- Chicks: 50
- Brooder: 48 in x 36 in (interior)
- Ambient Room Temp: 45 degrees F
- Heat Source: 250W Heat Lamp
Area = 48 x 36 = 1,728 sq in = 12.0 sq ft. Space per chick = 34.56 sq in. Wattage multiplier for 45 degrees F = 13. Watts required = 12.0 x 13 = 156W. One 250W lamp is selected. Temperature rise = (250 x 0.12) / 12.0 = 2.5 degrees F. Estimated brooder temp = 45 + 2.5 = 47.5 degrees F.
Result: 47.5 degrees F estimated, 250W, 1 lamp. Fatal pile-up risk warning.
This is the most dangerous configuration in small-flock homesteading: a large tub with a single lamp in an unheated garage. The thermal model shows the lamp is insufficient to overcome the 45-degree baseline. Two or three 250W lamps or a combination of radiant heat and a ceramic emitter would be required to approach 90 degrees F at this room temperature and brooder size.
Scenario 3: Overheated Small Box
- Chicks: 10
- Brooder: 18 in x 18 in (interior)
- Ambient Room Temp: 92 degrees F
- Heat Source: 250W Heat Lamp
Area = 18 x 18 = 324 sq in = 2.25 sq ft. Space per chick = 32.4 sq in. Wattage multiplier for 92 degrees F = 5. Watts required = 2.25 x 5 = 11.25W. One 250W lamp. Temperature rise = (250 x 0.12) / 2.25 = 13.3 degrees F. Estimated brooder temp = 92 + 13.3 = 105.3 degrees F (capped at 105 degrees F by the model).
Result: Estimated 105 degrees F, pasty butt risk warning triggered.
A 250W lamp in an 18 x 18 in box in a hot room is a thermal trap. The heat cannot escape and chicks have nowhere to cool down. At this temperature, dehydration and pasty butt onset can begin within hours. Raising the lamp height, switching to a lower-wattage ceramic emitter on a thermostat, or moving to a much larger brooder with a cooler zone would resolve this.
Reference Table (Fast Lookup)
| Ambient Temp (F) | Multiplier (W/sq ft) | Watts Req (3 sq ft box) | Watts Req (6 sq ft box) | Watts Req (12 sq ft box) | Risk Zone if Underpowered |
|---|---|---|---|---|---|
| Below 40 | 15 | 45W | 90W | 180W | Fatal pile-up, rapid hypothermia |
| 40 to 49 | 13 | 39W | 78W | 156W | Severe pile-up risk in any large brooder |
| 50 to 59 | 11 | 33W | 66W | 132W | High pile-up risk; single lamp marginal at 12 sq ft |
| 60 to 69 | 9 | 27W | 54W | 108W | Moderate risk; one 250W lamp typically sufficient to 6 sq ft |
| 70 to 79 | 7 | 21W | 42W | 84W | Low risk; radiant plate viable for small brooder |
| 80 and above | 5 | 15W | 30W | 60W | Pasty butt risk if lamp is too close or room reaches 90+ F |
| Any (Week 1 target) | N/A | 95 F at chick level required | 95 F at chick level required | 95 F at chick level required | Below 90 F: pile-up. Above 95 F: pasty butt |
| Any (Week 2 target) | N/A | 90 F at chick level | 90 F at chick level | 90 F at chick level | Reduce heat by 5 F per week through Week 6 |
| Any (Week 3 target) | N/A | 85 F at chick level | 85 F at chick level | 85 F at chick level | Chicks increasingly self-regulate; give cool zone option |
| Any (Week 6 target) | N/A | 70 F at chick level | 70 F at chick level | 70 F at chick level | Most breeds ready to wean from supplemental heat |
How the Calculation Works (Formula + Assumptions)

Show the calculation steps
Step 1 - Brooder area in square inches: Area (sq in) = Length x Width. This is the usable floor footprint of the brooder.
Step 2 - Convert to square feet: Area (sq ft) = Area (sq in) divided by 144. All wattage requirements use square feet as the base unit.
Step 3 - Check space per chick: Space per chick = Area (sq in) divided by number of chicks. Week 1 minimum is 6 square inches per bird. Below this threshold the overcrowding flag is raised independently of the temperature calculation.
Step 4 - Determine wattage multiplier: The multiplier represents watts required per square foot of brooder floor based on ambient temperature. Colder rooms require more watts to overcome the temperature differential. The scale runs from 15 W/sq ft (below 40 degrees F) down to 5 W/sq ft (above 80 degrees F).
Step 5 - Watts required: Watts Required = Area (sq ft) x Multiplier. This is the minimum wattage your heat source must deliver to have a chance of achieving Week 1 brooder temperatures.
Step 6 - Number of heat sources: Number of Sources = ceiling(Watts Required divided by source wattage). A 250W lamp is rated at 250W. The radiant plate is modeled at 75W effective output for the purpose of source counting.
Step 7 - Estimated brooder temperature: For a 250W lamp: Temperature Rise = (Total Watts x 0.12) divided by Area (sq ft). For a radiant plate: Temperature Rise = (Total Watts x 0.18) divided by Area (sq ft). Estimated Temp = Ambient Temp + Temperature Rise. The model caps estimated temperature at 105 degrees F. The coefficient of 0.18 for radiant plates reflects their more targeted, conductive heat delivery versus a lamp's dispersed radiant output.
Step 8 - Safety verdict: If Estimated Temp is below 90 degrees F, a pile-up risk warning is issued. If above 95 degrees F, a pasty butt risk warning is issued. If space per chick is below 6 sq in, an overcrowding warning is issued. All three checks run independently.
Rounding rule: Watts required and BTU output are rounded to the nearest whole number in display. Temperature values show one decimal place. Number of sources always rounds up (ceiling function) so the recommendation never undershoots.
BTU conversion: BTU/hr = Total Watts x 3.412. This is a standard electrical-to-thermal conversion constant.
Assumptions and Limits
- The temperature model assumes a standard enclosed indoor brooder with no significant drafts or air gaps. Open-topped brooders in breezy spaces will lose heat faster than the model predicts.
- The 0.12 coefficient for 250W lamps and 0.18 for radiant plates are simplified approximations. Actual performance depends on lamp height, brooder insulation material, bedding depth, and ventilation openings.
- The calculator targets Week 1 chick requirements (95 degrees F). Adjustments for older chicks (5 degrees F reduction per week) are shown in the reference table but are not automatically applied based on age input.
- Space minimum of 6 sq in per chick applies to Week 1. Chicks require more space as they grow; 12 sq in per chick by Week 4 is a commonly cited target.
- The model does not account for the latent body heat generated by a large flock. A batch of 100 chicks produces measurable self-generated warmth that a batch of 5 does not.
- Radiant heat plates are modeled at 75W effective heating output for source-count purposes. Actual plate wattage varies by manufacturer and plate size; check your specific unit.
- The estimated temperature output is a planning estimate, not a measured reading. Always verify with a calibrated digital thermometer placed at chick level (approximately 2 inches from the floor) before placing live birds.
- Extreme ambient temperatures below 20 degrees F or above 110 degrees F fall outside the validated input range and are rejected by the calculator.
Standards, Safety Checks, and "Secret Sauce" Warnings
Critical Warnings
- The Corner Smother Response: When brooder temperature falls below 90 degrees F in Week 1, chicks do not simply look lethargic. They activate a hardwired thermoregulatory instinct and press together in the warmest corner they can find. Chicks at the bottom of a pile-up die from crushing and suffocation within minutes, not hours. This failure mode is silent and fast. A brooder that appears calm may already be killing birds at the bottom of a corner cluster.
- Pasty Butt from Overheating: Above 95 degrees F, chicks dehydrate rapidly. The first visible symptom is often pasty butt, where dried droppings seal the vent opening and create a fatal blockage. Chick electrolyte and vitamin powder can support recovery in mild cases, but prevention through accurate temperature control is the only reliable approach.
- Single-Lamp Failure in Cold Rooms: A single 250W lamp in an unheated garage or barn in early spring is insufficient for any brooder larger than approximately 2 to 3 square feet at ambient temperatures below 50 degrees F. The math is clear: the wattage required at cold ambient temperatures exceeds what a single standard lamp can deliver across the brooder floor area.
- Overcrowding Compounds Every Other Risk: When space per chick falls below 6 sq in, the pile-up instinct activates even at correct temperatures, because chicks have nowhere to spread out. Overcrowding and underpowered heat are not independent problems; they accelerate each other.
Minimum Standards
- Week 1 target temperature: 90 to 95 degrees F measured at chick level.
- Minimum floor space: 6 square inches per chick at Week 1, increasing to 12 square inches by Week 4.
- Always use a dedicated thermostat controller (such as the Inkbird ITC-308) between your heat source and the power supply. Lamps and plates have no built-in regulation. A thermostat prevents the overheating failure mode entirely.
- Chicks need a cool zone as well as a hot zone. Do not heat the entire brooder floor uniformly. One end should allow chicks to move away from the heat source if needed.
Competitor Trap: Most generic brooder guides state a rule of thumb like "one 250-watt lamp per 50 chicks" without any reference to ambient temperature, brooder box dimensions, or floor area. That rule fails completely in a cold garage at 40 degrees F and produces dangerous overheating in a small tote at 80 degrees F. The formula in this calculator explicitly factors in room temperature because the ambient baseline determines how hard your heat source has to work. A lamp that is more than adequate in a 70-degree indoor room becomes dangerously insufficient in a barn in February. Room temperature is not a detail; it is the primary variable in the thermal equation. For brooder setups inside a barn structure, the barn ventilation calculator helps confirm that air exchange rates are not pulling cold outside air across the brooder zone faster than the heat source can compensate.
Common Mistakes and Fixes
Mistake: Measuring the Outside of the Brooder Box
A plastic tote or plywood box with walls that are 0.5 inches thick or more on each side can have a measurable difference between exterior and interior floor area. At small brooder sizes, this error shifts the space-per-chick calculation enough to produce a false safe reading. The calculator operates on usable interior floor space, which is where the chicks actually live.
Fix: Measure from inner wall to inner wall on both length and width before entering values.
Mistake: Reading Room Temperature from the House Thermostat
Garages, barns, and outbuildings where many homesteaders set up brooders can be 20 to 35 degrees F colder than the adjacent house. A thermostat reading of 68 degrees F indoors means nothing about the conditions where the brooder is sitting. Using an inflated ambient temperature produces an underestimated wattage requirement. The winter cattle feed calculator uses the same principle for livestock energy needs: the actual measured temperature at animal level, not a distant reference point, drives the result.
Fix: Place a digital thermometer at the brooder location at floor level at least 30 minutes before taking a reading.
Mistake: Assuming a Single Red Heat Lamp Is the Only Option
Red-colored heat bulbs are common but problematic. The red spectrum light in an enclosed brooder has been associated with elevated pecking aggression, particularly as chicks develop and can see blood from any minor wound. A 250W ceramic heat emitter produces the same wattage with zero light output, which also allows chicks to develop normal day-night cycles.
Fix: Switch to a ceramic heat emitter (CHE) on the same lamp fixture for identical wattage without the behavioral complications of continuous red light.
Mistake: Not Providing a Cool Zone in the Brooder
A common beginner configuration places the heat source over the center of the brooder, heating the entire floor area uniformly. Chicks that are too warm have nowhere to go except the cool walls, which creates a different kind of crowding problem. The brooder should have one warm zone directly under the heat source and one cool zone that chicks can freely access.
Fix: Place the heat source over one end of the brooder, not the center. Chicks will self-regulate by moving toward or away from the heat zone.
Mistake: Treating the Calculator Result as a Final Answer Instead of a Pre-Check
The calculator models heat delivery based on simplified coefficients. Real-world variables like bedding depth, brooder wall material, draft conditions, and heat lamp mounting height all affect actual temperature. The tool tells you whether your planned setup is in the right order of magnitude; it does not replace a physical thermometer reading before birds go in.
Fix: Run the calculator as a planning step, then run the brooder empty for at least two hours and verify the temperature with a digital probe at chick level before placing any birds. After chicks are established in the brooder, tracking their growth efficiency with a feed conversion ratio calculator gives a useful secondary signal for whether thermal conditions are supporting healthy development.
Next Steps in Your Workflow
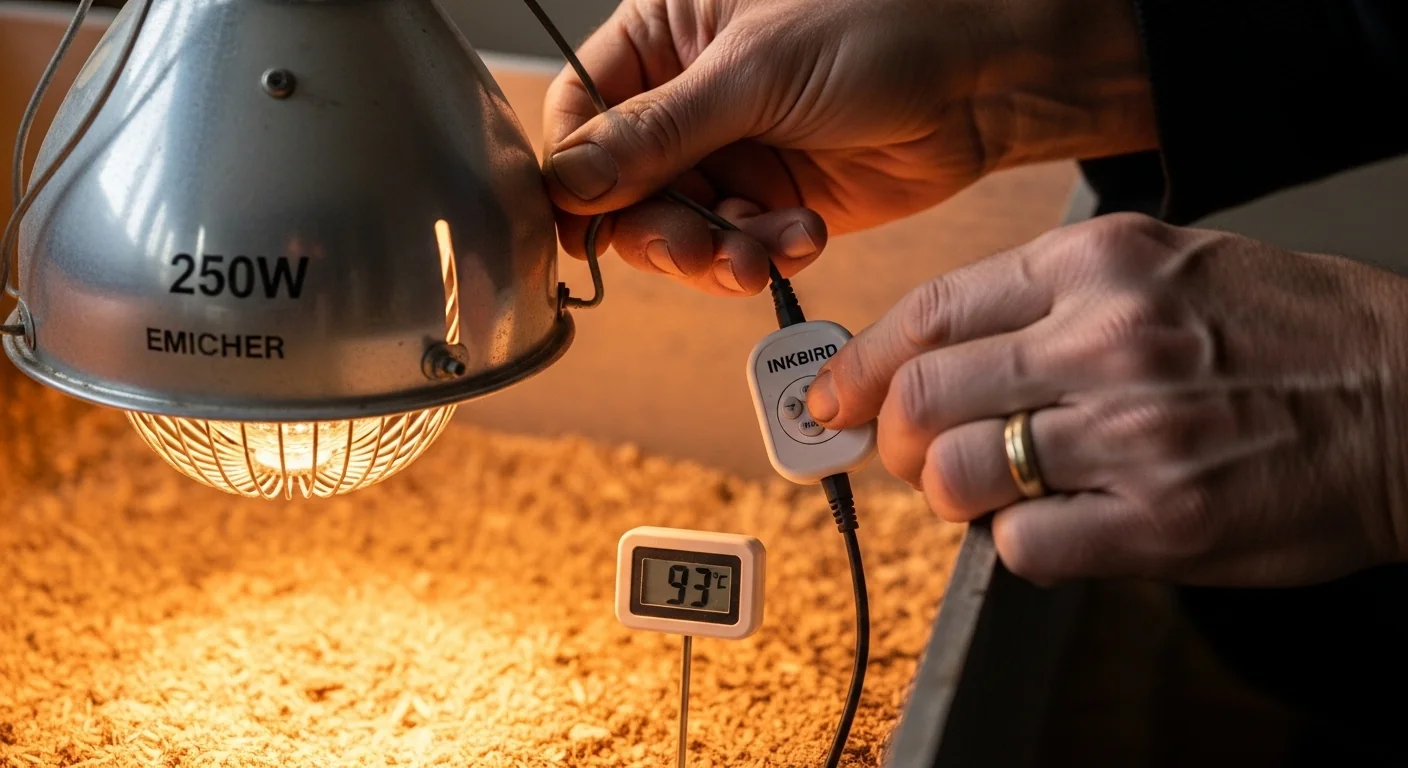
Once you have a heat source configuration that clears the temperature safety check, the immediate next task is purchasing or confirming your thermostat controller setup. A lamp or radiant plate without a thermostat is an open-loop system: it runs at full power continuously regardless of actual brooder conditions. Temperature controllers like the Inkbird ITC-308 introduce a closed loop that shuts off the heat source when the setpoint is reached and restarts it when temperature drops. This single addition eliminates the pasty butt overheating failure mode almost entirely and reduces the pile-up risk in fluctuating ambient conditions. Set the controller probe at chick level, 2 to 3 inches from the floor surface, and dial the setpoint to 95 degrees F for Week 1.
As chicks grow, you will step down the brooder temperature by approximately 5 degrees per week through Week 6, at which point most breeds are feathered enough to manage at ambient outdoor temperatures above 65 degrees F. Planning for that transition now means accounting for coop space and outdoor protection. The pasture stocking rate calculator can help you size the outdoor range area before chicks are ready to move, and the electric fence calculator is useful for determining perimeter fencing requirements to protect the flock from predators once they leave the brooder environment.
FAQ
What is the correct brooder temperature for Week 1 chicks?
The target temperature at chick level for the first week of brooding is 90 to 95 degrees Fahrenheit. Below 90 degrees, chicks will instinctively cluster for warmth, creating a pile-up and smothering risk. Above 95 degrees, dehydration and pasty butt become serious concerns. The temperature should decrease by approximately 5 degrees per week as chicks feather out.
How many watts per square foot does a brooder need?
The wattage required per square foot of brooder floor depends heavily on ambient room temperature. The range runs from roughly 5 watts per square foot in a warm 80-degree room to 15 watts per square foot in a very cold room below 40 degrees Fahrenheit. This is why generic rules of thumb that ignore room temperature are unreliable for cold-weather brooding situations.
Can I use a radiant heat plate instead of a heat lamp?
Yes. Radiant heat plates have several practical advantages: they produce no light, which supports normal chick day-night cycles and reduces pecking aggression; they are contact-based, so chicks warm up from below like they would under a broody hen; and they carry a lower fire risk than lamp fixtures. The tradeoff is that they cover a fixed floor area determined by the plate size, making them less flexible for very large brooders.
What causes pasty butt in chicks?
Pasty butt, also called pasting up, occurs when fecal matter dries and adheres to the vent opening, creating a blockage that can be fatal if not cleared. Temperature stress is a primary trigger, particularly overheating above 95 degrees Fahrenheit. Shipping stress, improper brooder humidity, and a few other factors can contribute, but overheating is the most common preventable cause in the first 72 hours.
How do I know if my brooder is too cold without a thermometer?
Observe chick behavior. Chicks that are too cold will vocalize loudly and continuously, press together in tight groups especially toward corners, and move toward the heat source in a way that creates crowding. Chicks at the correct temperature will spread out relatively evenly across the brooder, vocalize at a low, content level, eat and drink actively, and move freely. Behavioral observation is an important secondary check even when you are using a thermometer.
Does brooder box size affect the heat requirement?
Yes, directly. A larger brooder floor area requires more total watts to maintain the target temperature, because there is more air volume and more surface area losing heat to the environment. Putting 20 chicks in a very large brooder with a single heat lamp does not just create cold corners; it creates a dangerous thermal gradient where chicks on the far side may be 20 to 30 degrees colder than chicks directly beneath the lamp.
Conclusion
Chick brooding temperature management is a problem of thermal physics, not instinct. The failure modes, pile-up from cold and pasty butt from heat, are predictable and preventable when the wattage calculation is done with your actual brooder dimensions and room conditions. Generic rules of thumb built without ambient temperature correction are the root cause of most first-week chick losses, and the gap between a correct setup and a dangerous one can be as small as one additional heat source or a thermostat controller that costs less than a single replacement chick order.
The single most important mistake to avoid is running a cold-room brooder with a single lamp sized for indoor conditions. Run the numbers before the chicks arrive, verify with a thermometer after setup, and use a thermostat controller to hold the setpoint automatically. For a complete picture of ongoing flock costs as birds grow out of the brooding phase, the feed cost calculator can help you plan the feed budget through the remainder of the grow-out period.
Lead Data Architect
Umer Hayiat
Founder & Lead Data Architect at TheYieldGrid. I bridge the gap between complex agronomic data and practical growing, transforming verified agricultural science into accessible, mathematically precise tools and guides for serious growers.
View all tools & guides by Umer Hayiat →