The real advantage of any cold frame raised bed comes from treating the cover as an integrated extension of your existing raised bed structure and soil volume rather than an isolated add-on. This alignment traps daytime solar heat at the root zone more effectively while reducing gaps that let cold air in.
This guide covers 10 specific cold frame configurations designed to sit directly on or attach to common raised beds for edible crops. It focuses on passive designs using wood, plastic, and recycled materials. Full greenhouses, heated systems, or in-ground-only setups fall outside the scope.
You gain a structured way to evaluate options against your bed dimensions, typical low temperatures, and maintenance capacity. The result is a clear match that protects cool-season vegetables through early freezes without excess labor.
Align your cold frame choice with your raised bed’s soil profile and expected low temperatures to extend your harvest window reliably.
The Yield Grid Decision Grid
Branch 1: Raised beds in locations where nighttime temperatures stay above 28°F most of the season and wind remains low. Recommended: Items 2, 5, and 8 below.
Branch 2: Raised beds facing nighttime lows between 15°F and 28°F with occasional snow. Recommended: Items 1, 4, and 7 below.
Branch 3: Raised beds in areas with lows below 15°F or frequent high winds and snow accumulation. Recommended: Items 3, 6, 9, and 10 below. For broader raised bed protection tactics, see winterizing raised beds.
Quick Comparison Table
| Option | Key mechanism | Best for | Decision Grid Branch | Effort Score |
|---|---|---|---|---|
| Custom Hinged Polycarbonate Frame | Sloped wood frame with hinged rigid lid | Moderate frost with easy daily access | Branch 2 | 2 |
| Recycled Window Sash Lid | Upcycled glass or acrylic sash on simple frame | Light frost on budget | Branch 1 | 1 |
| Attached PVC Hoop System | Flexible hoops anchored to bed sides with plastic cover | High wind or snow with quick collapse | Branch 3 | 3 |
| Straw Bale Perimeter Frame | Bales as insulated walls topped with plastic sheet | Organic heat boost in moderate conditions | Branch 2 | 1 |
| Commercial Metal and Polycarbonate Kit | Pre-cut metal frame with twinwall panels | Quick assembly on any bed size | Branch 1 | 2 |
| Multi-Layer Insulated Panel Cover | Stacked rigid panels with air gap for insulation | Extended cold with passive warmth | Branch 3 | 2 |
| Heavy-Duty Wood Frame with Twinwall | Thick lumber frame and double-wall polycarbonate | Snow load and low temperatures | Branch 2 | 3 |
| Low Tunnel Frame with Removable Plastic | Wire or pipe hoops with clip-on sheeting | Flexible light frost coverage | Branch 1 | 4 |
| Drip-Compatible Hinged Lid Frame | Hinged lid with built-in access ports for tubing | Consistent moisture under cover | Branch 3 | 2 |
| Modular Stackable Cold Frame Panels | Interlocking panels that build height as needed | Variable snow or crop height | Branch 3 | 1 |
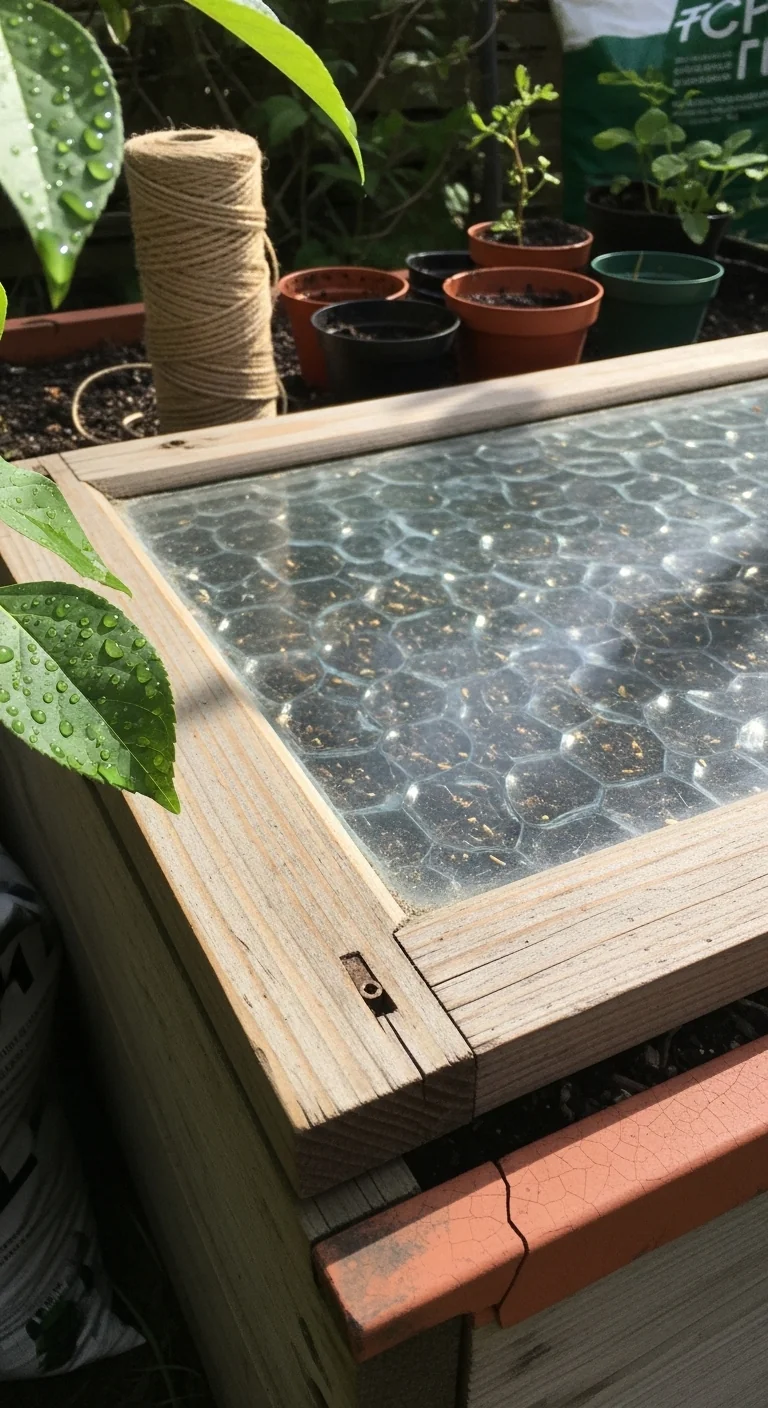
Custom Hinged Polycarbonate Frame

Best for: Branch 2
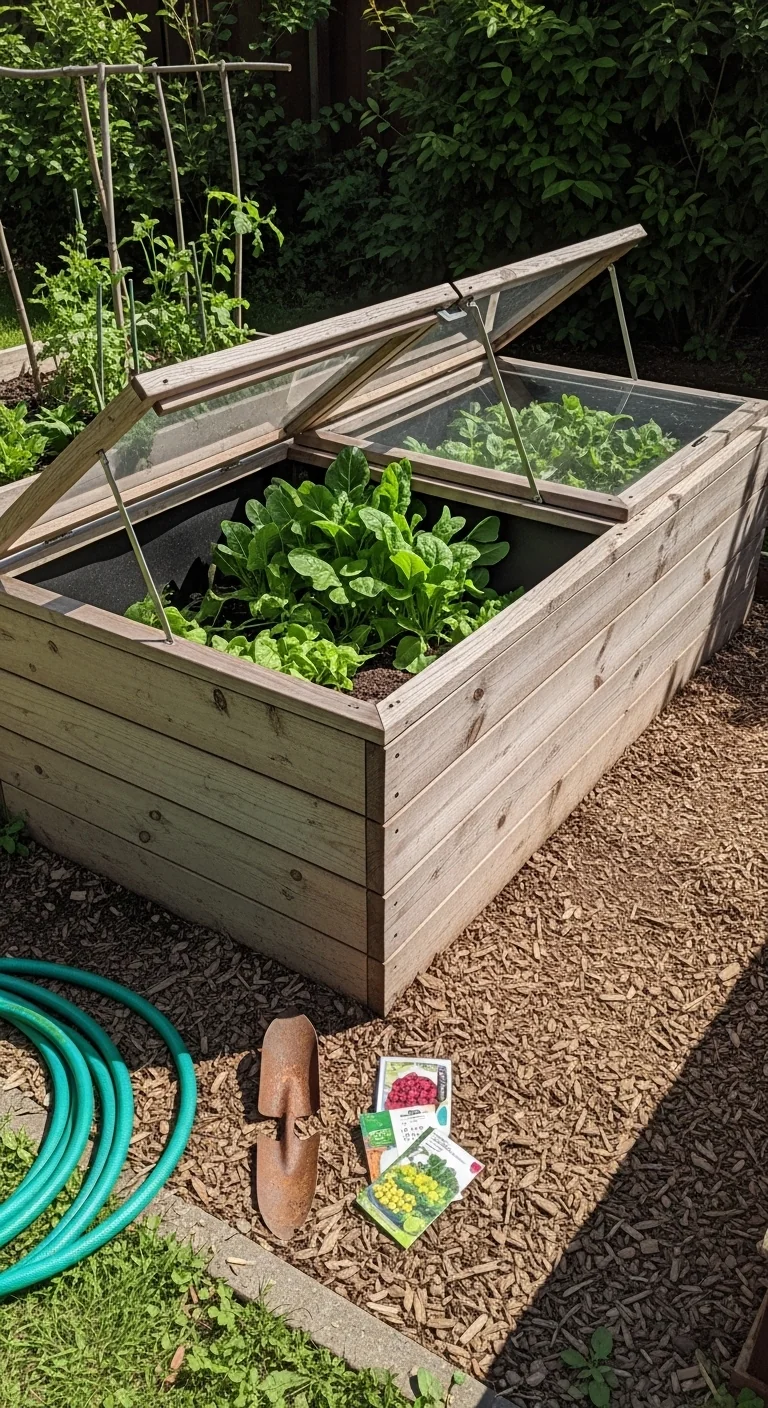
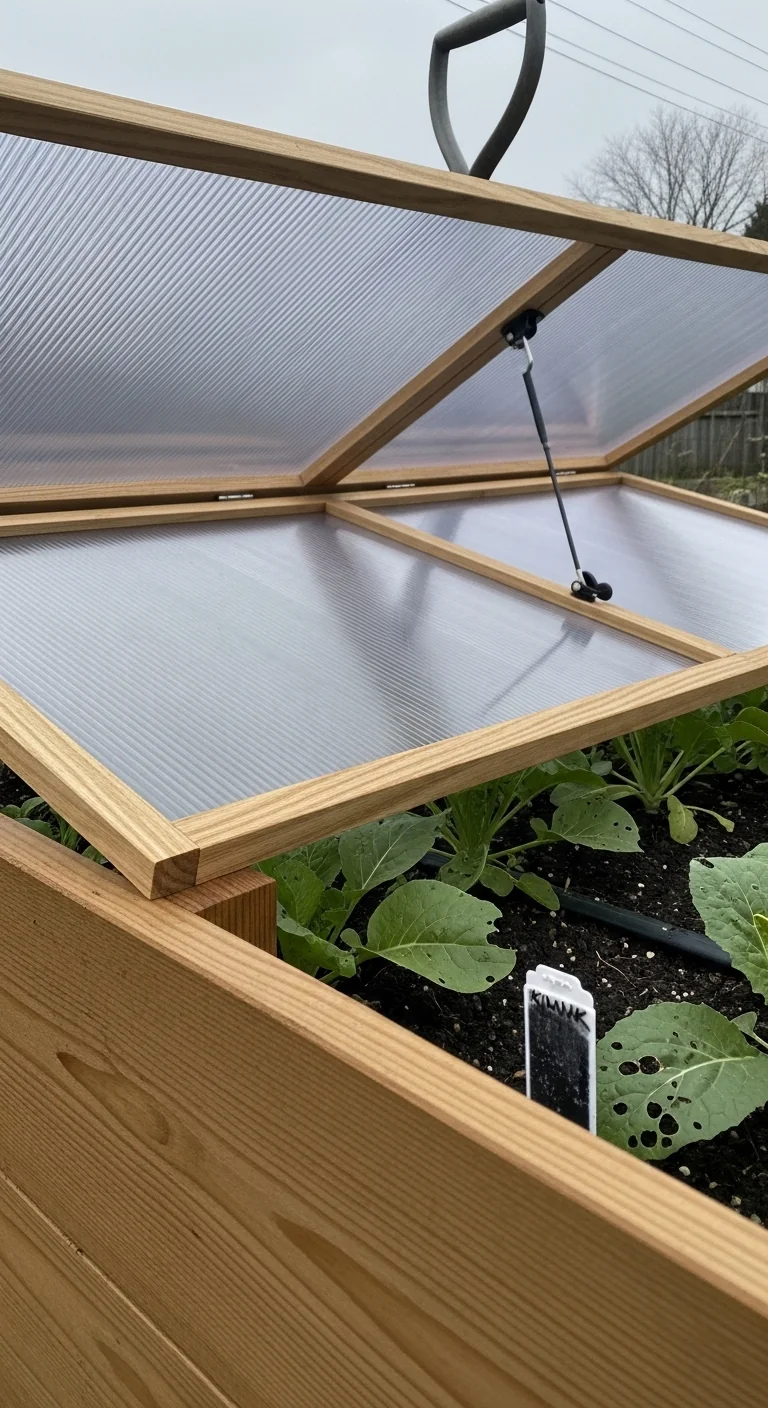
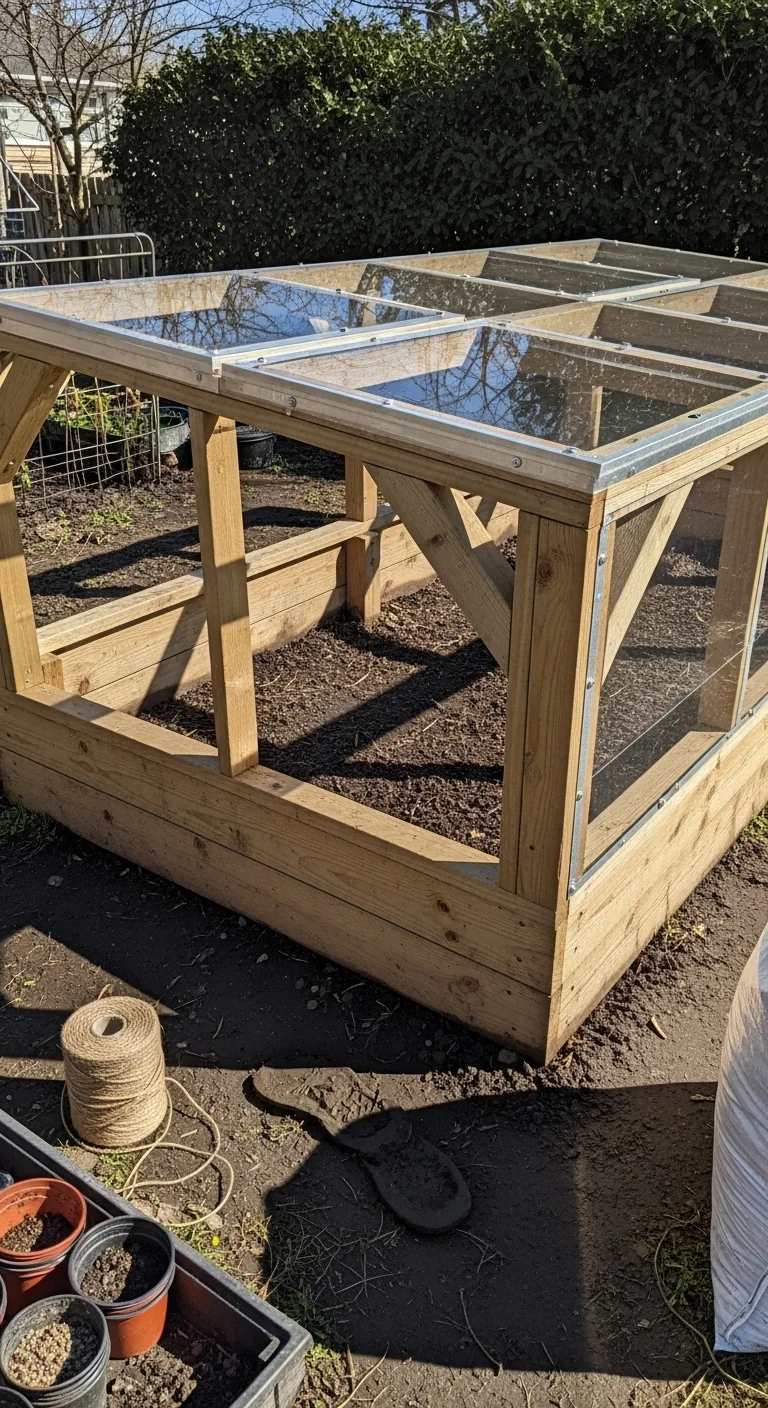
This design uses a wood frame cut to match your raised bed top dimensions with a sloped hinged lid made from polycarbonate sheeting. It creates a sealed microclimate that captures solar gain while allowing full access for harvesting or weeding.
Blueprint steps: Measure the inner bed perimeter. Cut four 1-by-2 boards for the base and four angled side pieces to create a 15-degree slope. Attach corner braces and hinges at the back. Secure the polycarbonate panel with screws and weather stripping. Place the frame directly on the bed rim.
One common mistake is leaving an air gap larger than one inch at the soil line. Fill any void with straw or mulch immediately after placement to prevent heat escape. Pair this frame with the best soil mix for raised beds to improve root-zone warmth retention.
Recycled Window Sash Lid
Best for: Branch 1
Use vs skip: Skip this option if your raised bed top measures larger than 4 by 4 feet or if the sash weighs more than 25 pounds. Use it when you already own an old single-pane window that fits exactly over the bed edges.
Pros include zero material cost beyond hinges and a rigid transparent lid that transmits maximum light. Cons include added weight when wet and potential glass breakage in hail. Edge case: it works best on beds under 12 inches tall where lifting remains easy.
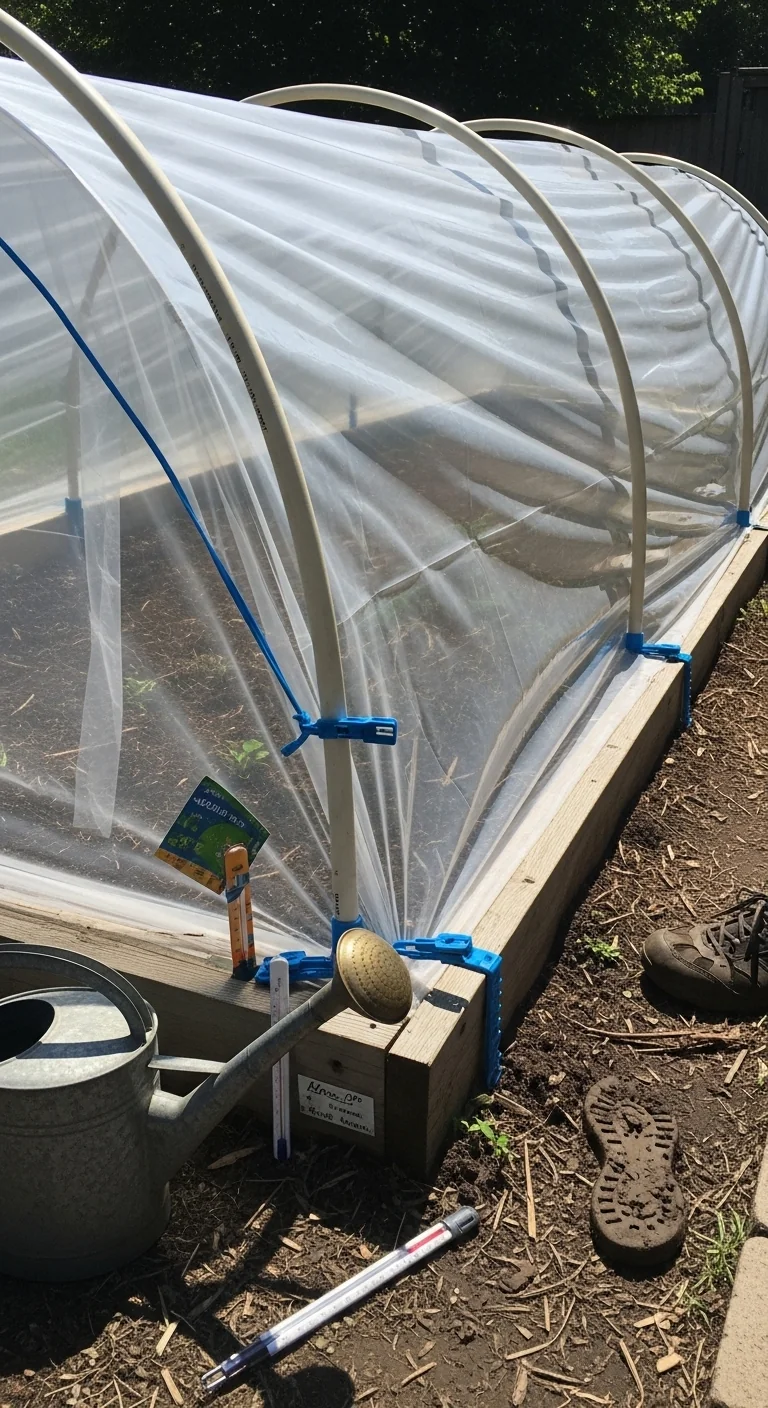
Attached PVC Hoop System
Best for: Branch 3
Threshold rule: Deploy this system when sustained winds exceed 10 mph or snow accumulation is expected above 4 inches. Space hoops every 24 inches along the bed length and anchor base pipes directly into the raised bed corners with rebar stakes.
The flexible PVC creates a curved tunnel that sheds snow while the plastic sheeting clips on and off in under five minutes. Adjust cover tension weekly to avoid sagging. This setup pairs well with drip irrigation raised beds because the hoops leave clear access along the sides.
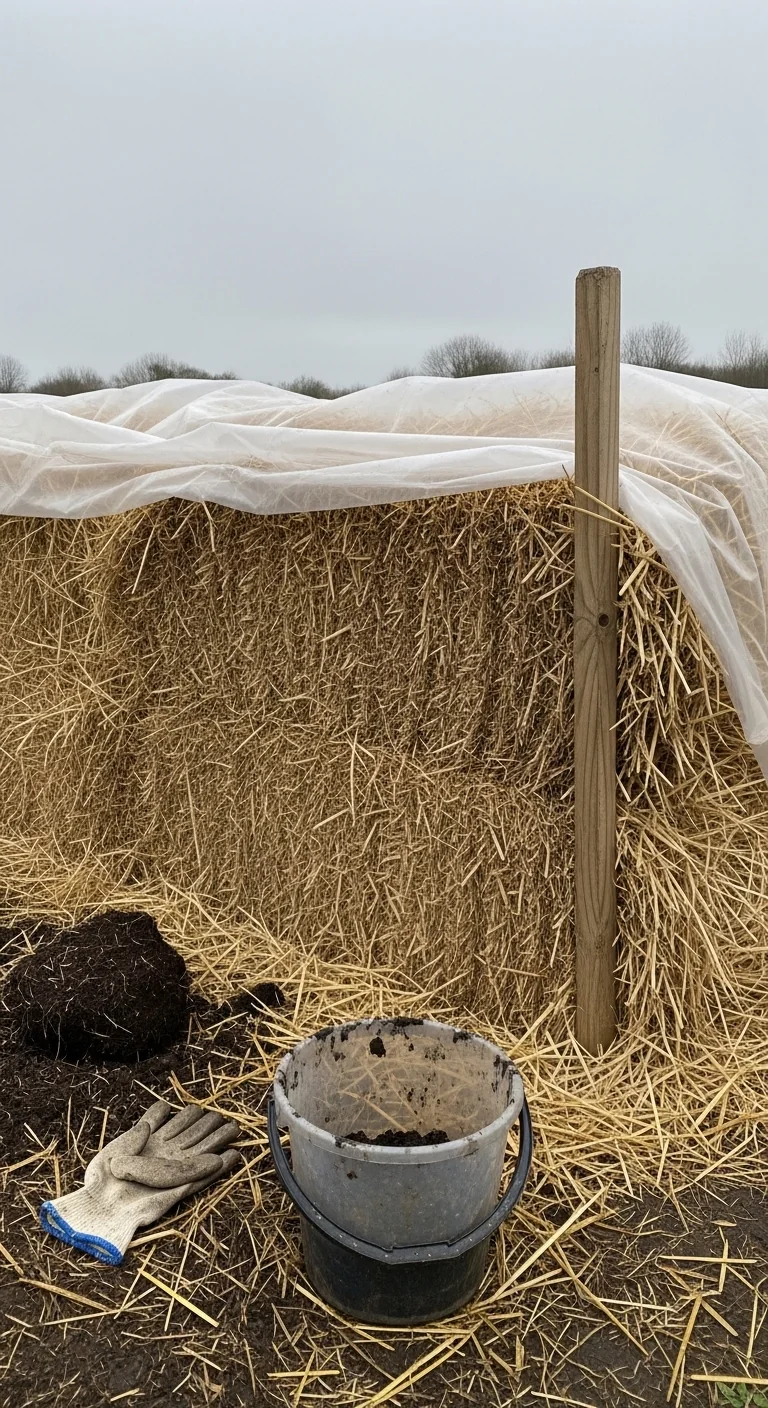
Straw Bale Perimeter Frame
Best for: Branch 2
10-minute workflow: Position four straw bales around your raised bed perimeter to form insulated walls. Lay a single sheet of 6-mil plastic or greenhouse film across the top and weigh down the edges with bricks or soil. Open one side daily for ventilation by simply lifting the plastic.
Upgrade option: Replace one bale with a hinged wood panel for faster access once the bales settle after two weeks. This method adds passive heat from decomposing straw and requires no power tools. It works especially well when combined with hugelkultur raised bed construction because both rely on organic matter for steady warmth.
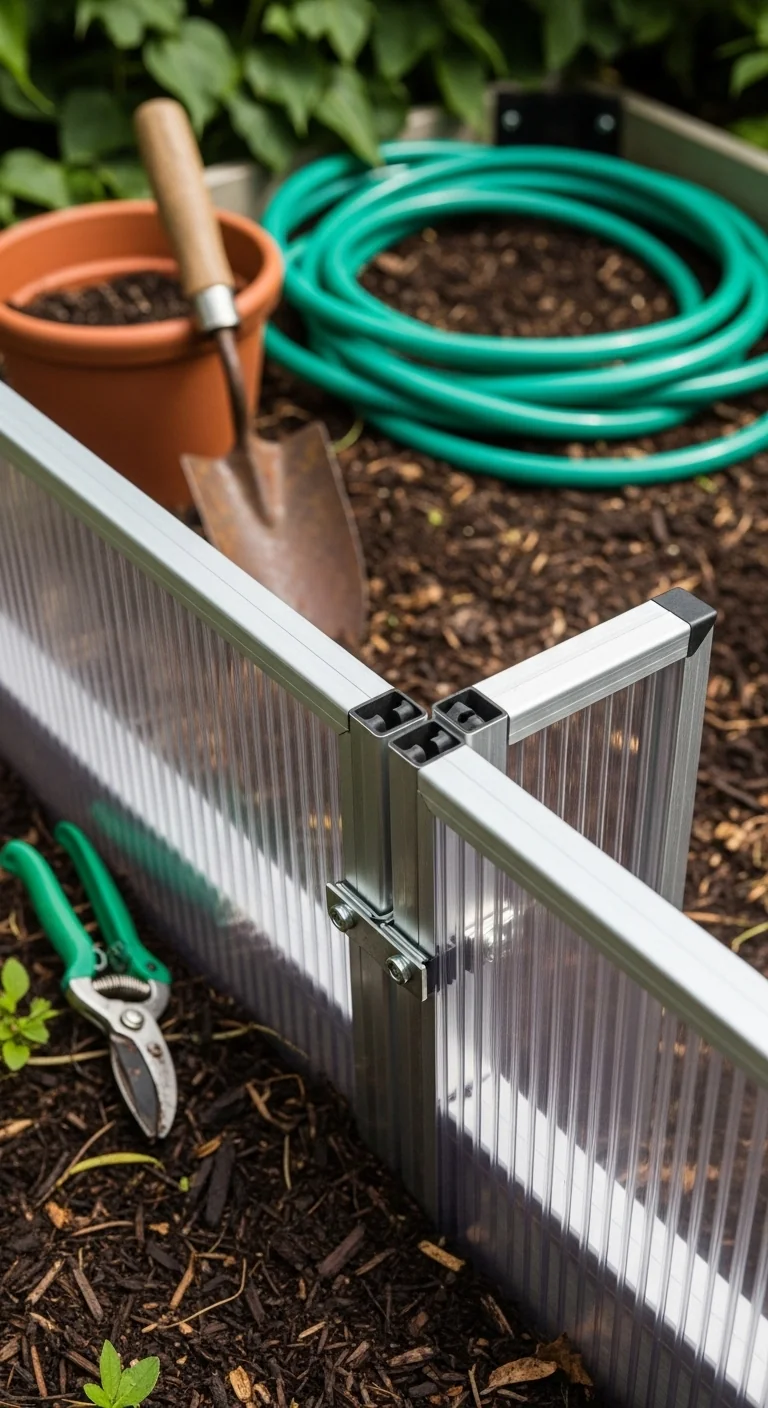
Commercial Metal and Polycarbonate Kit
Best for: Branch 1
Use vs skip: Use when you want assembly in under 45 minutes and prefer corrosion-resistant metal over wood. Skip if your raised bed has irregular top edges or exceeds the kit’s listed maximum dimensions.
These kits arrive with pre-drilled frames and twinwall panels that snap together. The result is a lightweight cover that resists UV degradation for multiple seasons. Edge case: they perform best on beds 12 to 18 inches tall where the frame sits flush without additional shimming.
Multi-Layer Insulated Panel Cover
Best for: Branch 3
Threshold rule: Activate this cover when nighttime lows drop below 15°F for more than three consecutive nights. Stack two rigid polycarbonate panels with a one-inch air gap between them to create an insulating barrier.
The layered design traps additional heat without extra weight on the bed frame. Remove the top panel first during daytime thaws to control temperature swings. This configuration maintains stable conditions under extreme cold when single-layer options lose effectiveness.
Heavy-Duty Wood Frame with Twinwall

Best for: Branch 2
Blueprint: Build the base from 2-by-4 lumber sized to your bed. Add cross braces every 24 inches for snow load support. Attach twinwall polycarbonate panels with screws and seal all joints with silicone. Install two gas struts to hold the lid open hands-free.
The thicker lumber and double-wall material handle moderate snow while providing superior insulation. One detail that matters: orient the frame with the long slope facing south to maximize winter sun exposure. This pairs effectively with wicking raised bed systems because consistent soil moisture reduces temperature fluctuations inside the frame.
Low Tunnel Frame with Removable Plastic
Best for: Branch 1
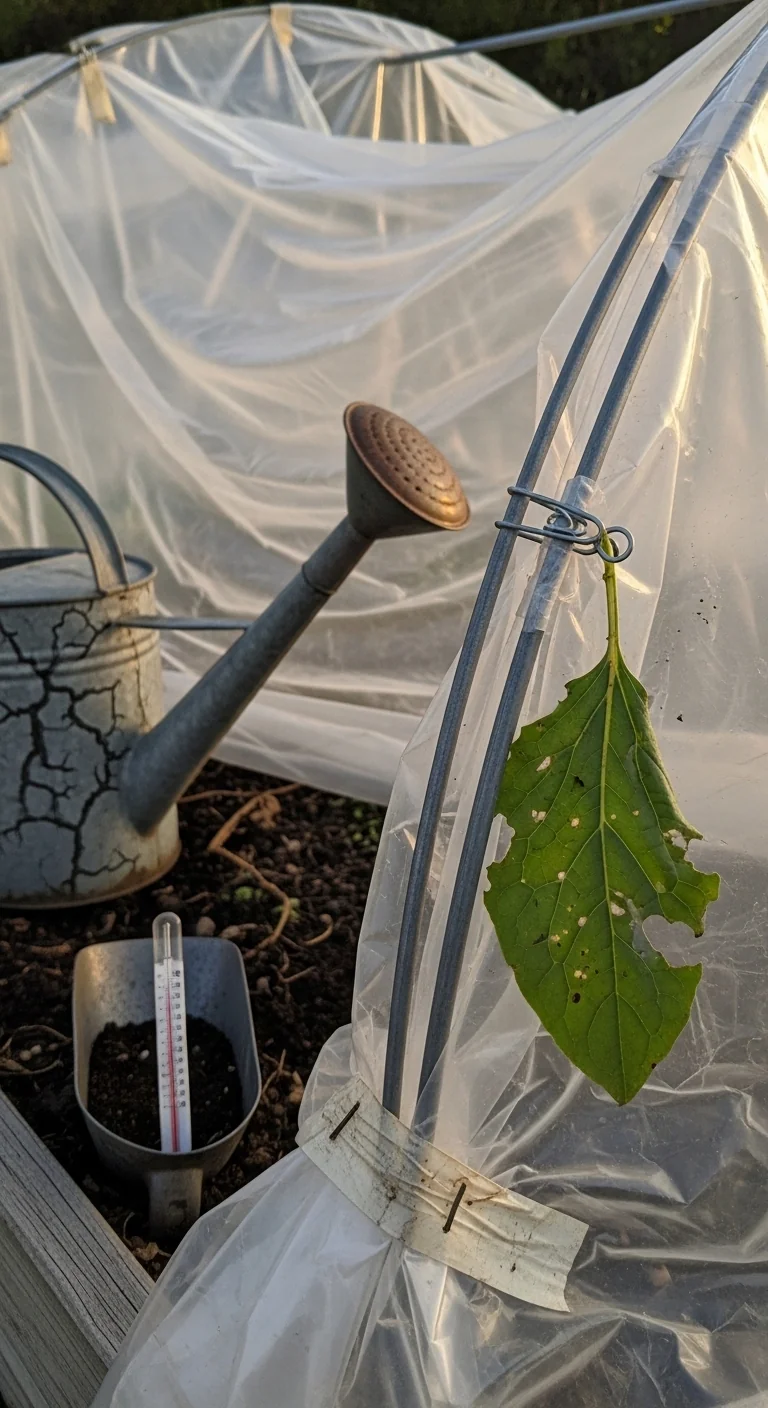
10-minute workflow: Insert wire or PVC hoops into the soil along both long sides of the raised bed. Drape 6-mil plastic sheeting over the hoops and secure with clips or sandbags. Roll back the plastic from one end for quick access and ventilation.
Upgrade option: Add a second layer of row cover fabric underneath the plastic for extra insulation on colder nights. This design collapses flat for storage in under 10 minutes at season end.
Drip-Compatible Hinged Lid Frame
Best for: Branch 3
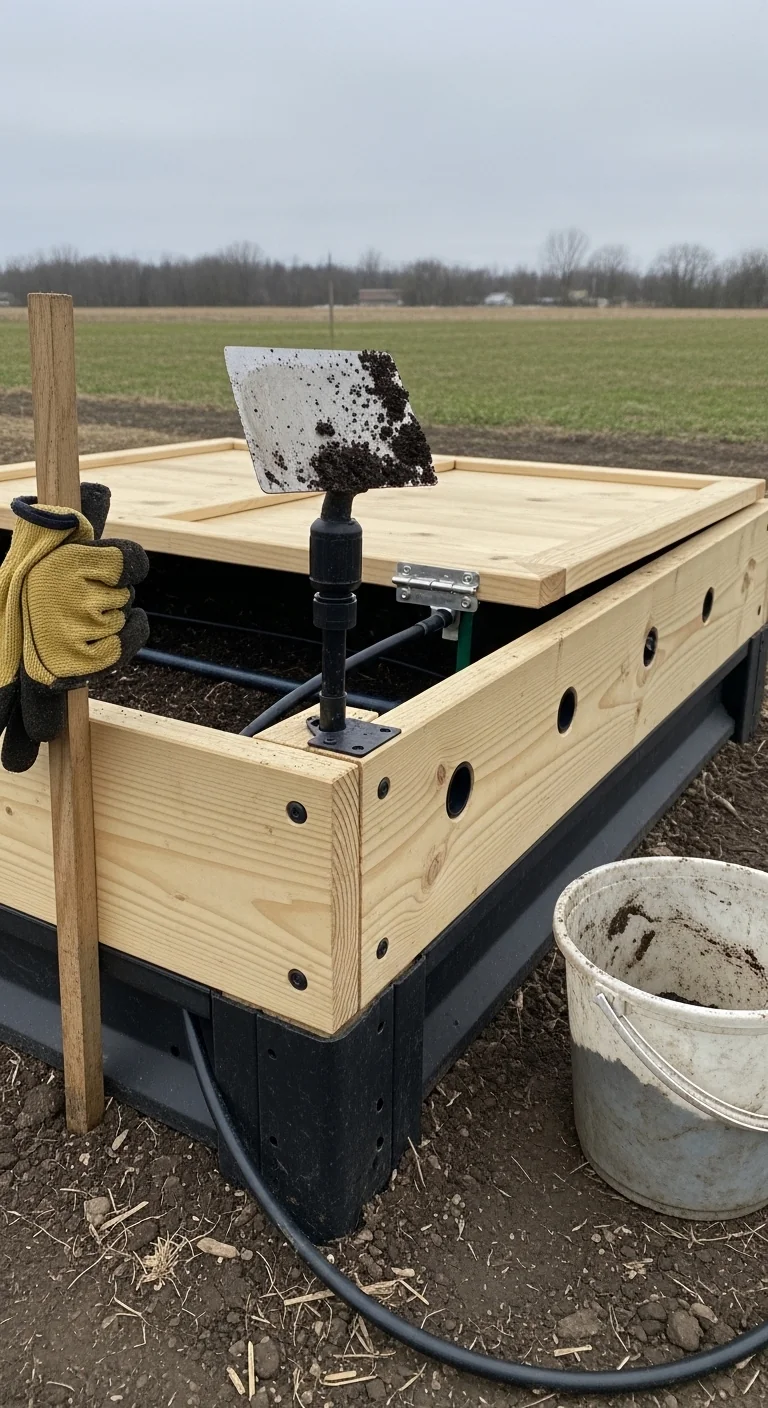
Blueprint: Construct the frame from pressure-treated 1-by-3 lumber with a hinged lid. Cut two access notches in the front rail sized for drip tubing. Route lines underneath the lid so irrigation runs without removal.
The design keeps soil moisture even under the cover, reducing the need to open the frame solely for watering. Seal the base edges with foam tape to maintain temperature stability. This option shines in beds already equipped with drip lines.
Modular Stackable Cold Frame Panels
Best for: Branch 3
Threshold rule: Stack additional panels when snow depth exceeds 6 inches or when taller crops such as kale require vertical clearance. Each panel interlocks with the one below using built-in channels.
The system starts as a low cover and grows in height as conditions change. Disassemble and store flat when no longer needed. This flexibility suits variable winter weather without rebuilding the entire structure each year.
Starter Stack (What to Choose First)
For Branch 1 (mild frost exposure above 28°F)
Start with the Recycled Window Sash Lid plus the Commercial Metal and Polycarbonate Kit. The window delivers immediate rigid coverage at minimal cost while the metal kit adds durability and easy removal. Together they require under two hours total setup and cost between 20 and 80 dollars depending on materials on hand.
For Branch 2 (moderate frost 15-28°F)
Begin with the Custom Hinged Polycarbonate Frame and the Straw Bale Perimeter Frame. The hinged design offers reliable access while the bales provide extra insulation through decomposition. Synergy appears in the combined heat retention: one rigid lid plus organic walls extends protection without daily intervention. Expect 30 to 90 dollars and one to three hours.
For Branch 3 (harsh conditions below 15°F)
Choose the Attached PVC Hoop System and the Multi-Layer Insulated Panel Cover first. The hoops handle wind and snow load while the panels add passive insulation layers. They work together to maintain root-zone stability with under four hours of initial work and material costs from 40 to 120 dollars.
When This Won’t Work
A cold frame raised bed fails when the base gap between frame and soil exceeds two inches without sealing material in place. Heat escapes faster than solar gain can replace it, leaving roots exposed to freezing. Switch to a ground-level cold frame or add a full skirt of rigid foam board around the bed perimeter.
It also underperforms on raised beds narrower than three feet because internal access becomes awkward once the lid is closed. Daily tasks turn frustrating and plants suffer from neglected watering or harvesting. In that case convert to a low tunnel style or move to wider beds.
Choosing the Right Option for Your Situation
Budget threshold
Under 50 dollars: select the Recycled Window Sash Lid or Straw Bale Perimeter Frame. Both rely on readily available or free materials and basic hardware.
Time threshold
Under 90 minutes total build time: choose the Commercial Metal and Polycarbonate Kit or the Modular Stackable Cold Frame Panels. Pre-cut parts eliminate measuring and cutting steps.
Technical constraint: snow load
Expected accumulation over 6 inches: go with the Heavy-Duty Wood Frame with Twinwall or the Attached PVC Hoop System. Curved or braced designs shed weight without collapse.
Yes/No checklist:
Do you have consistent access for weekly venting?
Does your raised bed top measure at least 3 by 4 feet?
Can you commit to sealing the base gap each season?
Will your local lows stay above 15°F for most of winter?
Expert Q&A
How does raised bed height affect cold frame performance?
Taller beds over 18 inches create larger air gaps at the frame base unless filled with mulch or a foam skirt. This increases heat loss at night. Shorter beds under 12 inches allow tighter enclosure but limit root space for overwintered root crops. Measure your bed height first and adjust the frame base accordingly.
What soil mix maximizes temperature stability under a cold frame?
A blend high in organic matter and with good drainage retains daytime heat longer into the night. Avoid pure sand or heavy clay mixes that fluctuate rapidly. The right balance keeps root zones steadier when outside air drops, reducing stress on cool-season greens and herbs.
Can drip irrigation run under a closed cold frame without daily removal?
Yes. Route tubing through small notches cut in the front rail or under the lid hinge. Timers keep soil moisture consistent even when the frame stays closed for days. This prevents the dry-out cycles common in enclosed spaces.
What is the main difference between a cold frame and a low tunnel on raised beds?
A cold frame uses rigid hinged or removable panels for better insulation and easier full access. A low tunnel relies on flexible hoops and sheeting for quicker setup but offers less wind resistance and harder internal reach. Choose based on how often you need to harvest or weed inside.
When should the cold frame come off in spring to avoid crop stress?
Remove or fully open the lid once daytime highs consistently exceed 65°F and nighttime lows stay above 40°F for seven straight days. Earlier removal risks bolting in leafy crops. Monitor soil temperature at 4 inches depth as the final cue before transitioning to open beds.
Conclusion
The right cold frame raised bed comes down to matching the cover mechanism to your specific raised bed construction and typical low-temperature patterns. The biggest mistake is installing any lid without first sealing the base gap and planning for regular venting on sunny days.
Take the next step by reviewing your bed dimensions and local frost dates against the Decision Grid above, then build or source your first matched system. For ongoing soil and irrigation strategies that complement any cold frame, see self-watering raised bed designs.
Lead Data Architect
Umer Hayiat
Founder & Lead Data Architect at TheYieldGrid. I bridge the gap between complex agronomic data and practical growing, transforming verified agricultural science into accessible, mathematically precise tools and guides for serious growers.
View all tools & guides by Umer Hayiat →