Self watering raised bed designs succeed when the water delivery method aligns capillary action in the soil profile with your local evaporation rate and crop root patterns rather than depending on reservoir size alone.
This guide examines nine passive systems built around raised bed frames for edible gardening. It covers wicking reservoirs, pipe feeds, and commercial kits suited to 4-by-8-foot or similar dimensions and excludes powered pumps, timers, or non-raised containers.
You will identify the exact mechanism that maintains consistent root-zone moisture for vegetables and herbs based on your space, climate conditions, and available tools.
Match the chosen design to your soil drainage speed and seasonal heat pattern to maintain even moisture without daily manual checks.
The Yield Grid Decision Grid
Branch 1 applies when your garden footprint measures 4 feet wide or less or sits on a deck or balcony. Recommended: Items 2, 5, and 8 below.
Branch 2 applies when average summer highs exceed 85 F for more than 30 days and rainfall averages below 1 inch per week. Recommended: Items 1, 4, and 7 below.
Branch 3 applies when you prefer building with basic hand tools and have access to standard lumber or metal frames in any climate. Recommended: Items 3, 6, and 9 below.
See how these options stack up against traditional planting in our raised bed vs in ground guide.
Quick Comparison Table
| Option | Key mechanism | Best for | Decision Grid Branch | Effort Score |
|---|---|---|---|---|
| DIY Gravel Reservoir Wicking Bed | 4-to-6-inch gravel reservoir with overflow pipe and wicking soil layer | Hot-dry climates needing steady bottom-up moisture | Branch 2 | 2 |
| Commercial Elevated Self-Watering Cedar Planter | Built-in water reservoir with indicator and capillary mat | Decks and small patios with limited floor space | Branch 1 | 1 |
| PVC Pipe Reservoir System | Horizontal perforated pipes feeding water from side reservoir | Custom frames requiring precise moisture control | Branch 3 | 3 |
| Metal Raised Bed with Pre-Fab Wicking Cells | Modular fabric cells creating separate water reservoirs | Hot-dry climates with metal frame durability needs | Branch 2 | 2 |
| IBC Tote Converted Wicking Bed | Repurposed tote base as sealed reservoir with overflow | Budget balcony or deck setups | Branch 1 | 1 |
| Hugelkultur Hybrid Self-Watering | Buried wood layers combined with top reservoir for slow release | Hot-dry climates seeking long-term moisture retention | Branch 2 | 2 |
| PVC Reservoir Wooden Raised Bed | Vertical PVC columns connected to bottom reservoir | DIY builders needing adjustable water levels | Branch 3 | 3 |
| Modular Commercial Self-Watering Kits | Stackable panels with integrated reservoir channels | Small-space or balcony gardens | Branch 1 | 1 |
| Self-Watering with Aeration Tubes | Perforated tubes in gravel base paired with wicking fabric | Custom frames requiring root aeration alongside moisture | Branch 3 | 3 |
DIY Gravel Reservoir Wicking Bed
Best for: Branch 2
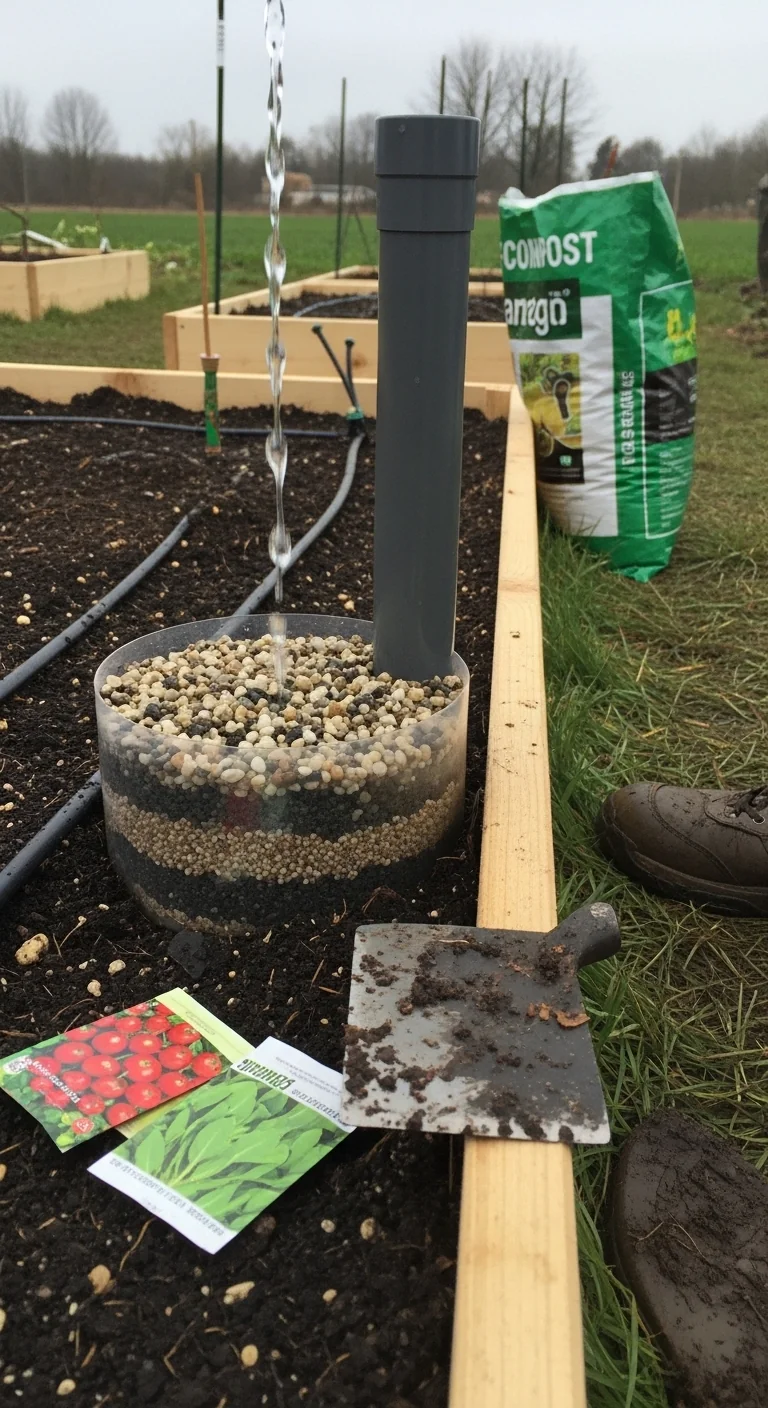
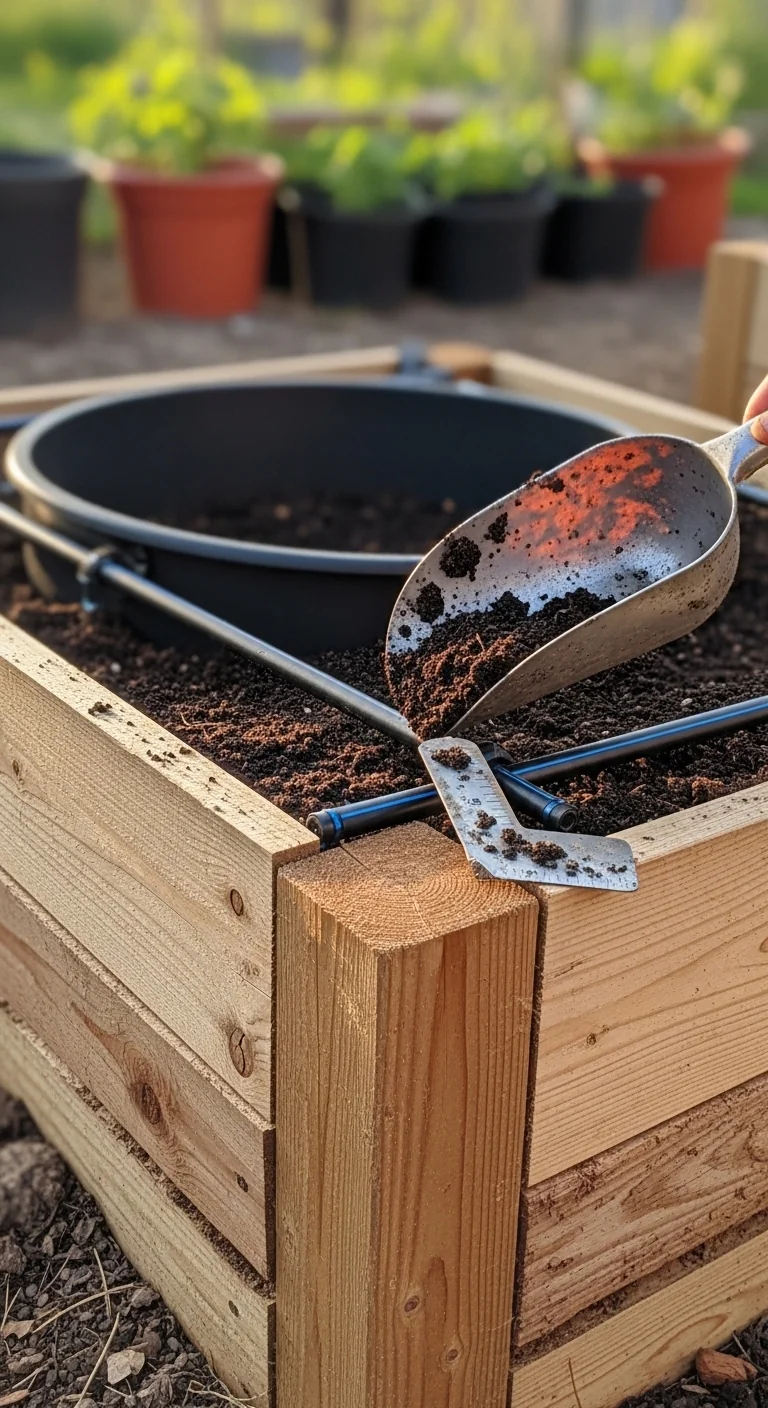
Build this by lining the bottom 6 inches of the frame with landscape fabric, adding a 4-to-6-inch gravel layer, then installing a vertical overflow pipe cut to sit 4 inches above the gravel. Fill the reservoir area with coarse sand or gravel up to the overflow, cover with another fabric layer, and top with 12 inches of wicking soil mix. Water enters through the overflow pipe and rises by capillary action.
The edge case appears in heavy clay sites where the fabric layer must extend up the sides to prevent soil migration into the reservoir. Steps include cutting the overflow pipe to exact reservoir height before adding gravel. Common mistake is skipping the top fabric barrier, which allows soil to clog the gravel within one season. Link this approach to proper layering details in our best soil mix for raised beds guide.
Commercial Elevated Self-Watering Cedar Planter
Best for: Branch 1
These cedar units feature a built-in reservoir below a capillary mat and water-level indicator. Fill the reservoir through the access port and allow the mat to draw moisture upward into the soil. Skip if your space receives less than 6 hours of direct sun because reduced evaporation still requires occasional top watering to flush salts.
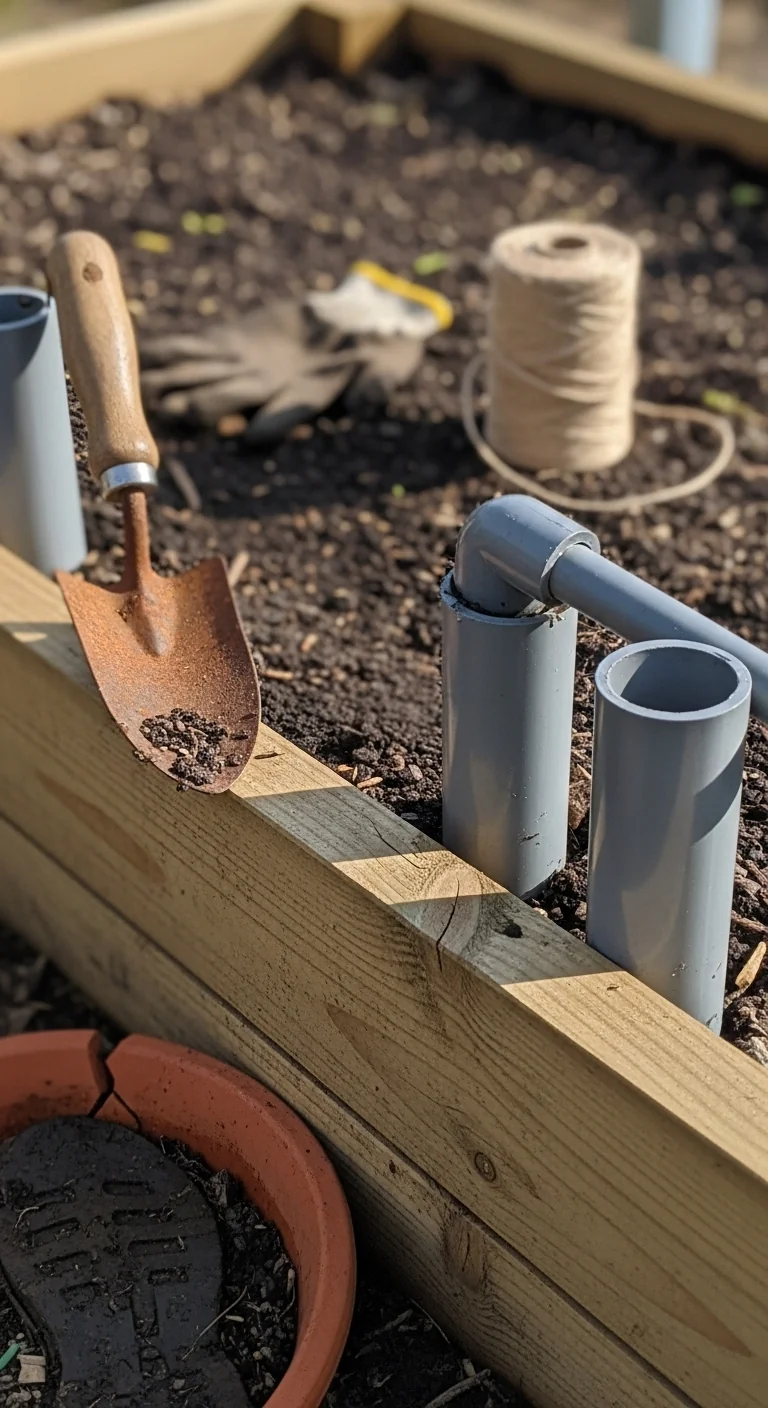
PVC Pipe Reservoir System
Best for: Branch 3
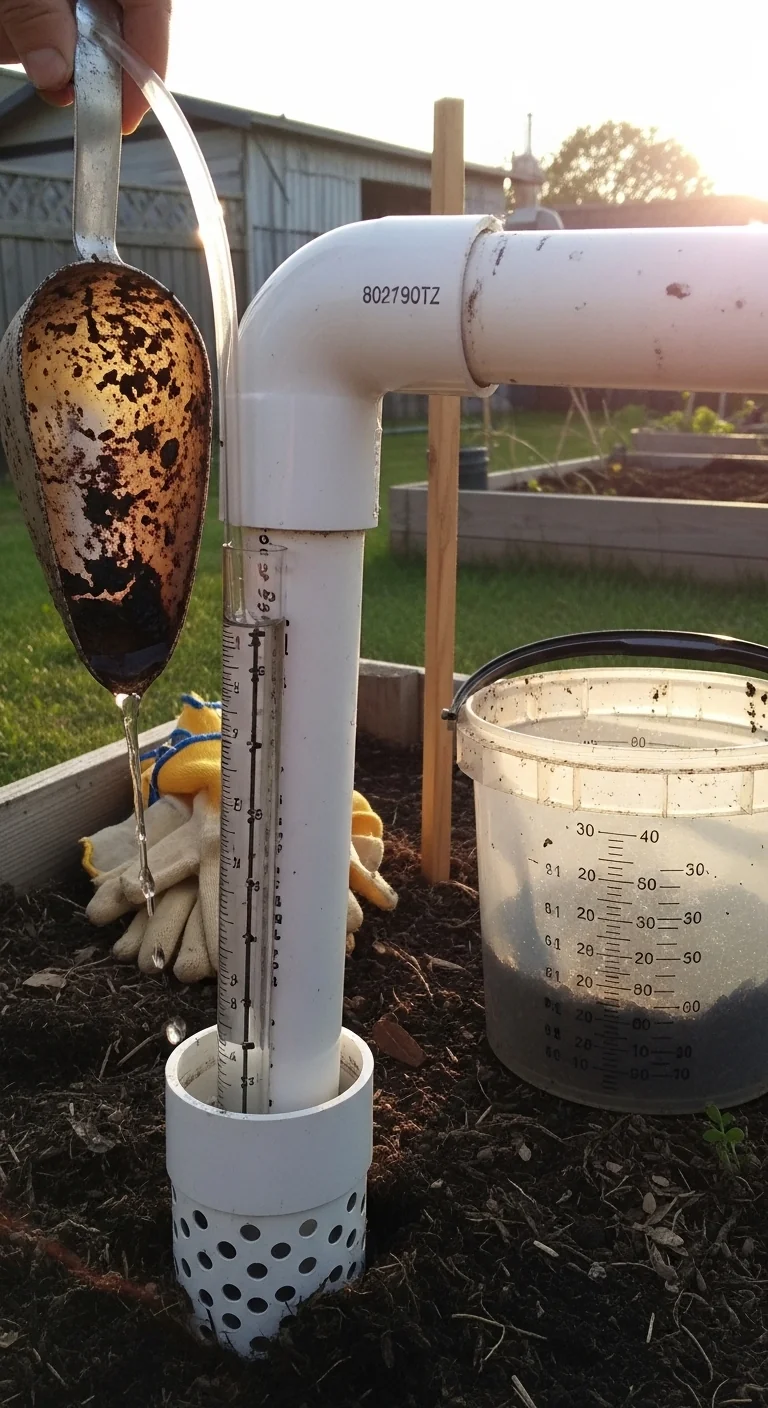
Use 4-inch perforated PVC pipes laid horizontally across the bed base and connected to a vertical fill tube. Set the pipes in a 4-inch gravel bed and cap the fill tube above soil level. Threshold rule: maintain water level so the reservoir stays below the soil interface to prevent saturation. Adjust fill frequency when soil surface dries to 2 inches deep in peak heat.
Metal Raised Bed with Pre-Fab Wicking Cells
Best for: Branch 2
Pre-fabricated fabric cells sit inside the metal frame to create isolated water reservoirs. Each cell connects to a shared fill tube and overflow. The design works well in hot-dry climates because the cells prevent water from pooling across the entire bed width. Combine with the wicking raised bed techniques for added control in metal frames exposed to full sun.
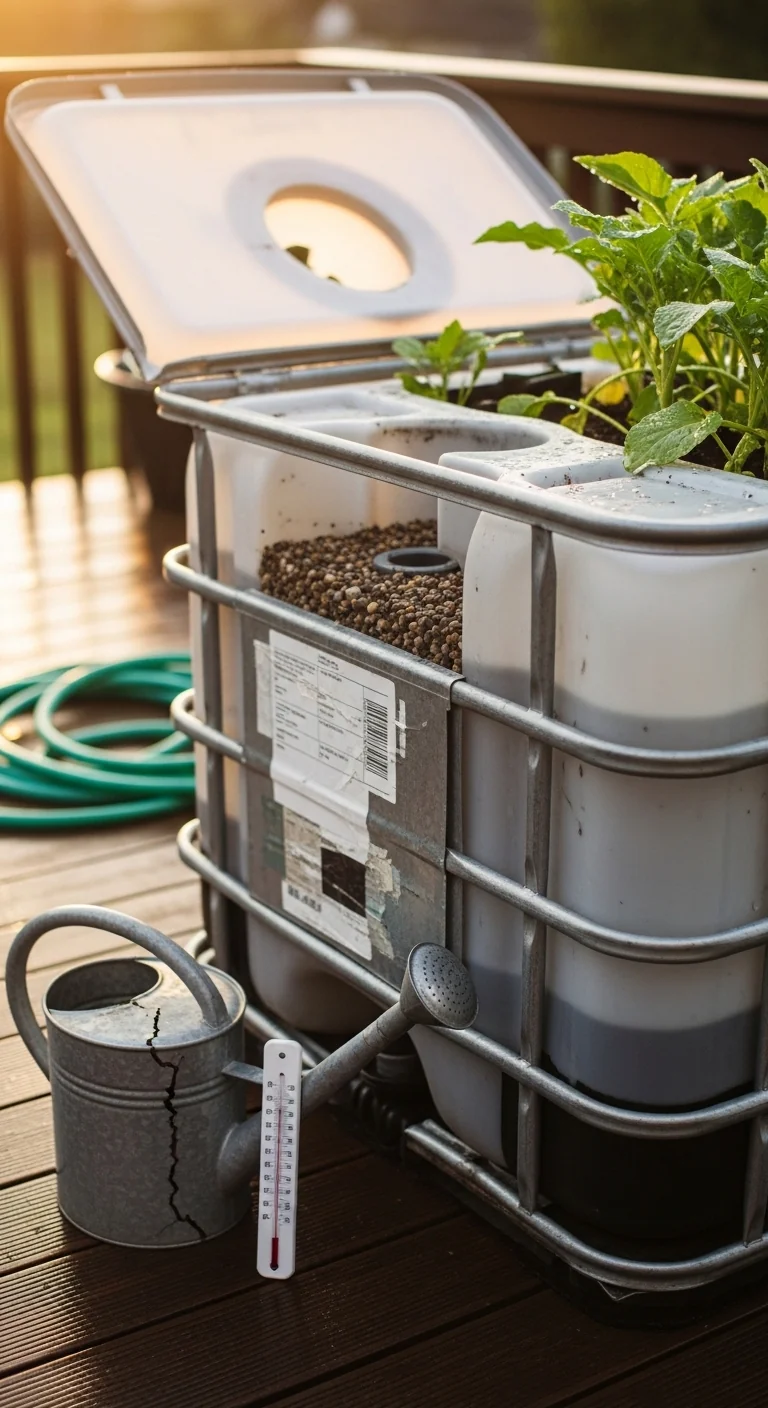
IBC Tote Converted Wicking Bed
Best for: Branch 1
Cut the top off a food-grade IBC tote, drill an overflow hole 4 inches from the new base, and line the interior with fabric before adding gravel and soil. The tote walls provide instant structure for balcony use. The tight footprint makes it ideal for decks where weight limits apply.
Hugelkultur Hybrid Self-Watering
Best for: Branch 2
Layer large woody debris at the bottom, cover with a 4-inch reservoir of gravel and sand, then add soil on top. The wood slowly absorbs and releases moisture from the reservoir while the wicking layer pulls water upward. This hybrid extends reservoir life in hot-dry conditions. See full layering details in our hugelkultur raised bed guide.
PVC Reservoir Wooden Raised Bed
Best for: Branch 3
Install vertical 2-inch PVC columns spaced every 18 inches and connected at the base to a shared reservoir pipe. Fill columns from above and use the overflow pipe to set maximum water height. Builders can adjust column height to fine-tune moisture delivery for different crops. The system integrates easily with standard wooden frames and requires only basic drilling tools.
Modular Commercial Self-Watering Kits
Best for: Branch 1
These kits use interlocking panels with built-in channels that form a continuous reservoir when assembled. Snap the panels together on a level surface, add the liner and soil, and fill the channels through corner ports. The modular design fits irregular balcony shapes and allows expansion without rebuilding the entire frame.
Self-Watering with Aeration Tubes
Best for: Branch 3
Place perforated aeration tubes vertically through the gravel reservoir and extend them above soil level. The tubes supply oxygen to roots while the surrounding gravel holds the water reservoir. Threshold rule: space tubes 12 inches apart and keep the water level at least 2 inches below the soil interface to maintain aeration. This prevents compaction in dense soil mixes.
Starter Stack (What to Choose First)
For Branch 1 (space-constrained or elevated setups)
Start with the Commercial Elevated Self-Watering Cedar Planter paired with the IBC Tote Converted Wicking Bed. The cedar unit handles immediate planting while the tote provides expandable capacity on decks. Total setup time ranges from 30 minutes to 1 hour with material costs under 150 dollars.
For Branch 2 (hot and dry climates)
Begin with the DIY Gravel Reservoir Wicking Bed and the Hugelkultur Hybrid Self-Watering. The gravel design delivers fast capillary rise while the hugelkultur layers extend moisture availability between fills. Combined setup ranges from 2 to 4 hours with material costs between 50 and 120 dollars.
For Branch 3 (DIY builders)
Choose the PVC Pipe Reservoir System and the Self-Watering with Aeration Tubes. The pipe system offers simple horizontal delivery while aeration tubes add root health in custom frames. Total build time falls between 1 and 3 hours with material costs from 40 to 90 dollars.
When This Won’t Work
These systems fail when soil temperatures stay below 50 F for more than two weeks because capillary action slows dramatically and roots cannot uptake water efficiently. Switch to a surface drip setup until soil warms.
Failure also occurs in sites with poor initial drainage where water sits in the reservoir longer than 48 hours after filling. In that case move to an alternative irrigation method suited to heavy soils.
For long-term cold-season protection see our winterizing raised beds guide.
Choosing the Right Option for Your Situation
Budget threshold
If total material costs must stay under 100 dollars select DIY gravel or PVC pipe options. Above that threshold commercial kits or metal-frame cells become viable without increasing long-term maintenance.
Time threshold
If assembly time must stay under 2 hours choose commercial elevated planters or modular kits. Longer windows allow full custom PVC or hugelkultur builds.
Technical constraint (soil type)
For fast-draining sandy soils use deeper reservoirs and finer wicking fabric. For heavier clay soils reduce reservoir depth to 4 inches maximum and add extra aeration tubes.
Yes/No checklist:
Does your space measure 4 feet wide or less? Yes leads to elevated or modular kits.
Do summer highs exceed 85 F regularly? Yes leads to reservoir-heavy designs.
Are you comfortable with basic power tools? Yes opens all DIY options.
Is soil drainage slower than 1 inch per hour? Yes requires added aeration.
Expert Q&A
How deep should the reservoir layer be in a self watering raised bed?
Most designs use 4 to 6 inches of gravel or sand below the soil interface. Shallower layers reduce total water storage while deeper layers risk anaerobic conditions if overflow height is not matched exactly.
Can self watering raised beds work with heavy clay soil?
Clay reduces capillary rise speed. Amend with perlite or coarse sand in the bottom 6 inches of the soil layer and add vertical aeration tubes to prevent compaction and maintain oxygen flow to roots.
How often do you refill the reservoir in hot summer conditions?
Refill when the water level drops 2 inches below the overflow pipe. In temperatures above 85 F with low humidity this typically occurs every 5 to 10 days depending on bed width and crop density.
Do self watering raised beds need different soil mixes than standard beds?
Yes. The lower layer must promote upward wicking so use a blend heavy in peat or coir with perlite rather than dense garden soil. The top 8 inches can follow standard vegetable mix guidelines.
Will self watering raised beds support vertical crops like tomatoes or cucumbers?
Yes when the frame includes trellis anchors. Keep the reservoir level consistent so roots do not dry at the edges where trellised vines concentrate water demand.
Conclusion
The right self watering raised bed mechanism eliminates daily watering while delivering moisture directly to root zones when capillary action and reservoir height match your climate and soil profile. The most common mistake is using a generic reservoir depth without adjusting for local evaporation patterns.
Next step: measure your bed width and note your average summer high temperature, then select the matching item from the decision grid. For seasonal protection see our winterizing raised beds guide.
Lead Data Architect
Umer Hayiat
Founder & Lead Data Architect at TheYieldGrid. I bridge the gap between complex agronomic data and practical growing, transforming verified agricultural science into accessible, mathematically precise tools and guides for serious growers.
View all tools & guides by Umer Hayiat →