A well-chosen DIY raised bed trellis does more than support vining plants. It aligns directly with your raised bed construction, soil setup, and watering method to keep frames stable and reduce daily adjustments.
This guide focuses on nine builds using common materials for edible climbers such as tomatoes, cucumbers, beans, and peas. It covers attachment methods that preserve bed integrity and placement rules that match typical raised bed dimensions. Store-bought kits, purely decorative designs, and in-ground-only options fall outside the scope.
You will walk away able to select one build that fits your exact bed type, crop load, and available space, then follow clear steps to complete it without guesswork.
Align the trellis anchor points and load distribution with your raised bed system to prevent the leaning or soil-shift problems common in mismatched setups.
The Yield Grid Decision Grid
Branch 1: Your raised bed includes self-watering or wicking features with a reservoir or capillary system in place. Focus on low-profile or side-mounted designs that leave moisture paths clear. Recommended: Items 2, 5, and 8 below. For more on these systems see our guide to self-watering raised bed systems.
Branch 2: Your raised bed uses standard soil mixes or hugelkultur and you grow heavy-fruiting climbers such as tomatoes or cucumbers. Choose reinforced arch or panel styles with external ground anchors. Recommended: Items 1, 4, and 7 below.
Branch 3: Your raised bed sits against a fence, uses cinder blocks, or follows a u-shape. Select integrated or back-mounted options that leverage existing structures. Recommended: Items 3, 6, and 9 below.
Quick Comparison Table
| Option | Key mechanism | Best for | Decision Grid Branch | Budget Tier |
|---|---|---|---|---|
| Cattle Panel Arch Trellis | Bent livestock panel on external T-posts | Heavy vining crops in fixed beds | Branch 2 | Low |
| Side Wire Mesh Panel | Mesh screwed to bed side with top brace | Light climbers in moisture-managed beds | Branch 1 | Low |
| Fence-Back Vertical Trellis | Wood frame anchored to fence and bed rim | Space-limited beds against structures | Branch 3 | Medium |
| A-Frame Wooden Trellis | Hinged wooden legs with cross slats | Medium-weight vines needing shade below | Branch 2 | Medium |
| String Netting on Frame | Removable nylon netting on corner posts | Light annuals in wicking beds | Branch 1 | Low |
| Cinder Block Ladder Trellis | Rebar uprights through block voids | Beds with block walls needing permanent support | Branch 3 | Low |
| Livestock Panel Between Beds | Panel braced by posts driven between two beds | Paired beds with shared heavy crops | Branch 2 | Low |
| U-Shaped Arch Integration | Panel curved to follow u-bend contour | U-shaped beds maximizing interior space | Branch 3 | Medium |
| Elevated Ladder-Style Trellis | Tall posts with horizontal rungs above bed rim | Taller elevated beds with vertical crops | Branch 3 | Medium |
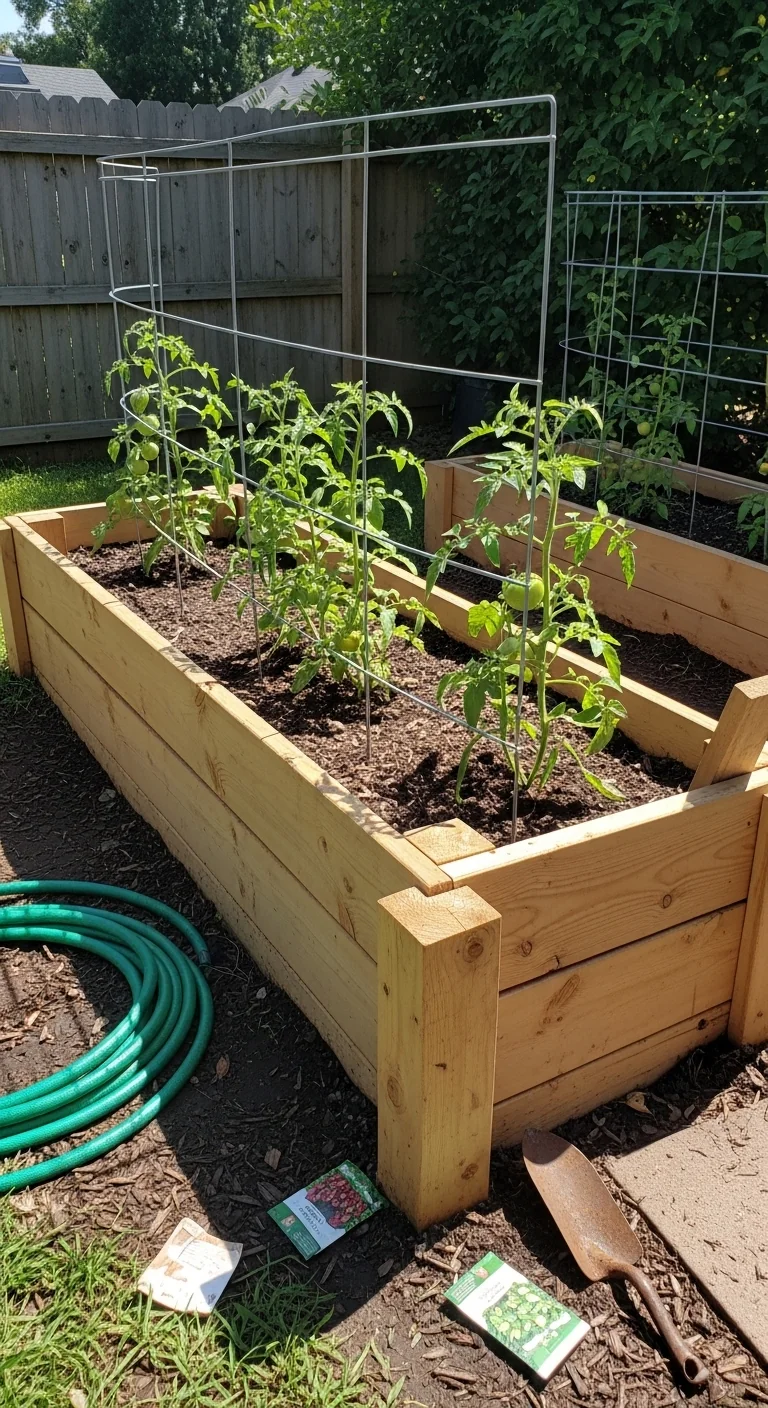
Cattle Panel Arch Trellis
Best for: Branch 2
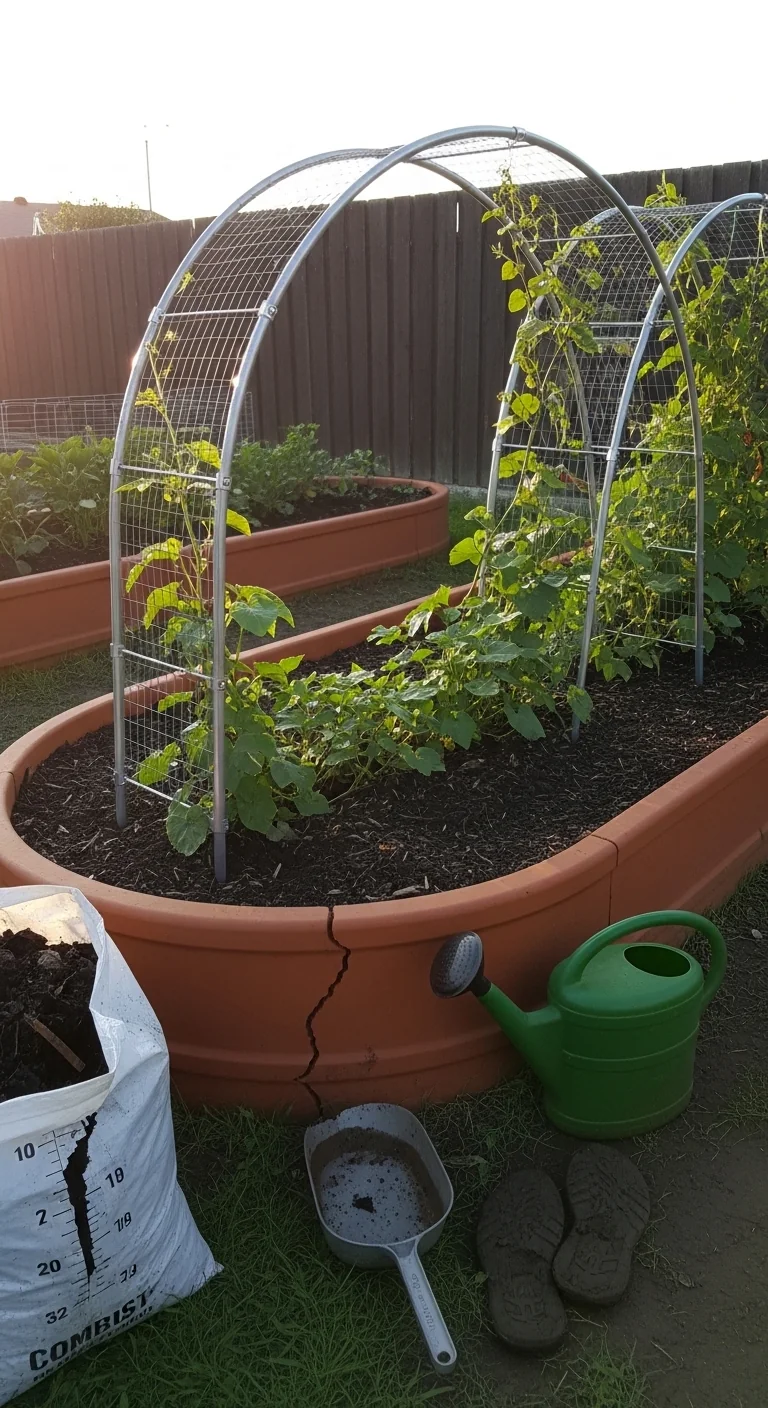
Blueprint. Gather one 16-foot by 50-inch cattle panel, two 6-foot T-posts, zip ties, and a post driver. Position the raised beds 3 to 4 feet apart or center the panel over one larger bed. Drive T-posts 12 inches outside each bed end, leaving 4 to 6 inches clearance from the bed wall. Bend the panel into an arch and secure each end to a post with zip ties at 6-inch intervals. Plant vining crops 6 inches inside the arch base to allow root spread without soil compaction. The external posts transfer load away from bed walls, which protects wooden frames from torque. This design handles mature tomato or cucumber weight once the panel is fully curved and posts are driven to full depth. Store the panel flat at season end if desired.
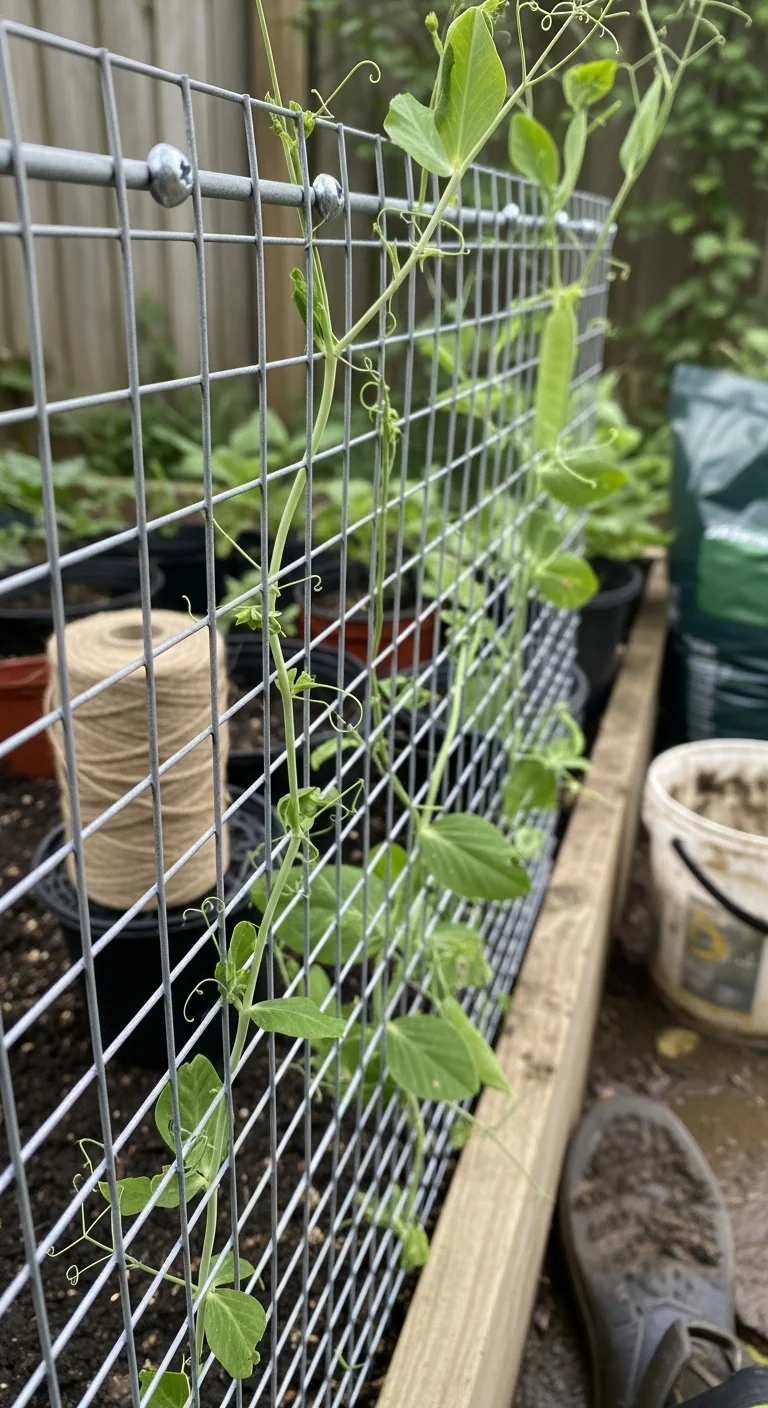
Side Wire Mesh Panel
Best for: Branch 1
Use versus skip. Use this when your self-watering bed already maintains even soil moisture and you need quick side support for peas or beans. It attaches in under 30 minutes with four deck screws into the bed rim and one top horizontal brace. Skip it if your beds move frequently, because repeated screw removal enlarges holes over time. Edge case: in beds narrower than 3 feet the panel can shade the center row, so shift it to the north side only.
Fence-Back Vertical Trellis
Best for: Branch 3
Threshold rule. Build this only when the fence sits within 8 inches of the bed back and your bed rim is at least 1 inch thick. Cut two 8-foot 2×2 posts and attach them vertically to the fence with lag screws every 24 inches. Stretch 4-foot-wide welded wire between the posts and secure the bottom edge to the bed rim. The rule keeps the trellis upright without pulling on the raised bed itself. See our raised bed against fence guide for exact spacing adjustments by fence type.
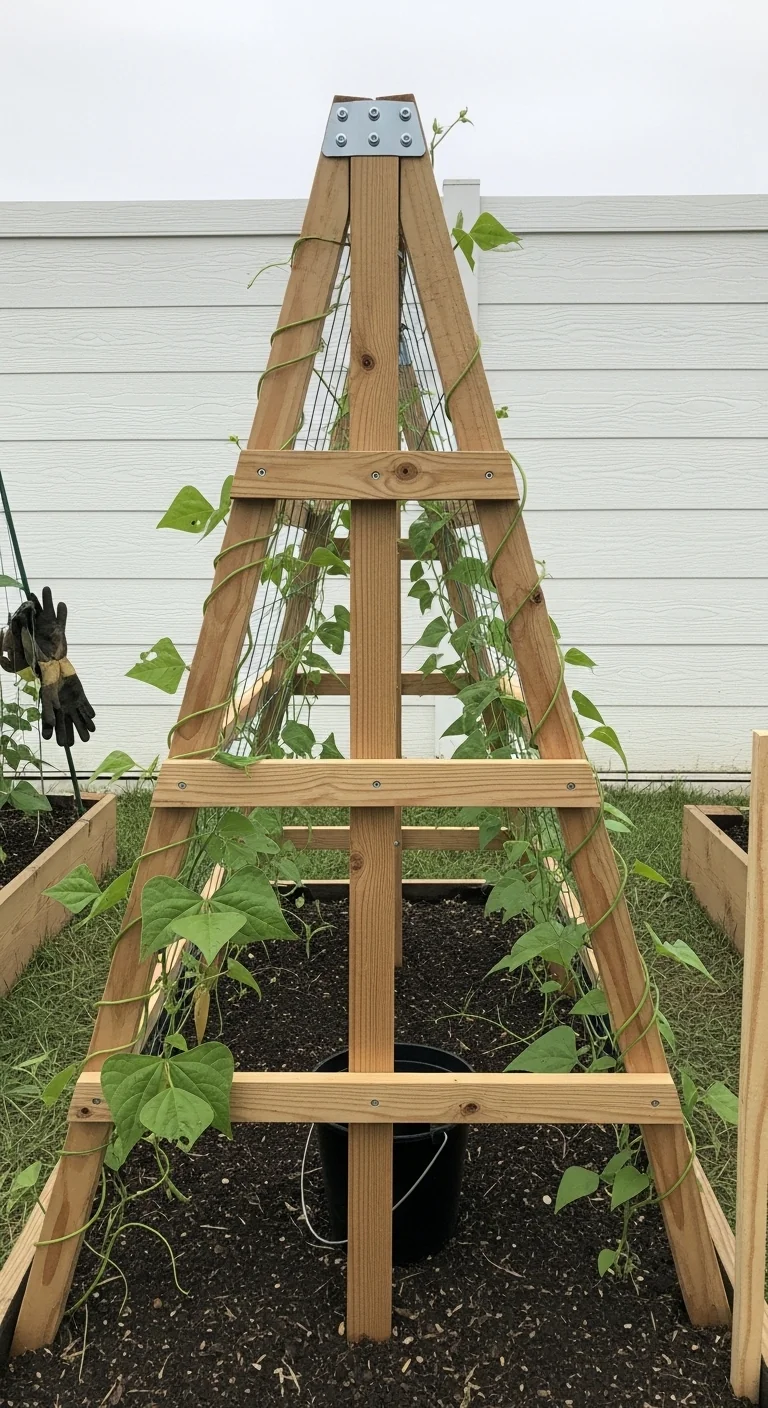
A-Frame Wooden Trellis
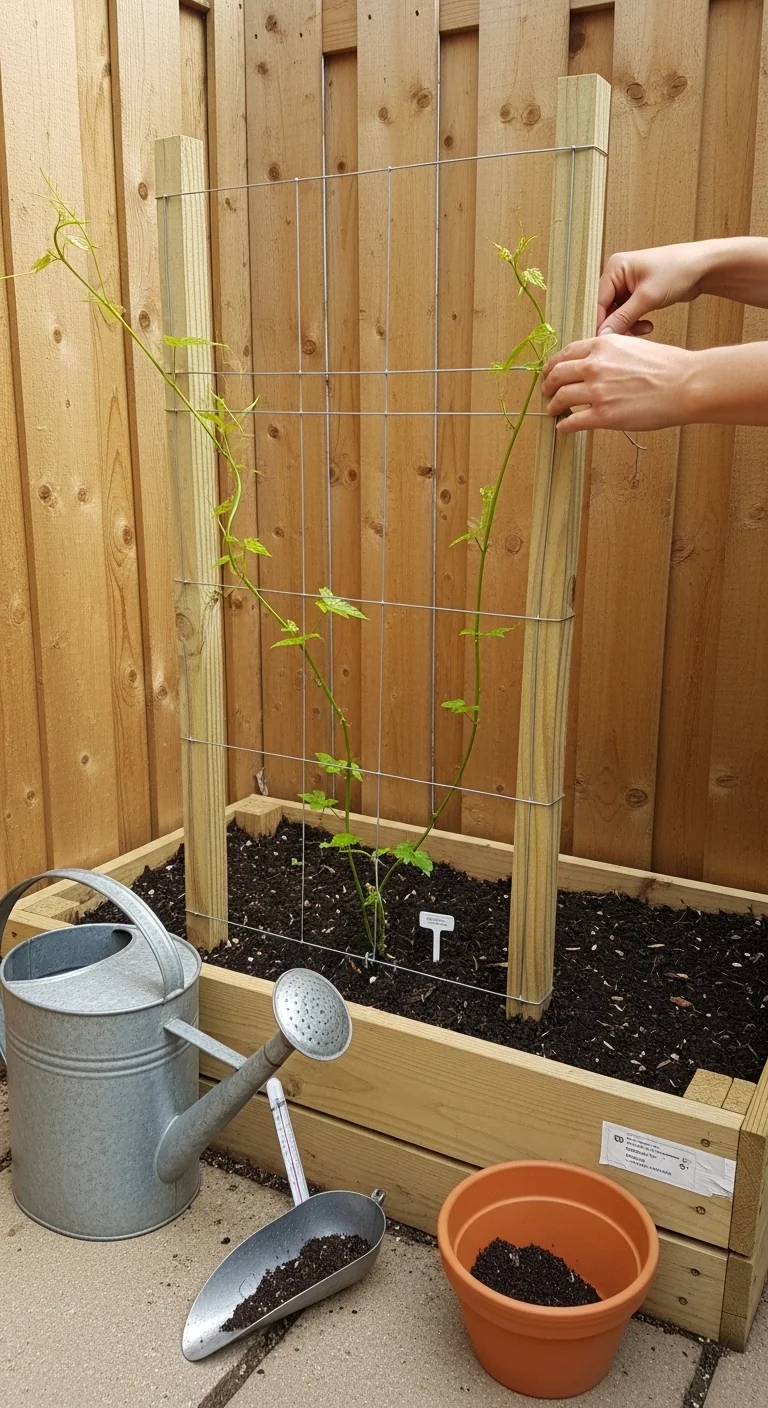
Best for: Branch 2
10-minute workflow. Cut four 6-foot 1×2 legs and eight 3-foot cross slats. Hinge two pairs of legs at the top with a single bolt. Lay the frame flat, attach cross slats at 12-inch intervals with screws, then stand it in the bed center. Upgrade option: add a center ridge pole for extra rigidity with cucumbers. Total build time stays under 10 minutes once materials are cut. Position the A-frame north to south so lower plants still receive full sun.
String Netting on Frame
Best for: Branch 1
Use versus skip. Use when your wicking bed supplies steady moisture and you want fully removable support at season end. Four corner posts and nylon netting create a 4-by-8-foot grid that lifts off in seconds. Skip if you grow indeterminate tomatoes, because the netting stretches under heavy fruit. Edge case: in windy zones over 15 miles per hour average, add diagonal guy lines to the bed corners.
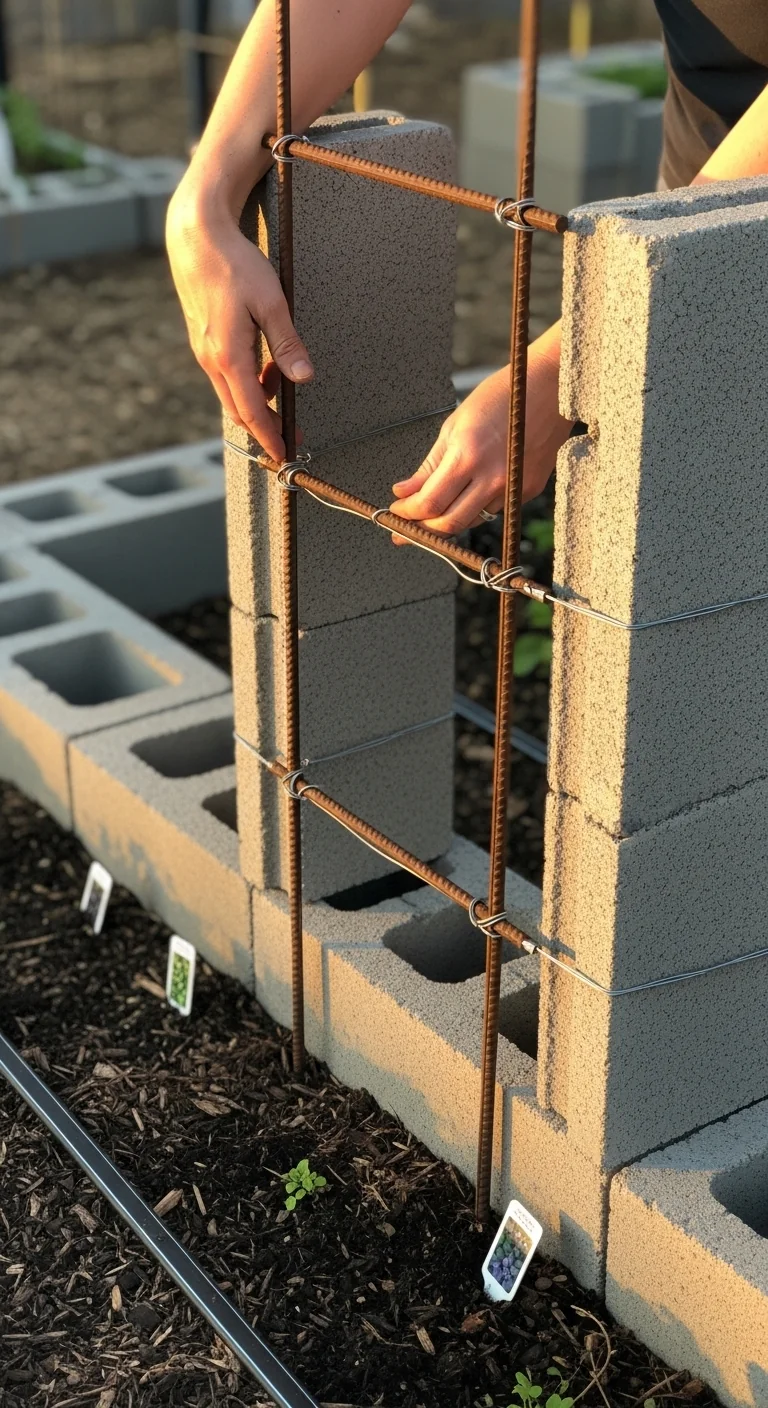
Cinder Block Ladder Trellis

Best for: Branch 3
Threshold rule. Use only with cinder block beds where the top course has open voids. Drop 4-foot rebar lengths into every third void along the back wall, then lash horizontal 1×2 rungs between rebar with wire. The rule limits rebar spacing to 24 inches to match block length. This creates permanent ladder rungs without drilling the blocks or disturbing the soil inside. See our cinder block raised beds guide for void alignment details.
Livestock Panel Between Beds
Best for: Branch 2
Blueprint. Place two raised beds 4 feet apart. Drive two 6-foot T-posts midway between them at each end. Cut one 16-foot livestock panel in half and stand each half vertically between the posts. Secure with wire and add a top horizontal brace. Vining crops planted along both bed edges climb the shared panel. External posts keep all weight off the bed frames. This works especially well when paired with consistent watering to support dual-sided growth.
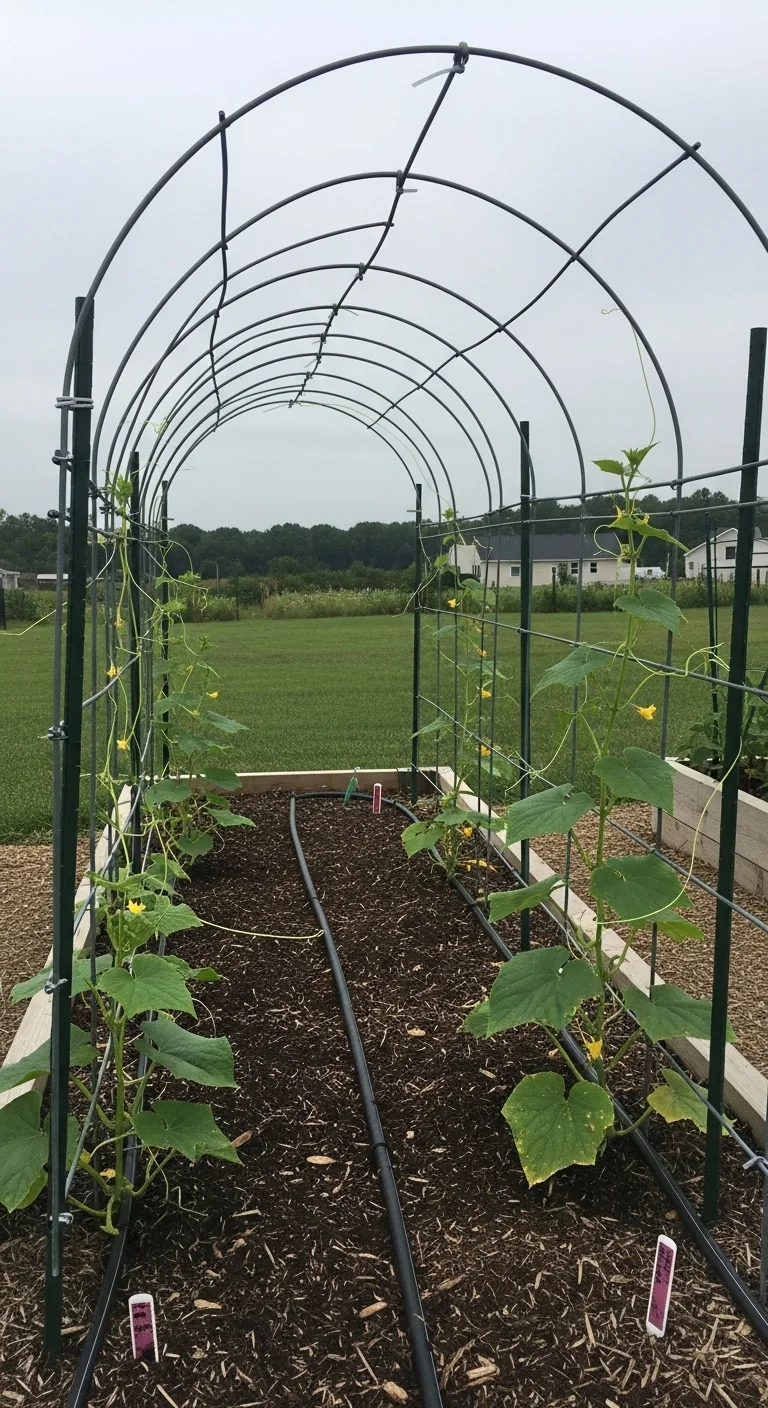
U-Shaped Arch Integration
Best for: Branch 3
Threshold rule. Apply when your u-shaped bed has an open center of at least 4 feet and the arms are under 6 feet long. Bend a single cattle panel to follow the u-contour and anchor the ends to the outer arms with brackets. The rule ensures the arch clears the center planting area by 18 inches. Integration keeps the trellis stable without extra posts. See our u-shaped raised bed guide for arm-width compatibility.
Elevated Ladder-Style Trellis
Best for: Branch 3
Threshold rule. Build only if your elevated bed stands 24 inches or taller and you need vertical reach without ground anchors. Use two 8-foot 2×2 posts attached to the bed legs with brackets, then add four horizontal rungs spaced 18 inches apart. The rule keeps rung height under 6 feet total to avoid top-heavy leverage. This design suits taller beds where standard ground-driven posts would be impractical. See our elevated raised beds guide for leg-bracket options.
Starter Stack (What to Choose First)
For Branch 1 (self-watering or wicking beds)
Start with the Side Wire Mesh Panel plus String Netting on Frame. The mesh provides permanent side support while the netting offers quick seasonal removal. Together they keep moisture paths open and allow full vine coverage without daily tying. Materials cost range: 20 to 60 dollars. Build time range: 45 to 90 minutes.
For Branch 2 (standard soil or hugelkultur beds with heavy crops)
Start with the Cattle Panel Arch Trellis plus Livestock Panel Between Beds. The arch maximizes height for tomatoes while the between-beds panel doubles usable space for paired beds. External anchoring on both prevents frame stress. Materials cost range: 30 to 80 dollars. Build time range: 60 to 120 minutes.
For Branch 3 (fence-adjacent, cinder, or u-shaped beds)
Start with the Fence-Back Vertical Trellis plus Cinder Block Ladder Trellis. Both leverage existing structures for zero extra footprint and permanent stability. Materials cost range: 25 to 70 dollars. Build time range: 30 to 75 minutes.
When This Won’t Work
These trellis designs fail when the raised bed walls measure under 0.75 inch thick and the trellis attaches directly without external posts, because heavy vines exert sideways torque that splits thin lumber. They also fail when average wind speeds exceed 15 miles per hour and no ground stakes extend at least 12 inches below soil level, because the entire assembly rocks and loosens bed corners.
In either case switch to fully freestanding versions or add diagonal braces driven into the ground beside the bed. Remove or store all removable components before winter to avoid ice load. See our winterizing raised beds guide for exact storage steps by climate zone.
Choosing the Right Option for Your Situation
Budget threshold
If your total materials budget stays under 50 dollars, limit choices to cattle panel, wire mesh, or string netting designs. These use single large panels or off-the-shelf fencing and require only basic fasteners.
Time threshold
If you have under 60 minutes available, select the A-Frame Wooden Trellis or Side Wire Mesh Panel. Both assemble with pre-cut lumber and minimal measuring.
Technical constraint
If your raised bed sits on uneven ground or uses elevated legs, avoid any design that relies on ground-driven posts. Choose ladder-style or fence-integrated options instead.
Yes/No checklist
Is your bed 4 feet wide or narrower? Yes: choose side or back mount.
Do you grow tomatoes or cucumbers? Yes: select reinforced arch or panel.
Is the bed against a fence or block wall? Yes: use integrated vertical styles.
Do you need full removal at season end? Yes: pick string netting or hinged A-frame.
Expert Q&A
How do you prevent a trellis from pulling a wooden raised bed frame apart under heavy vine weight?
Drive support posts outside the bed walls and transfer all load to those posts rather than screwing directly into the rim boards. Use external brackets or wire ties on the panel edges. This keeps the bed frame in compression instead of tension.
What spacing works best between trellis rungs for indeterminate tomatoes versus pole beans?
Space tomato rungs 18 inches apart to allow fruit clusters room without crowding. Use 12-inch spacing for pole beans so tendrils can grip easily and fill the grid faster.
Can you combine a trellis with drip irrigation lines without blocking water flow?
Run drip tubing along the bed base inside the trellis arch or panel footprint. Keep the first 6 inches of tubing clear of any trellis legs or posts so emitters remain accessible for seasonal cleaning.
How do you store a cattle panel trellis over winter without bending the metal permanently?
Lay the panel flat on a level surface and secure the ends with ratchet straps to prevent curling. Store it against a garage wall or under a tarp elevated off the ground to avoid rust from pooled water.
What adjustment keeps a vertical trellis stable on an elevated raised bed that has no ground contact?
Attach vertical posts directly to the bed legs with heavy-duty corner brackets rated for outdoor use. Add a horizontal top brace across the bed width to create a rigid triangle that counters forward pull from vines.
Conclusion
The decision always returns to matching the trellis load path and attachment points to your specific raised bed construction and watering approach. The number-one mistake is treating the trellis as a standalone add-on instead of an integrated part of the bed system, which leads to frame stress or uneven plant growth.
Next step: review your bed type against the decision grid above, then gather materials for your top choice. Pair it with a compatible watering setup for season-long stability. See our wicking raised bed guide for full system integration ideas.
Lead Data Architect
Umer Hayiat
Founder & Lead Data Architect at TheYieldGrid. I bridge the gap between complex agronomic data and practical growing, transforming verified agricultural science into accessible, mathematically precise tools and guides for serious growers.
View all tools & guides by Umer Hayiat →