
Ask most gardeners when to divide hostas and they will say “spring or fall.” Far fewer ask the question that actually determines success: what do you want the division to achieve? A hosta dug for maximum multiplication should be split differently than one being downsized to stay in the same bed. A clump with a dead center needs a different cut than a healthy plant you simply want to move. Treating every division as the same operation wastes plants, time, and recovery potential.
This guide covers in-ground and container hostas across USDA hardiness zones 3 through 9, with timing adapted for cool, temperate, and warm regions. What it excludes: tissue culture lab propagation, seed starting, and dividing dormant bare-root stock still in cold storage. Those follow entirely separate protocols.
By the end, you will be able to identify which of three core goals drives your project, select from nine distinct methods the one that fits, and know exactly what tool loadout and aftercare each demands. You will also recognize the two conditions under which dividing at all is a mistake.
Bottom line: Match the cut to the goal: multiplication techniques sacrifice short-term appearance for plant count, while size-control cuts prioritize minimal disruption and fast recovery.
The Yield Grid Decision Grid
Choose your branch based on the measurable condition of your hosta and your intended outcome. Each branch points to specific methods listed below.
Branch 1: Multiply Your Stock
Measurable conditions: The parent plant shows at least 6 to 8 visible eyes (growing points) at soil level. Soil temperature at 4-inch depth is above 45°F (7°C). You have prepared planting holes or pots ready before you dig. The plant has been in the ground for at least 3 full growing seasons.
Recommended: Items 1, 7, 3 below. These methods prioritize division count per plant. Expect smaller individual divisions that need a full season to reach display size.
Branch 2: Revive a Declining Clump
Measurable conditions: The center of the clump shows dead, hollow, or thinning growth while outer edges remain vigorous. Fewer than half of the crown’s eyes produce healthy foliage. The plant is at least 4 years old. Soil is workable but not waterlogged; squeezing a handful releases no dripping water.
Recommended: Items 2, 4, 8 below. These methods cut away dead tissue and redistribute healthy rhizome sections. Discard the dead central material; do not replant it.
Branch 3: Downsize Without Major Disruption
Measurable conditions: The hosta overhangs its allocated space by at least 12 inches on any side, or foliage physically touches neighboring plants. The plant is otherwise healthy with no center dieback. You want to keep the parent plant in its current location.
Recommended: Items 3, 5, 6 below. These partial-removal approaches let you reduce footprint without digging the entire root mass. For more on dividing similar clump-forming perennials, see our guide on how to divide daylilies.
Quick Comparison Table
| Option | Key Mechanism | Best For | Decision Grid Branch | Effort Score (1–5) |
|---|---|---|---|---|
| 1. Spring Full-Clump Division | Dig entire plant, cut into sections with 3–5 eyes each | Maximum propagation in cool spring soil | Branch 1 | 4 |
| 2. Fall Division with Winter Mulch | Divide 4–6 weeks before first frost, apply 3–4 inches of straw mulch | Rejuvenating tired clumps in regions with mild autumns | Branch 2 | 3 |
| 3. Wedge Removal Technique | Cut a pie-slice section from the clump perimeter without lifting the whole plant | Downsizing a healthy, oversized clump in place | Branch 3 | 2 |
| 4. Two-Fork Lever Split | Insert two garden forks back-to-back through the crown, pry handles apart | Splitting dense, fibrous root masses over 18 inches wide | Branch 2 | 3 |
| 5. Hand Teasing for Small Clumps | Lift the plant and gently pull natural root divisions apart by hand | Miniature and small hosta varieties with loose root structure | Branch 3 | 1 |
| 6. Container Hosta Division | Remove root-bound plant from pot, slice through circling roots, repot sections | Potted hostas that have filled their container | Branch 3 | 2 |
| 7. Rossizing: Single-Eye Multiplication | Wash all soil from roots, cut crown into individual eyes, pot separately | Rapidly building stock from a single prized cultivar | Branch 1 | 5 |
| 8. Post-Bloom Summer Division | Divide after flowering when soil is warm, cut foliage back by half, water daily | Emergency division when spring window was missed, zones 5–7 | Branch 2 | 4 |
| 9. Bare-Root Preparation for Delayed Planting | Divide, wash roots, trim damaged tissue, store in damp peat moss at 35–41°F | Dividing now but planting days or weeks later | Branch 1 | 4 |
1. Spring Full-Clump Division
Best for: Branch 1 (Multiply Your Stock)
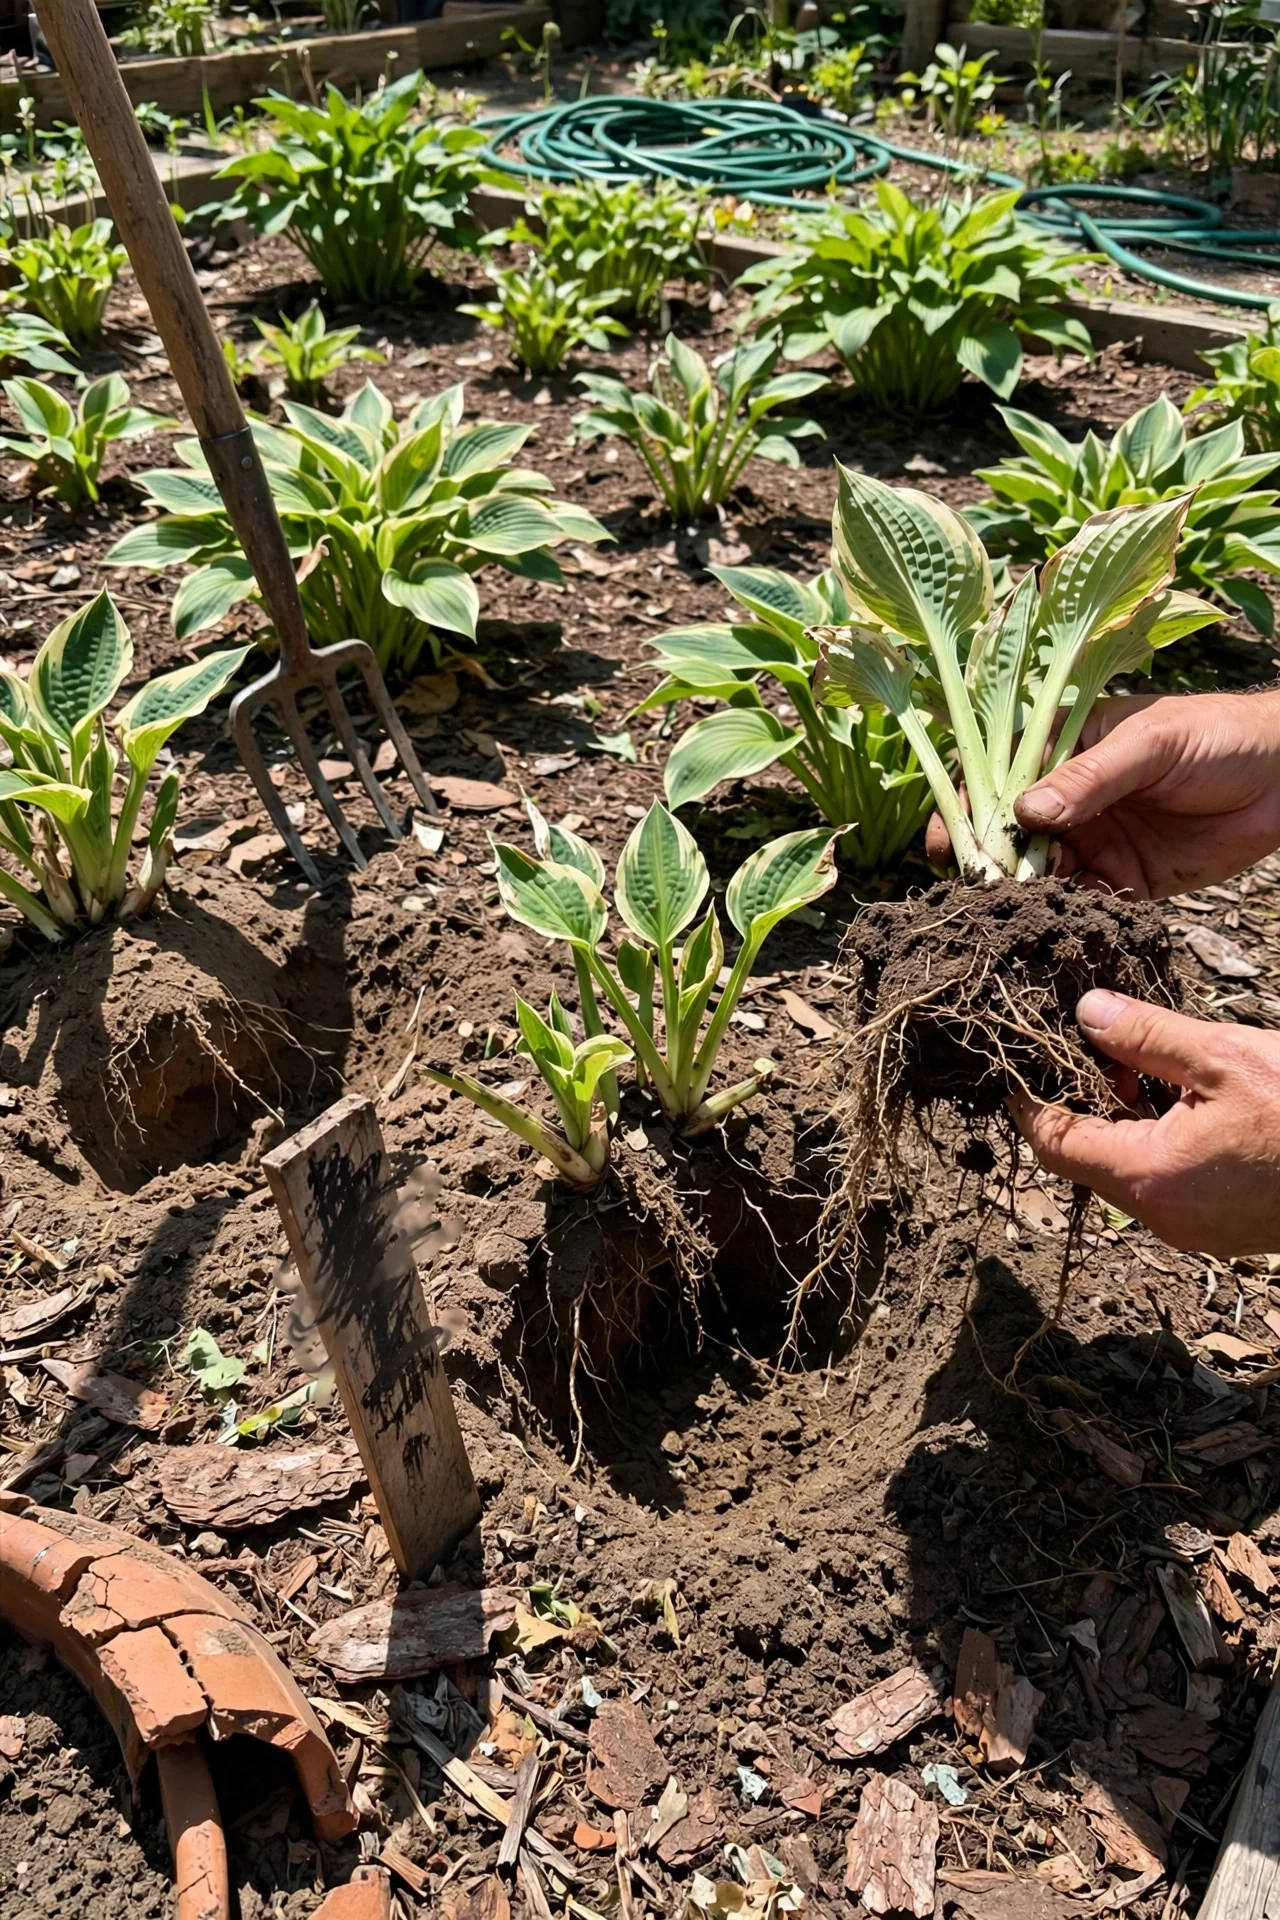
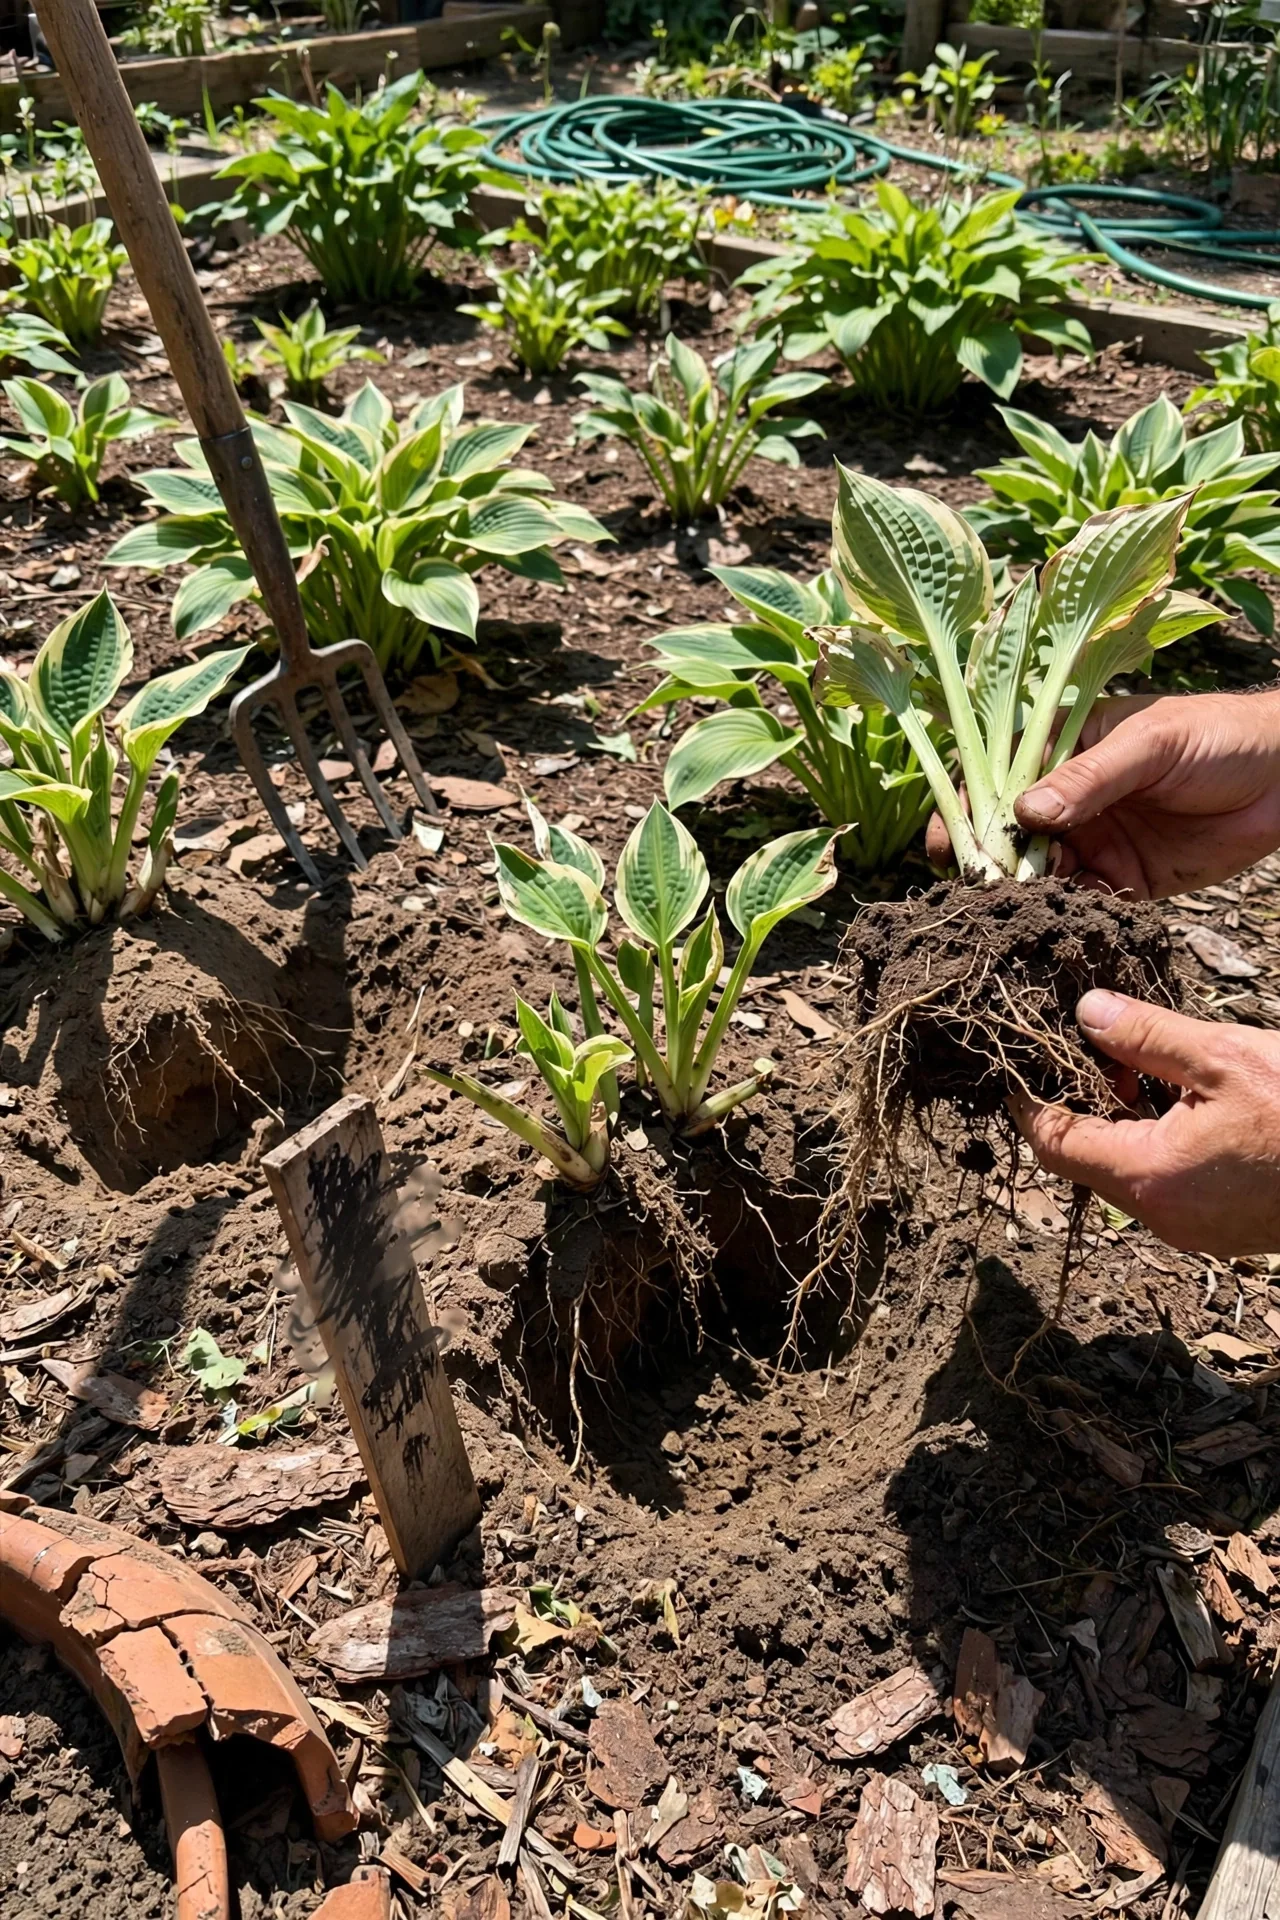
What it is: The most widely recommended approach. You dig the entire root ball, lift it, wash or shake off soil to expose the crown structure, and then cut through the rhizome with a sharp knife or spade. Each resulting piece should carry 3 to 5 eyes and a proportionate root mass.
When to use it: Early spring, after the pointed shoots break the soil surface but before leaves unfurl beyond 3 to 4 inches. At this stage the plant’s energy reserves are concentrated in the crown, and root damage triggers rapid new root production rather than leaf stress. In zones 3 and 4, this window typically falls in April; in zones 7 and 8, it may arrive as early as late February.
Critical constraint: Do not divide when the soil is saturated. Working wet clay soil compacts around the replanted roots and excludes oxygen. If a handful of soil holds its shape when squeezed but crumbles when poked, conditions are right. If water drips out, wait 48 hours.
Steps: Dig a circle 6 to 8 inches from the outermost leaf tips, going 10 to 12 inches deep. Slide a garden fork underneath and lever the clump upward. Wash soil from the crown with a gentle hose stream. Identify natural cleavage lines between eye clusters; cut there with a clean, sharpened pruner blade or garden knife. Replant immediately at the original depth, with the white basal portion of the petioles just below the soil surface. Water thoroughly, then apply 2 inches of mulch, keeping it away from the crown.
2. Fall Division with Winter Mulch
Best for: Branch 2 (Revive a Declining Clump)
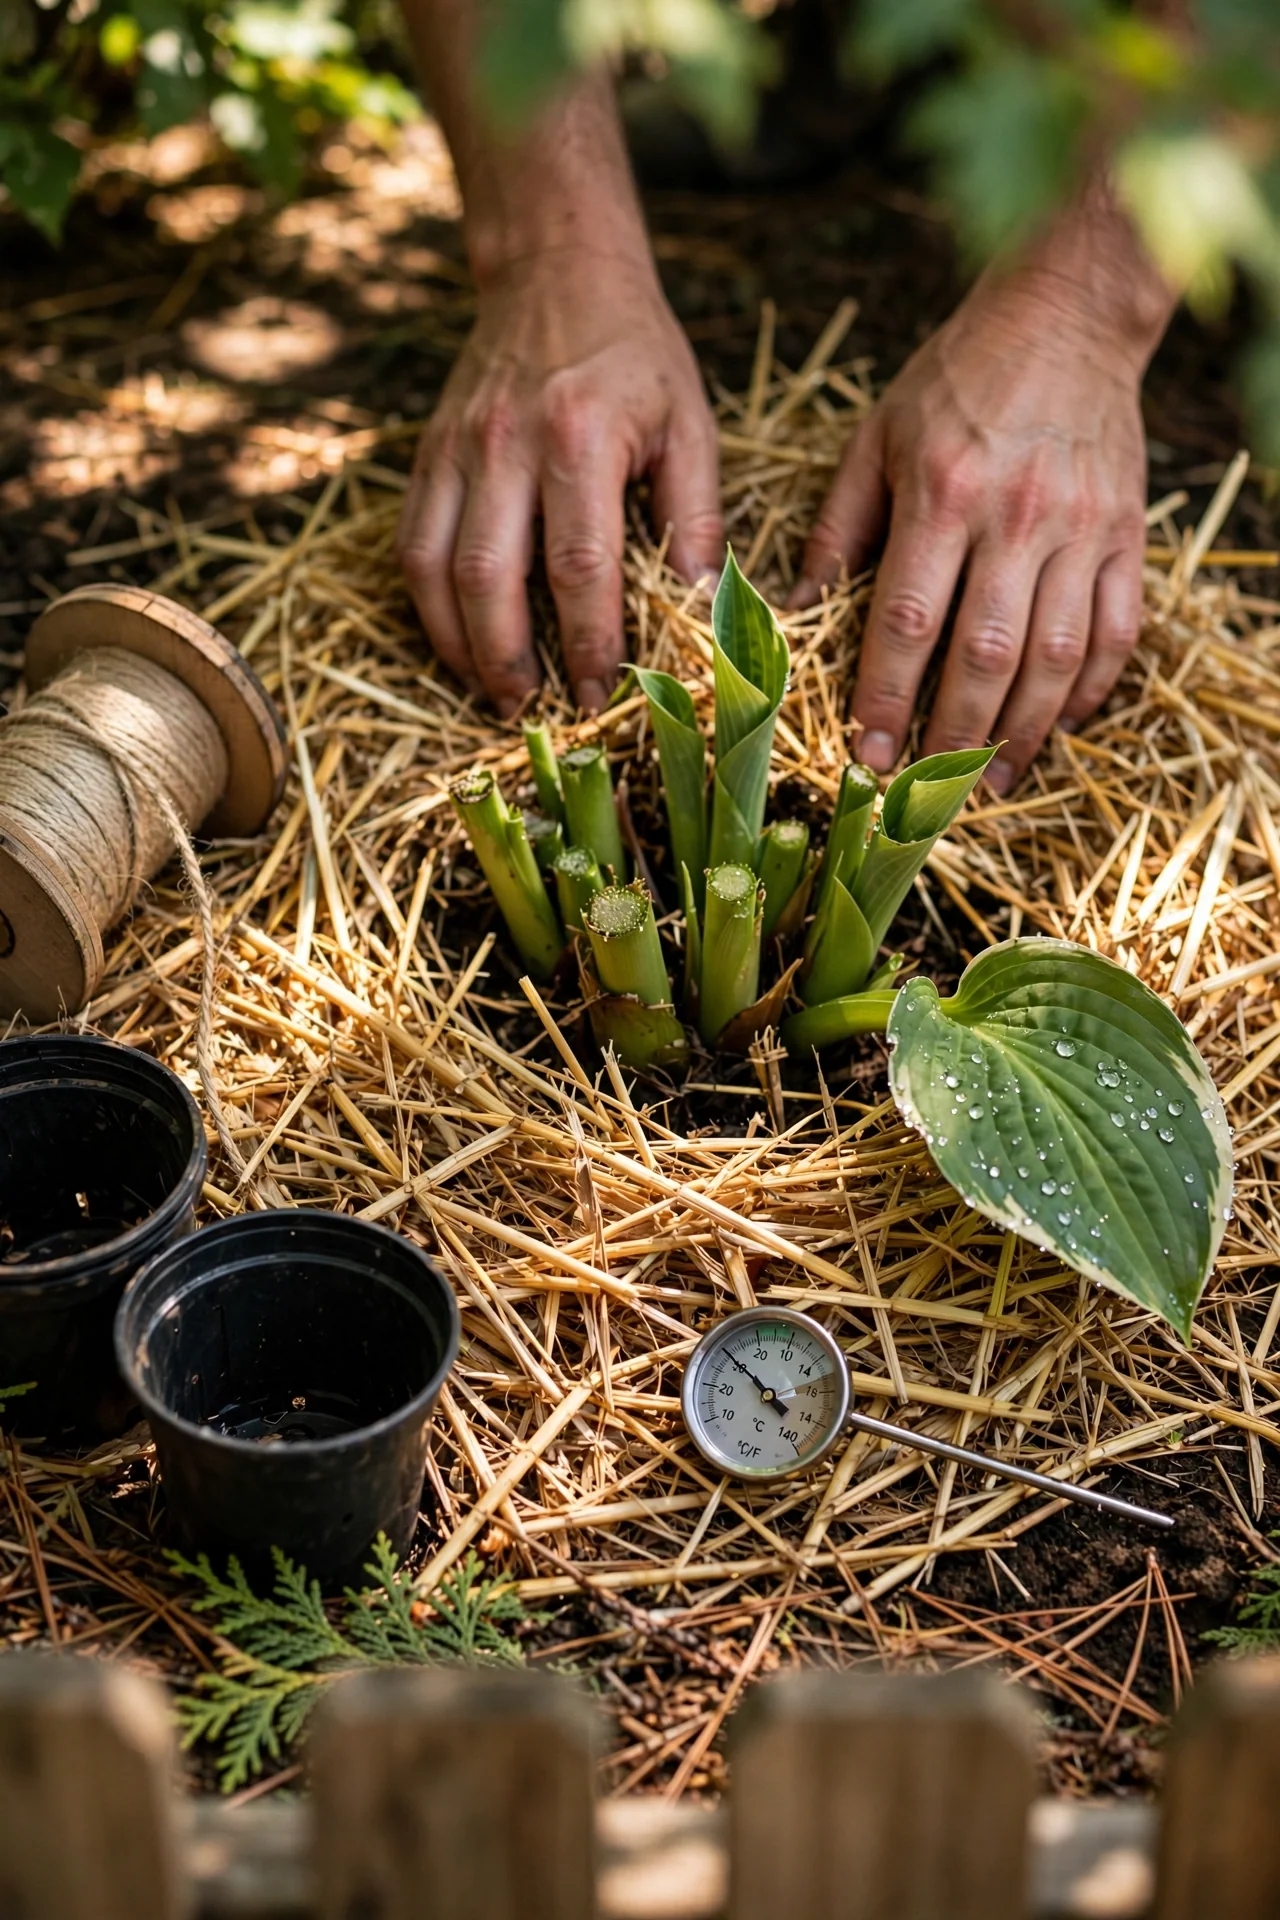
Divide in early autumn, 4 to 6 weeks before the average first frost date for your zone. Cut the foliage back to 4 to 6 inches before digging to reduce transpiration. After replanting, apply a 3- to 4-inch layer of straw, pine needles, or shredded leaves over the crown. This insulation prevents freeze-thaw cycles from heaving the shallow-rooted divisions out of the soil over winter. In zones 3 and 4, complete the work no later than mid-September; zones 7 and 8 can push into late October.
3. Wedge Removal Technique
Best for: Branch 3 (Downsize Without Major Disruption)
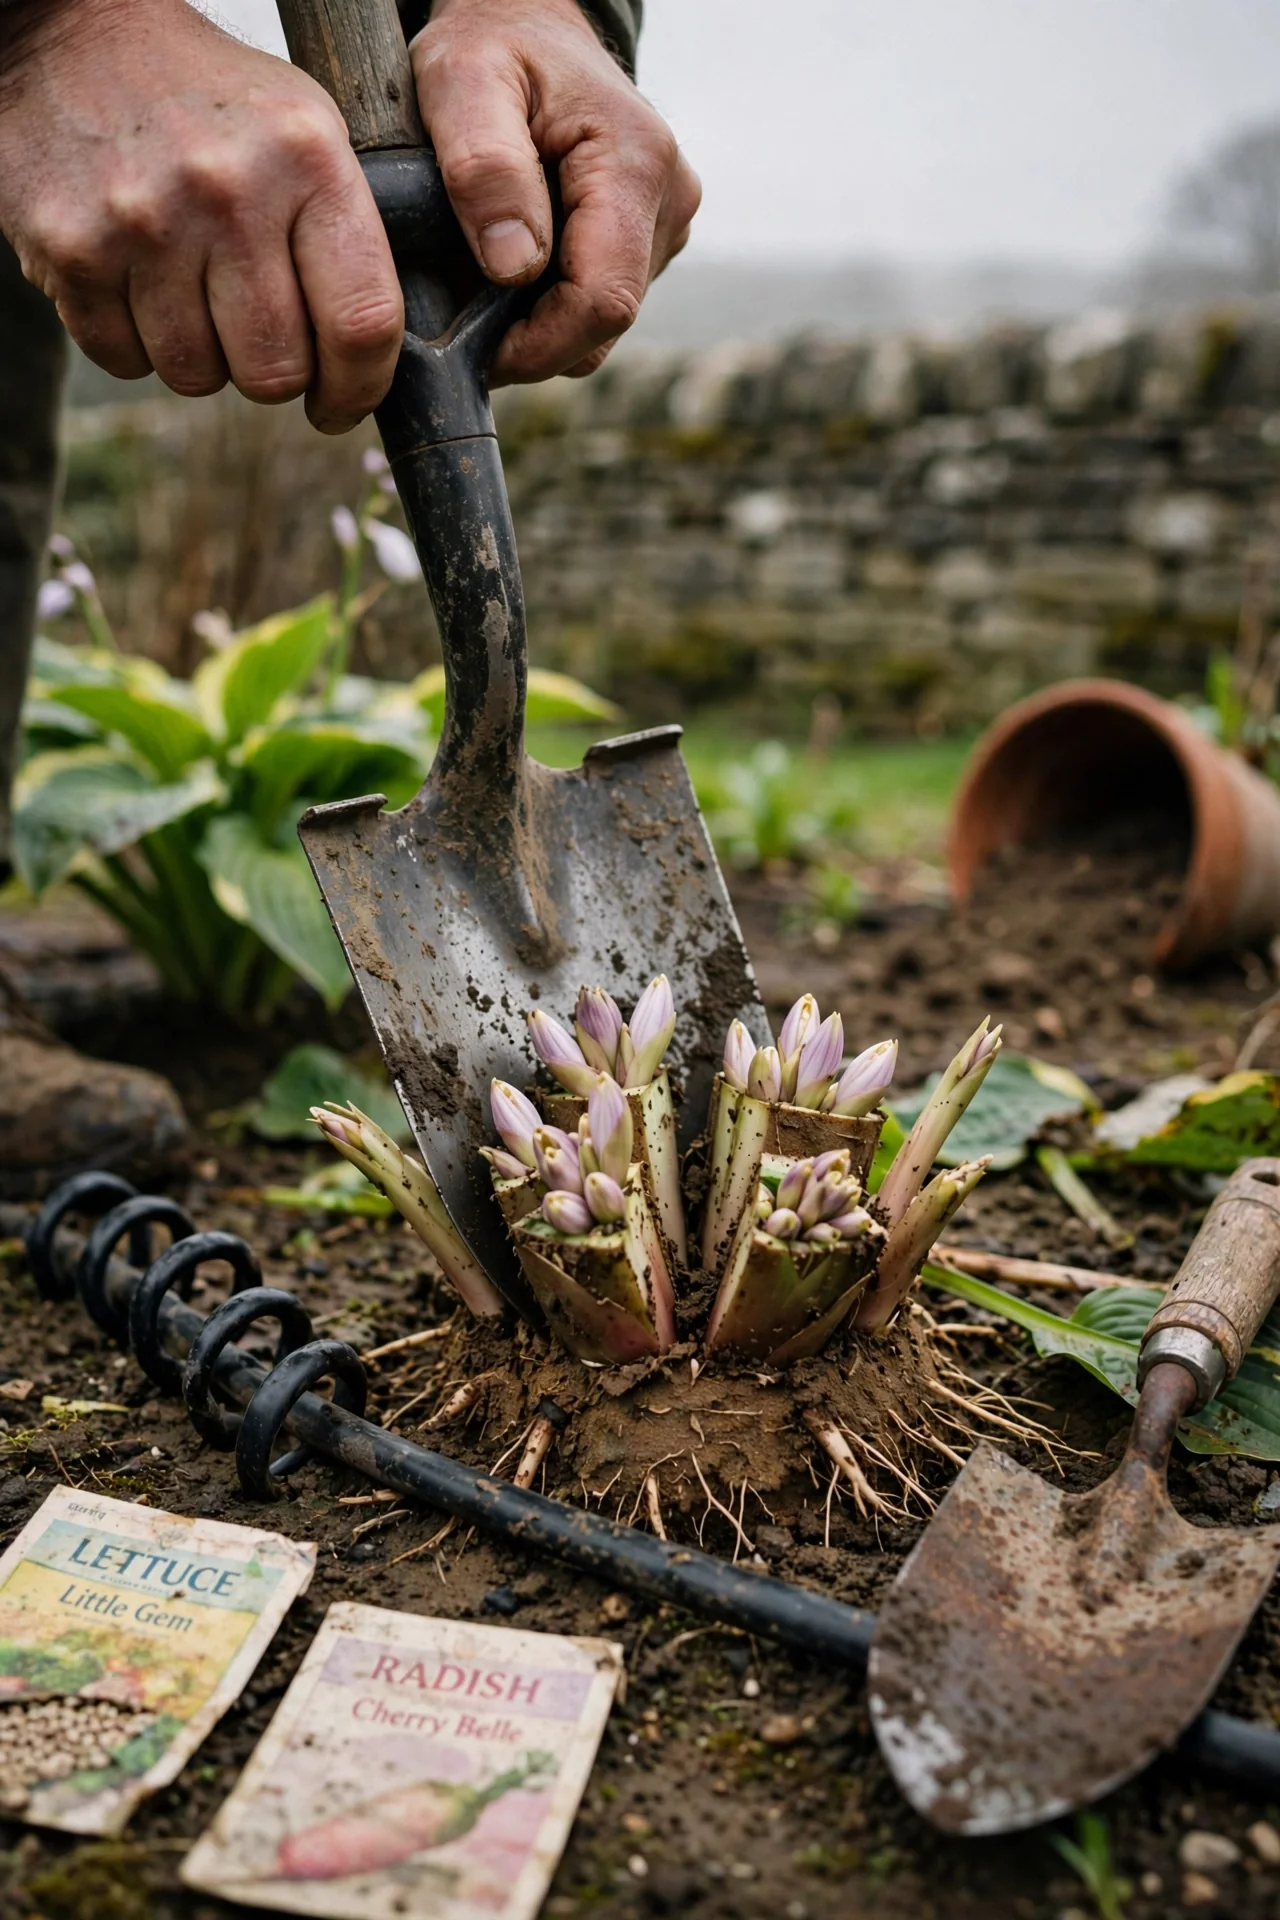
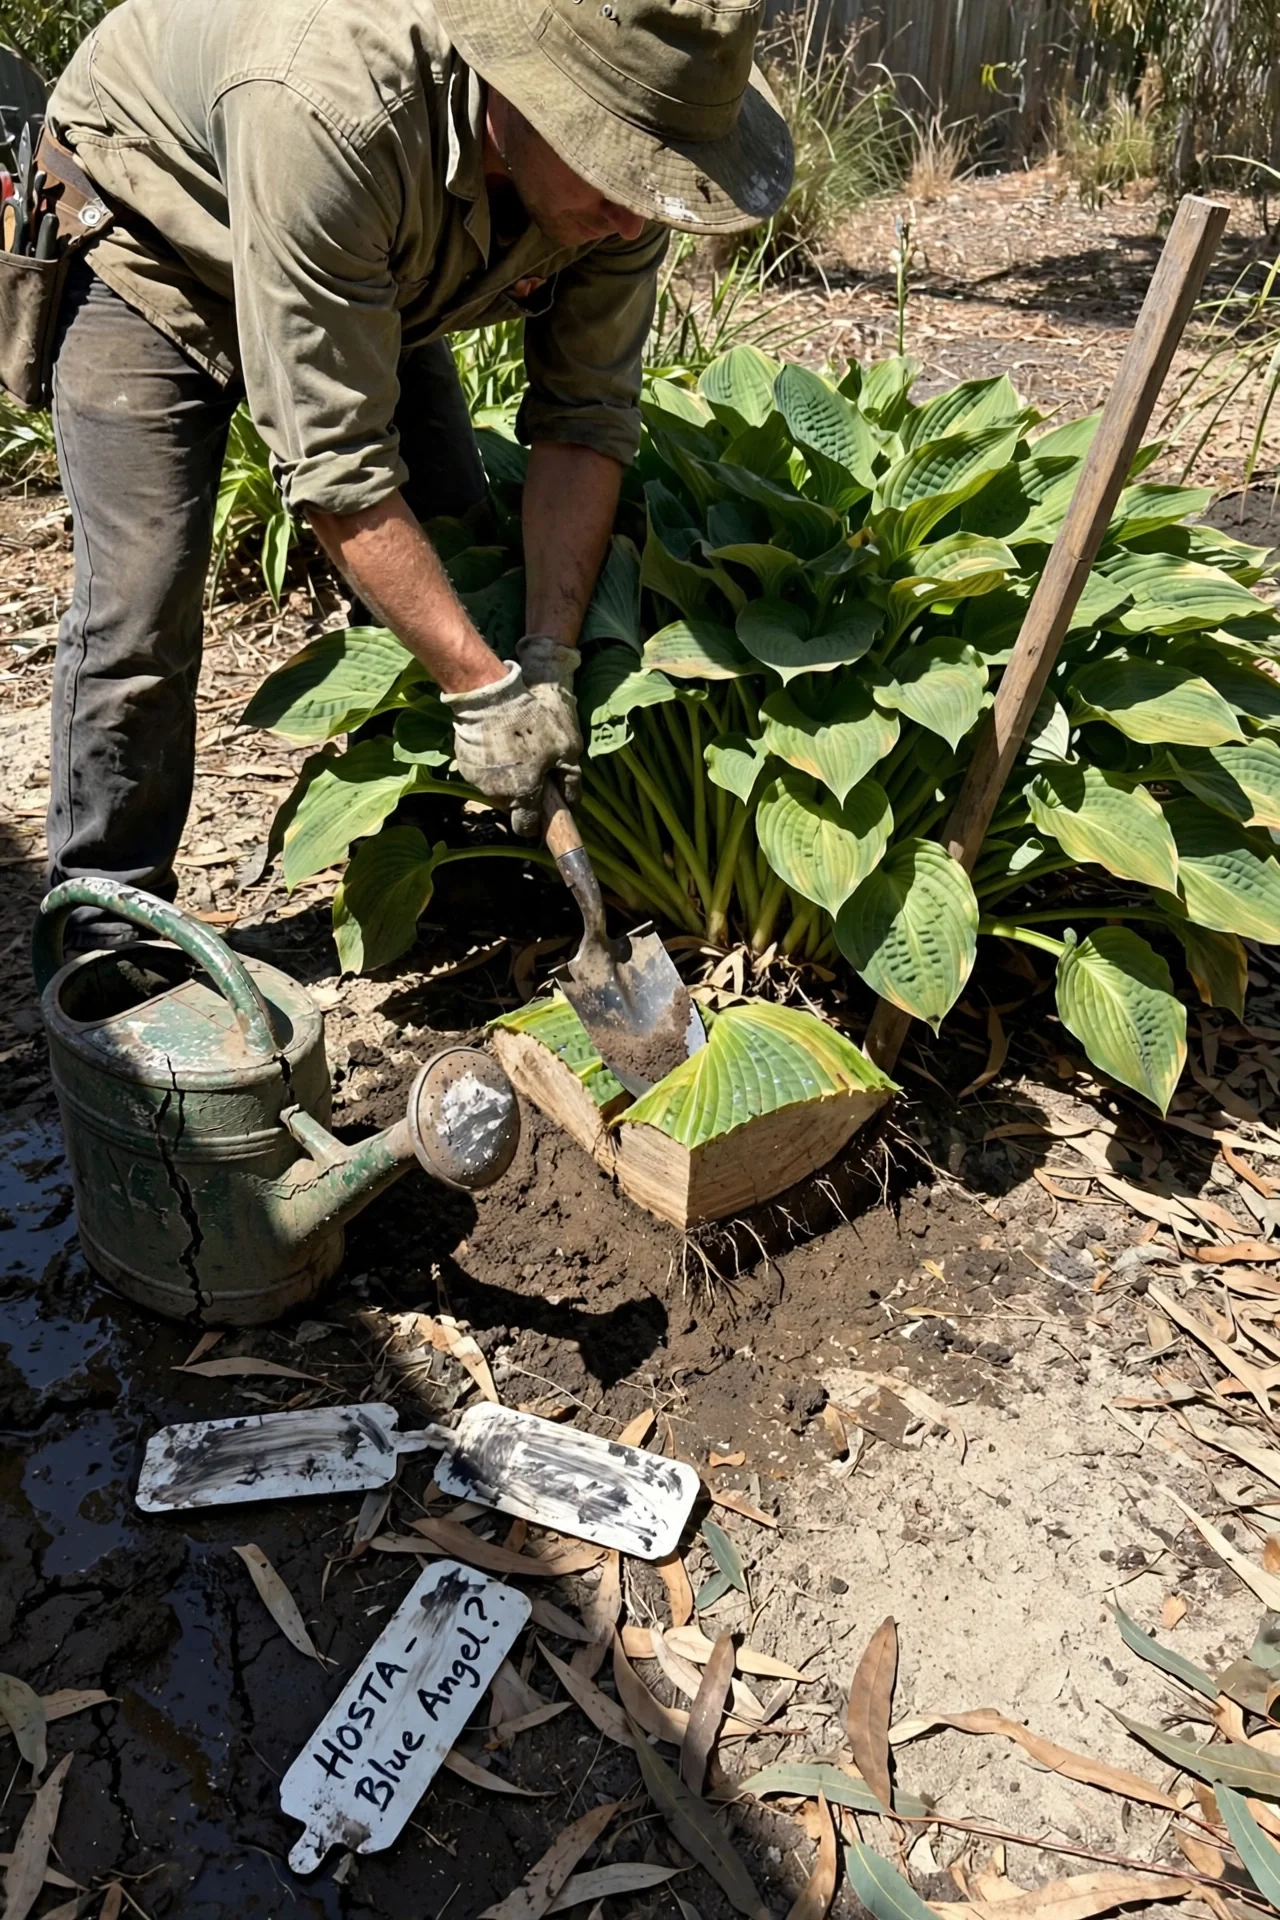
What it is: Instead of digging the entire plant, you remove a wedge-shaped section from one side using a sharp spade. Think of cutting a single slice from a pie while leaving the rest of the pie in the pan. The parent plant remains in place with most of its root system undisturbed. The removed wedge becomes a transplantable division.
Why it is underused: Most guides skip this method because it yields fewer divisions. But when your goal is simply reducing a clump’s footprint by 25 to 30 percent, it causes far less transplant shock than full excavation. The parent plant often shows no visible setback.
Execution: Water the plant thoroughly 24 hours beforehand. Push a sharp spade straight down through the crown at the point you want to separate, then make a second cut angling outward to free a wedge. Pry the wedge out with a garden fork. Backfill the resulting gap in the parent plant with compost-enriched soil. This technique works best on hostas at least 3 years old with a crown diameter exceeding 12 inches. For a related approach using cuttings instead of division, see our guide on softwood cuttings.
4. Two-Fork Lever Split
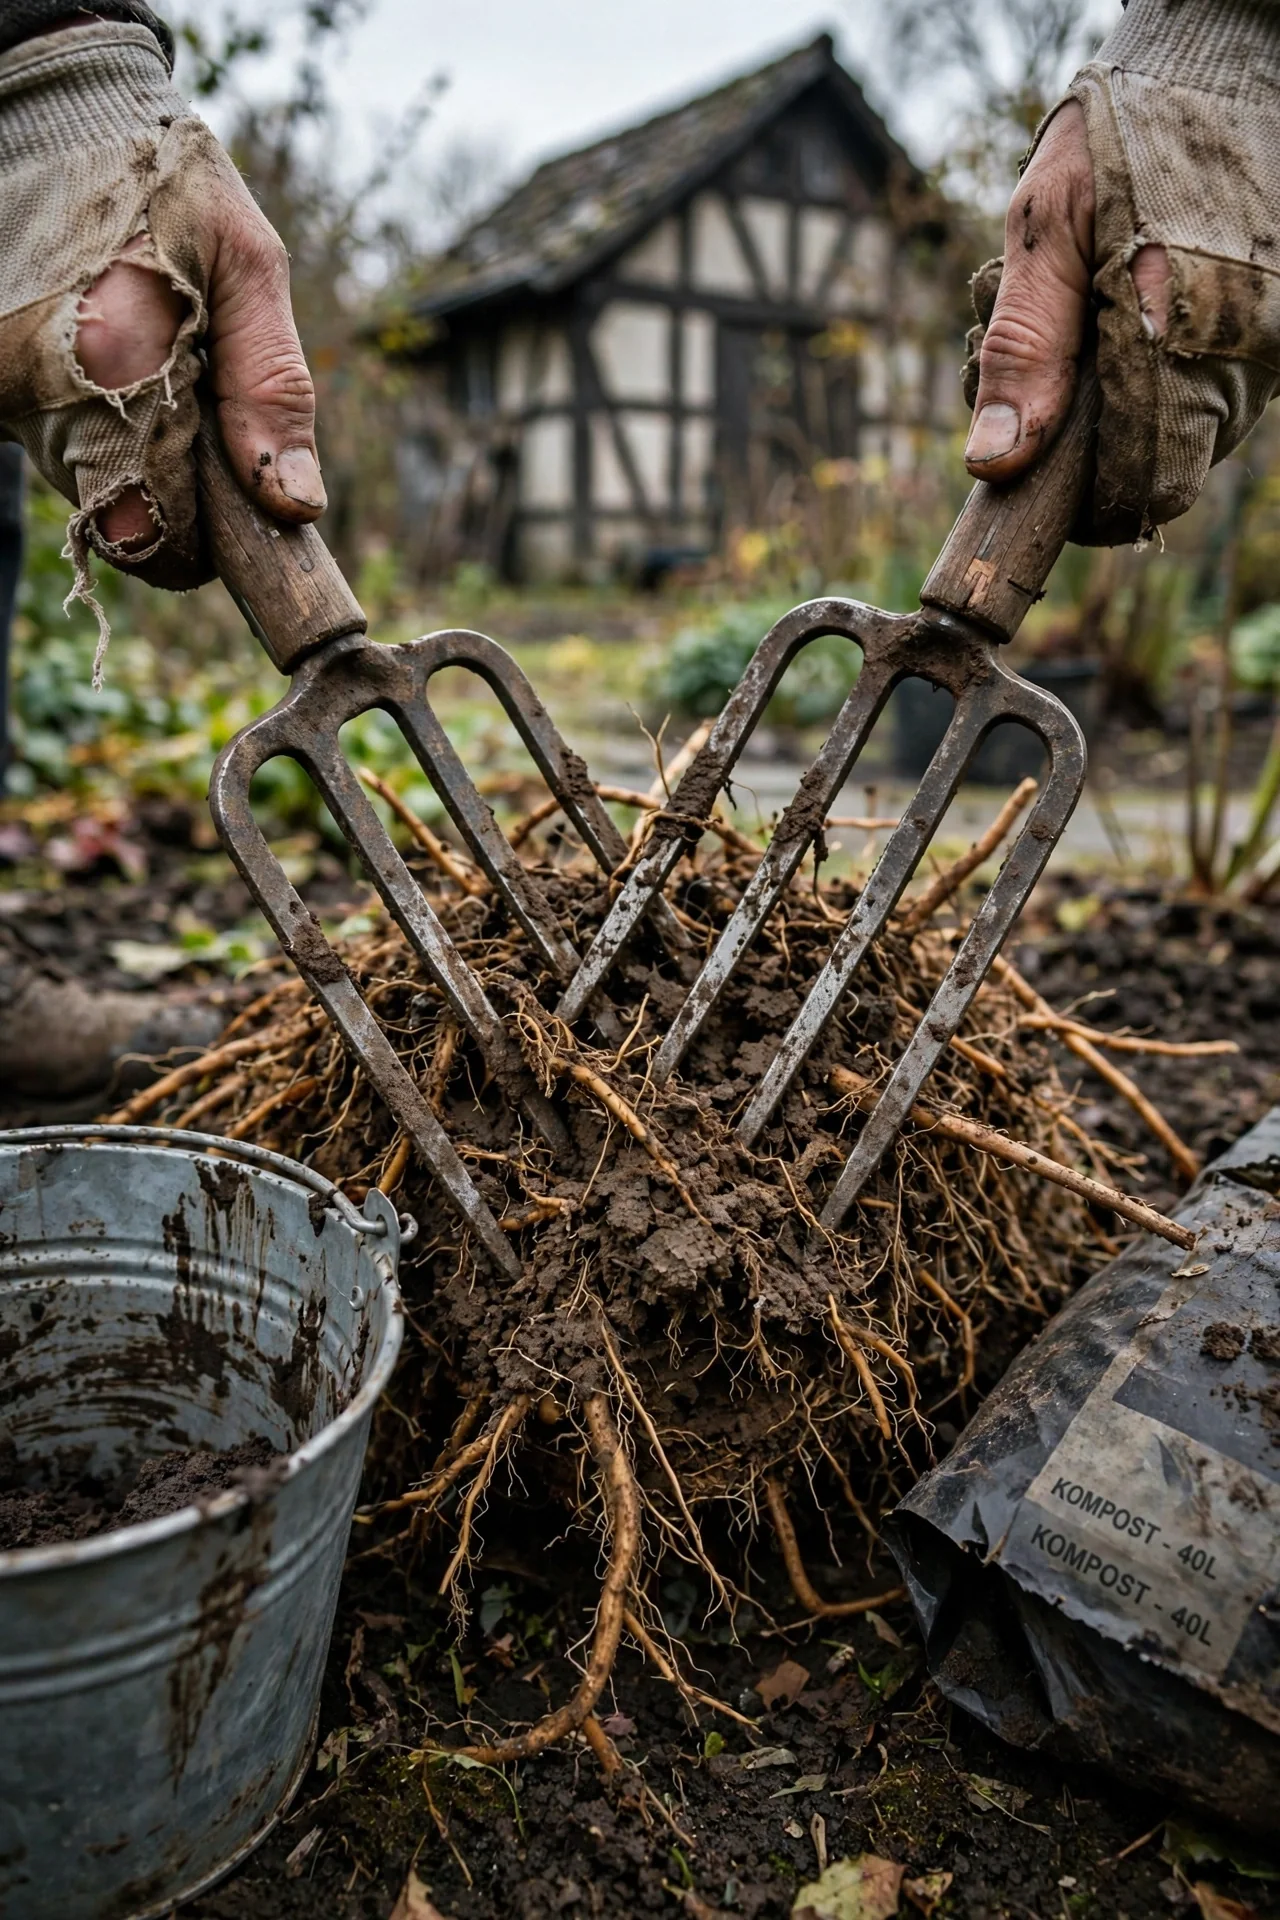
Best for: Branch 2 (Revive a Declining Clump)
The technique: After lifting the entire clump, insert two garden forks back-to-back through the center of the crown so their tines interlock. Push the handles toward each other, then pull them apart. The prying action splits the root mass along natural fault lines with less cutting damage than a spade chop. This method handles root masses exceeding 18 inches in diameter that resist a single spade cut.
When it beats everything else: Hostas grown in heavy clay for 5 or more years often form a root mass dense enough to break a spade handle. The two-fork method converts upper-body leverage into controlled splitting force. If the crown still will not separate, a serrated bread knife sawed through the remaining connecting tissue finishes the job cleanly.
Mistake to avoid: Do not rock the forks side to side. That motion tears roots rather than splitting them, leaving ragged wounds that heal slowly and invite fungal entry. Keep the motion strictly in one plane: handles together, handles apart. For maintaining the tools used in this method, refer to our guide on sharpening pruners and garden tools.
5. Hand Teasing for Small Clumps
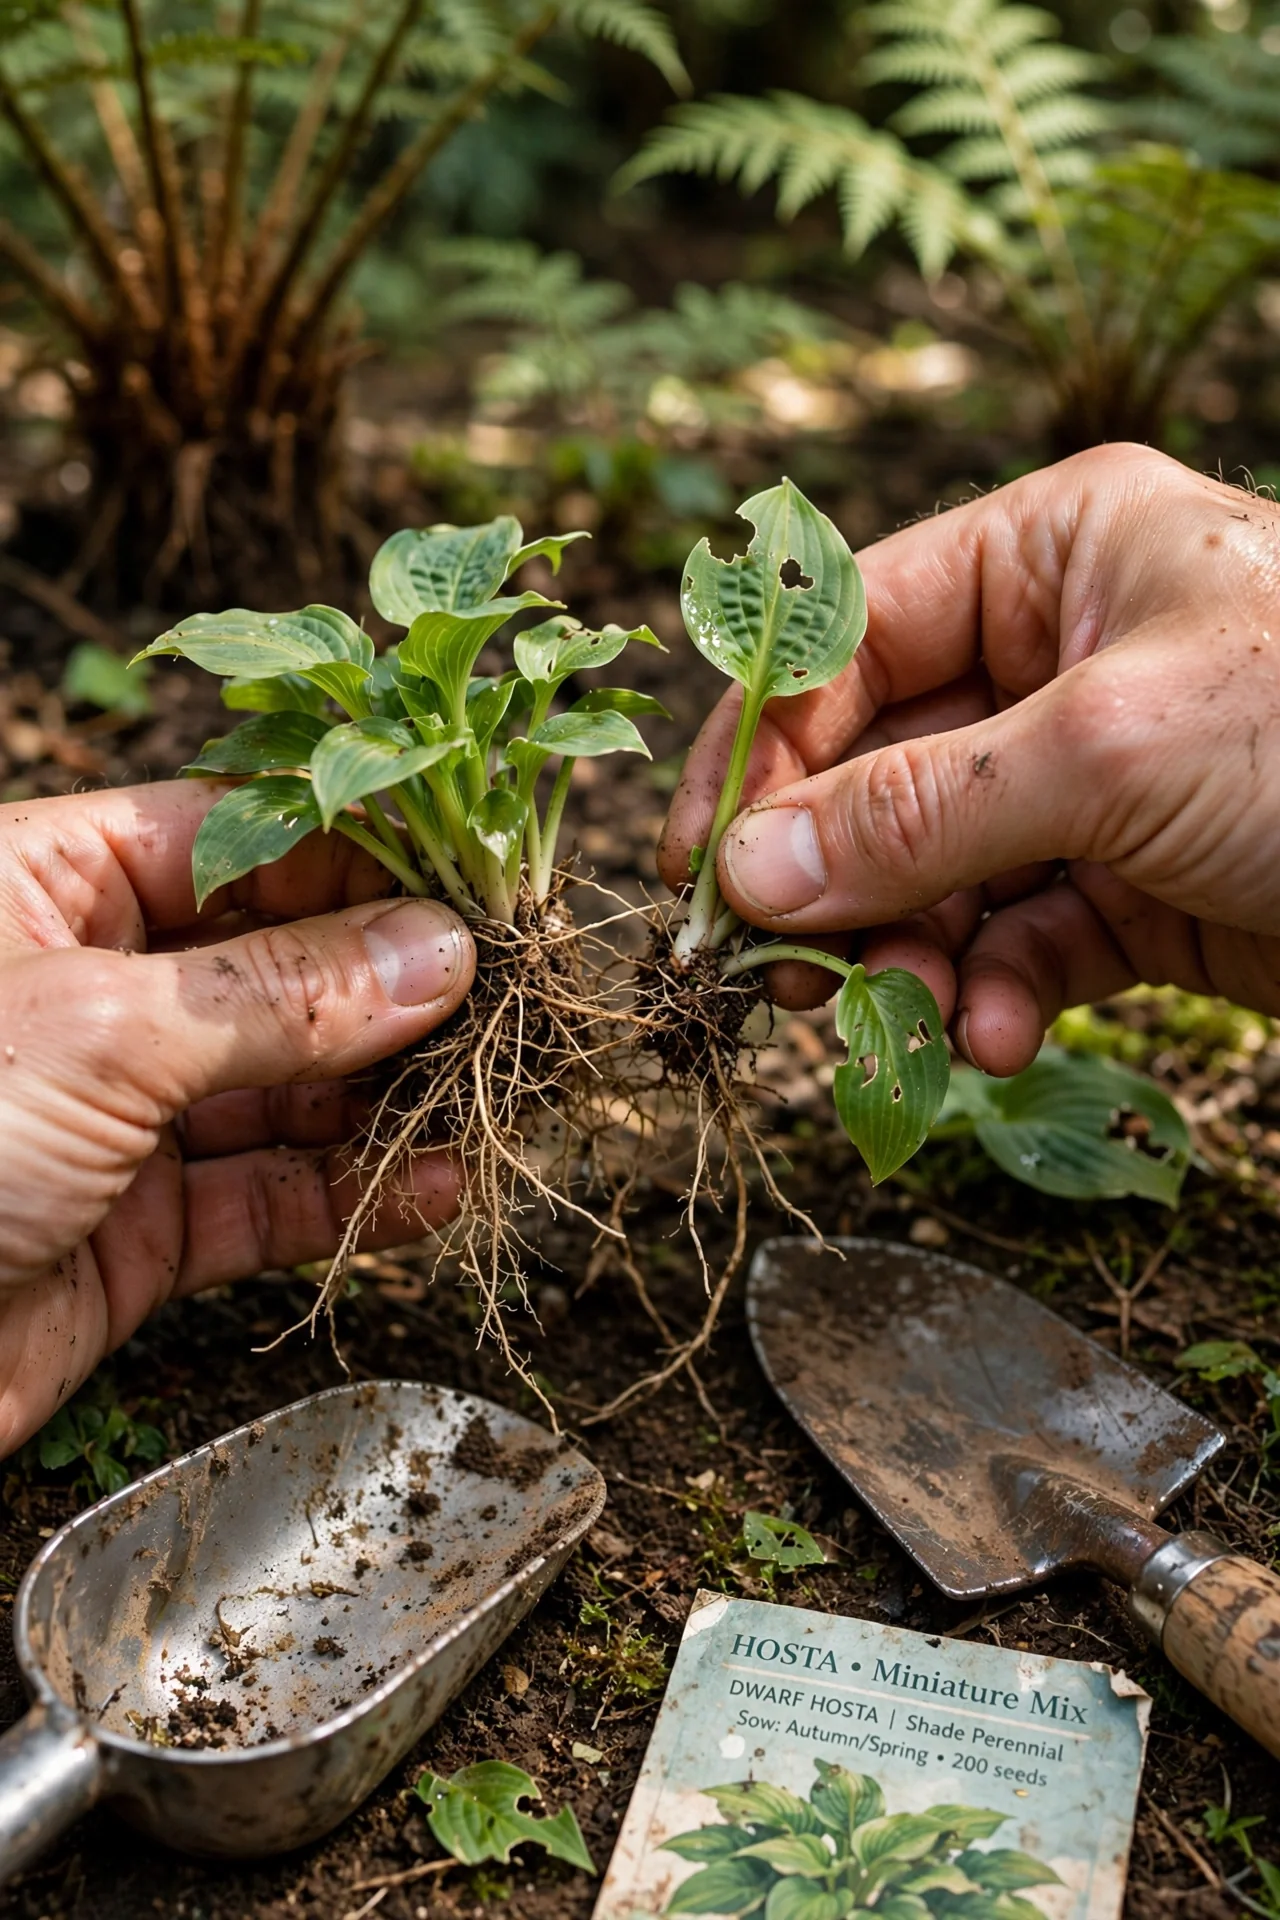
Best for: Branch 3 (Downsize Without Major Disruption)
Miniature and small hosta varieties, such as ‘Blue Mouse Ears’ or ‘Pandora’s Box,’ often have loose, fibrous root systems. After lifting the clump, you can gently pull sections apart with your fingers. No tools are needed. Soak the root ball in a bucket of water for 10 minutes if the roots resist separation. This zero-cut method virtually eliminates transplant shock and is safe for divisions with as few as 2 eyes.
6. Container Hosta Division
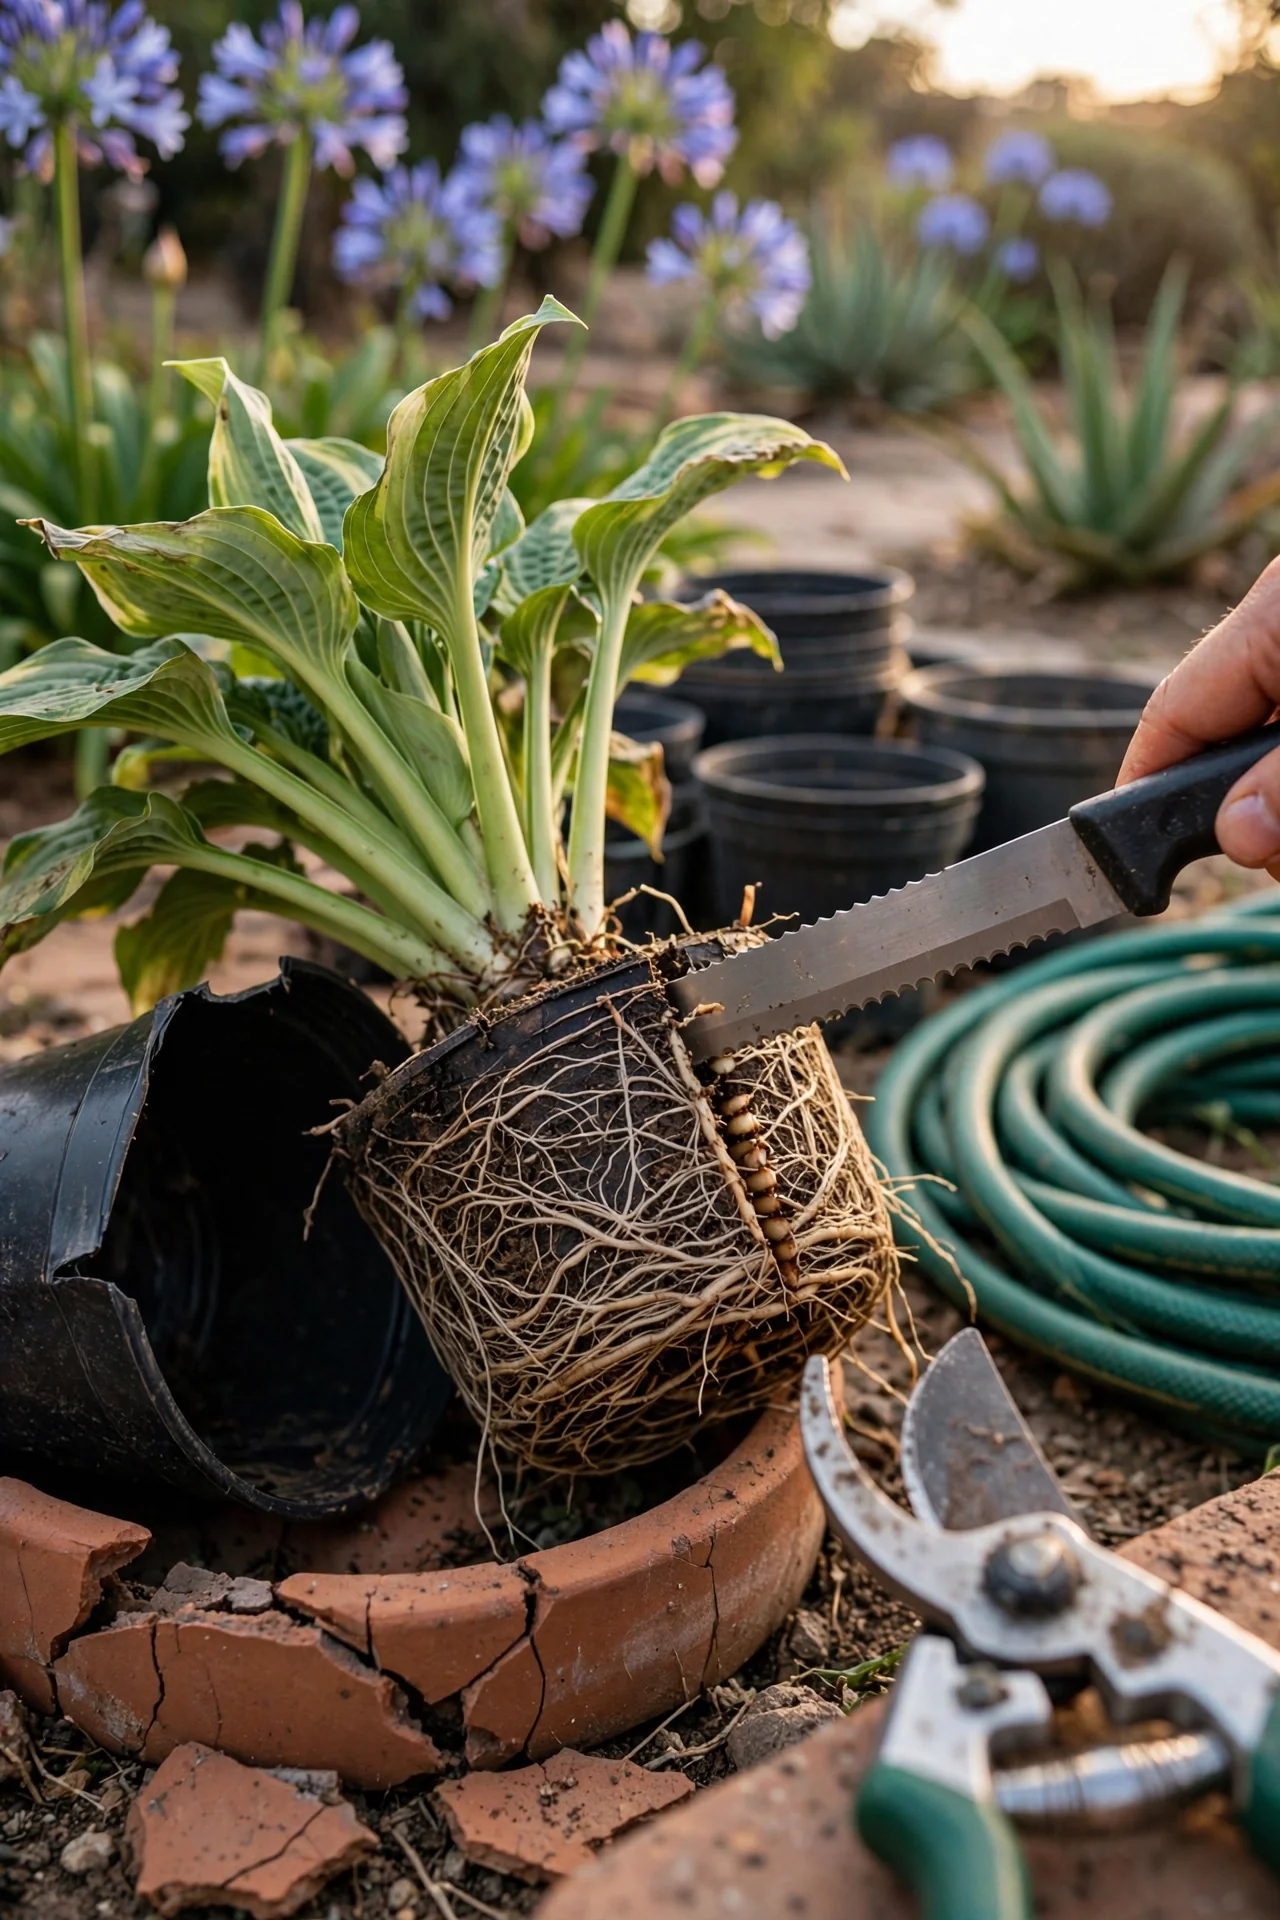
Best for: Branch 3 (Downsize Without Major Disruption)
Why container division differs: Pot-bound hostas develop circling roots that constrict the crown. Simply pulling the plant apart can snap the crown at weak points. Instead, slide the root mass out of the pot and use a serrated knife to slice vertically through the root ball, cutting through any encircling roots. Remove the bottom inch of matted roots entirely.
Timing: Container hostas can be divided any time during the growing season because you control the aftercare environment. However, avoid dividing during a heatwave above 90°F (32°C) unless you can move the divisions into full shade for 10 days. Repot each section into fresh potting mix; do not reuse the old depleted medium. Water until it drains from the bottom, then let the top inch dry before watering again.
7. Rossizing: Single-Eye Multiplication
Best for: Branch 1 (Multiply Your Stock)
Origin and mechanism: Named after hosta hybridizer Henry Ross, this technique produces the maximum possible number of plants from a single clump. Wash every grain of soil from the roots until the crown and all eyes are fully visible. Using a sharp, sterilized knife, cut the crown into individual eyes, each with a small piece of rhizome and at least one attached root strand. A mature clump with 30 eyes can yield 20 to 25 viable single-eye divisions after discarding weak or rootless eyes.
Critical aftercare: Rossized divisions are fragile. Pot each eye into a 3- to 4-inch container filled with a 50/50 mix (by volume) of peat-free compost and perlite or fine grit. Place pots in a sheltered location with bright indirect light, never direct sun. Water from below by standing pots in a tray for 20 minutes, then remove. Expect 8 to 12 weeks before the division produces its second leaf; do not plant out until it has at least 3 leaves. For ideas on setting up a dedicated growing area, see our propagation station ideas.
8. Post-Bloom Summer Division
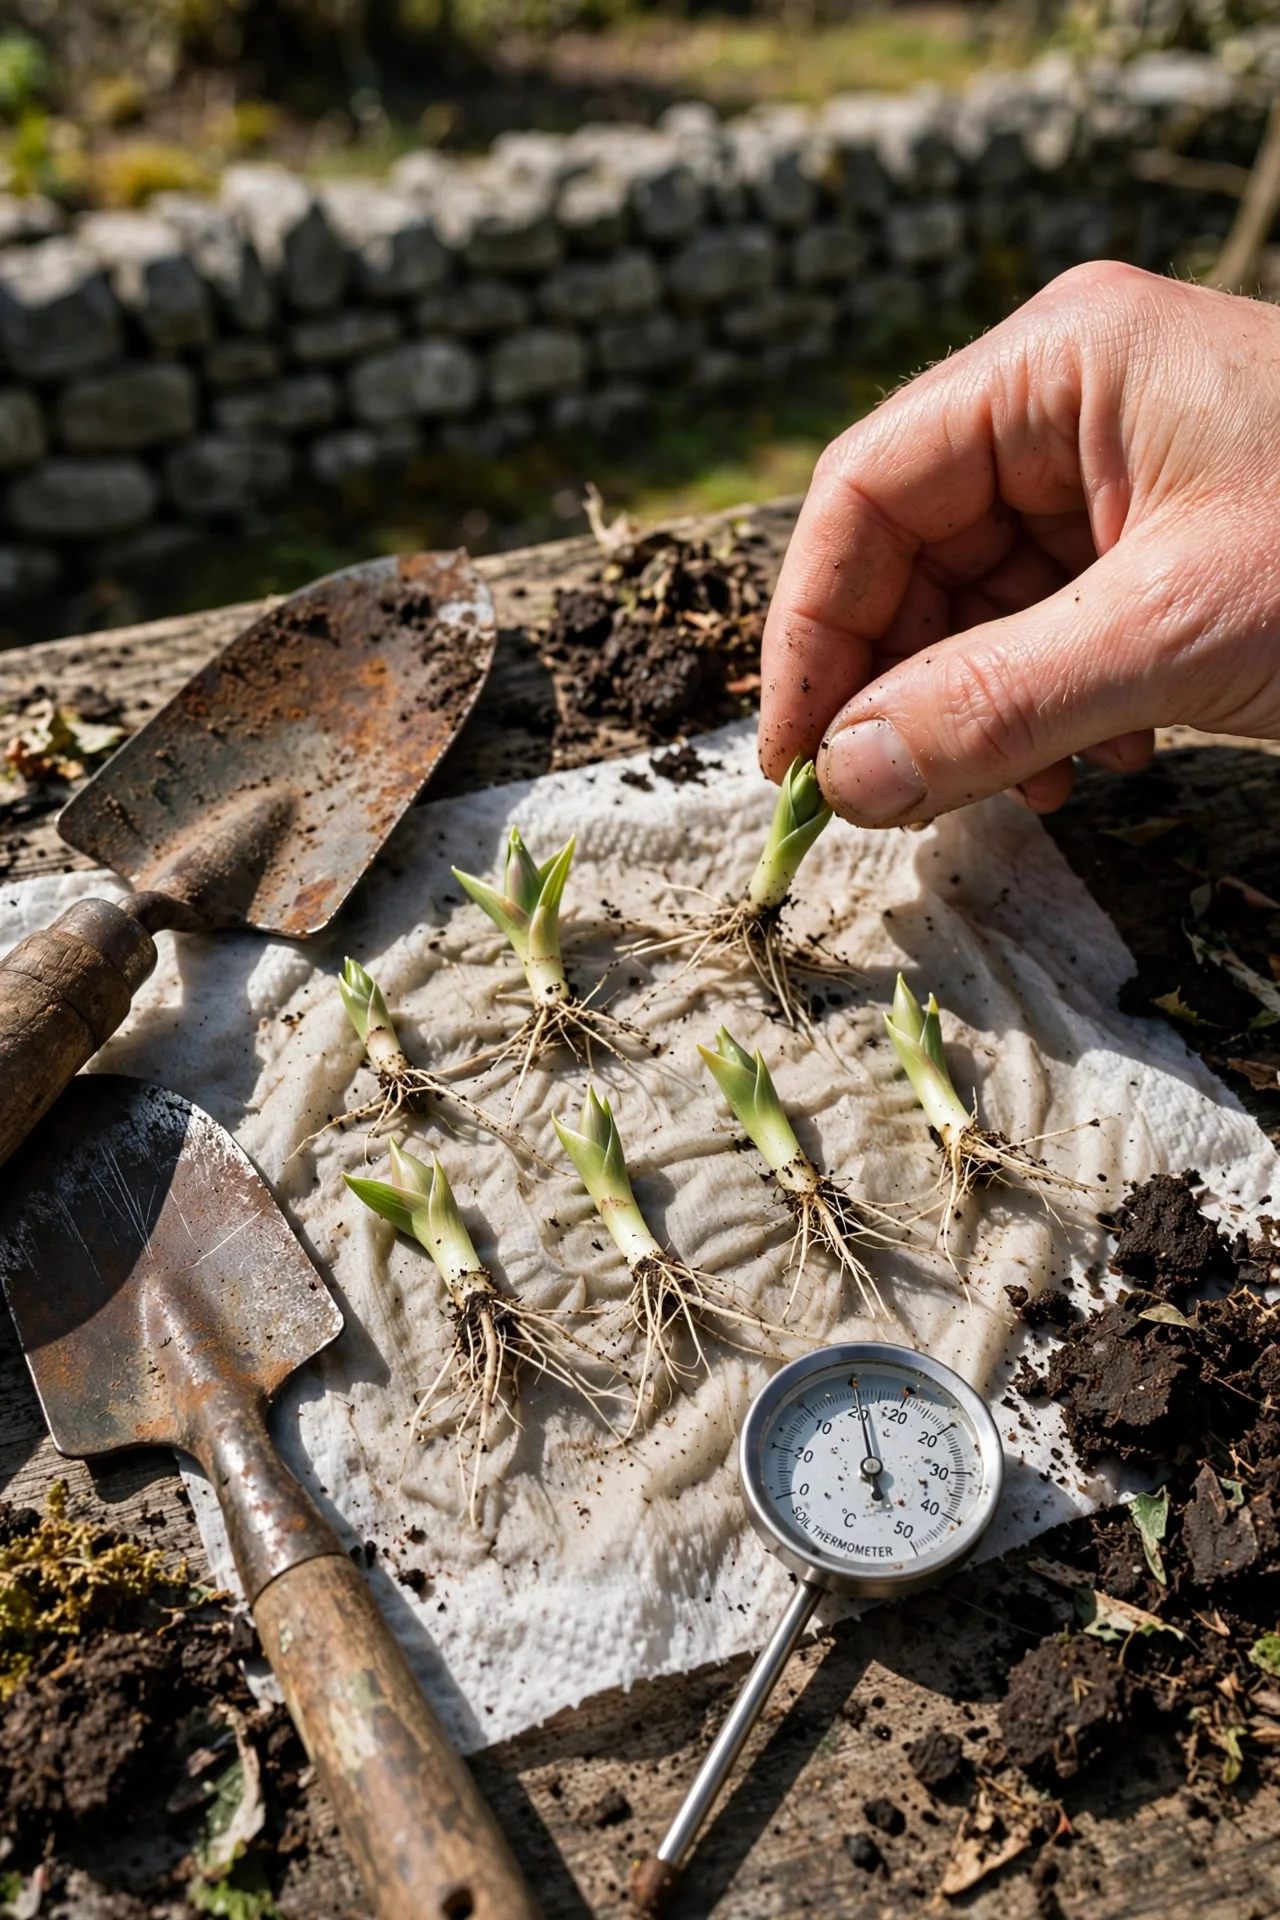
Best for: Branch 2 (Revive a Declining Clump)
Summer division is not ideal, but a declining plant should not wait until autumn if the center is rotting. Cut all flower stalks and reduce foliage height by half before digging. After replanting, water daily for the first two weeks. Shade the division with an overturned nursery pot or shade cloth during the hottest part of the day. Accept that leaves will wilt; do not trim green foliage, as it still feeds root development even when limp.
9. Bare-Root Preparation for Delayed Planting
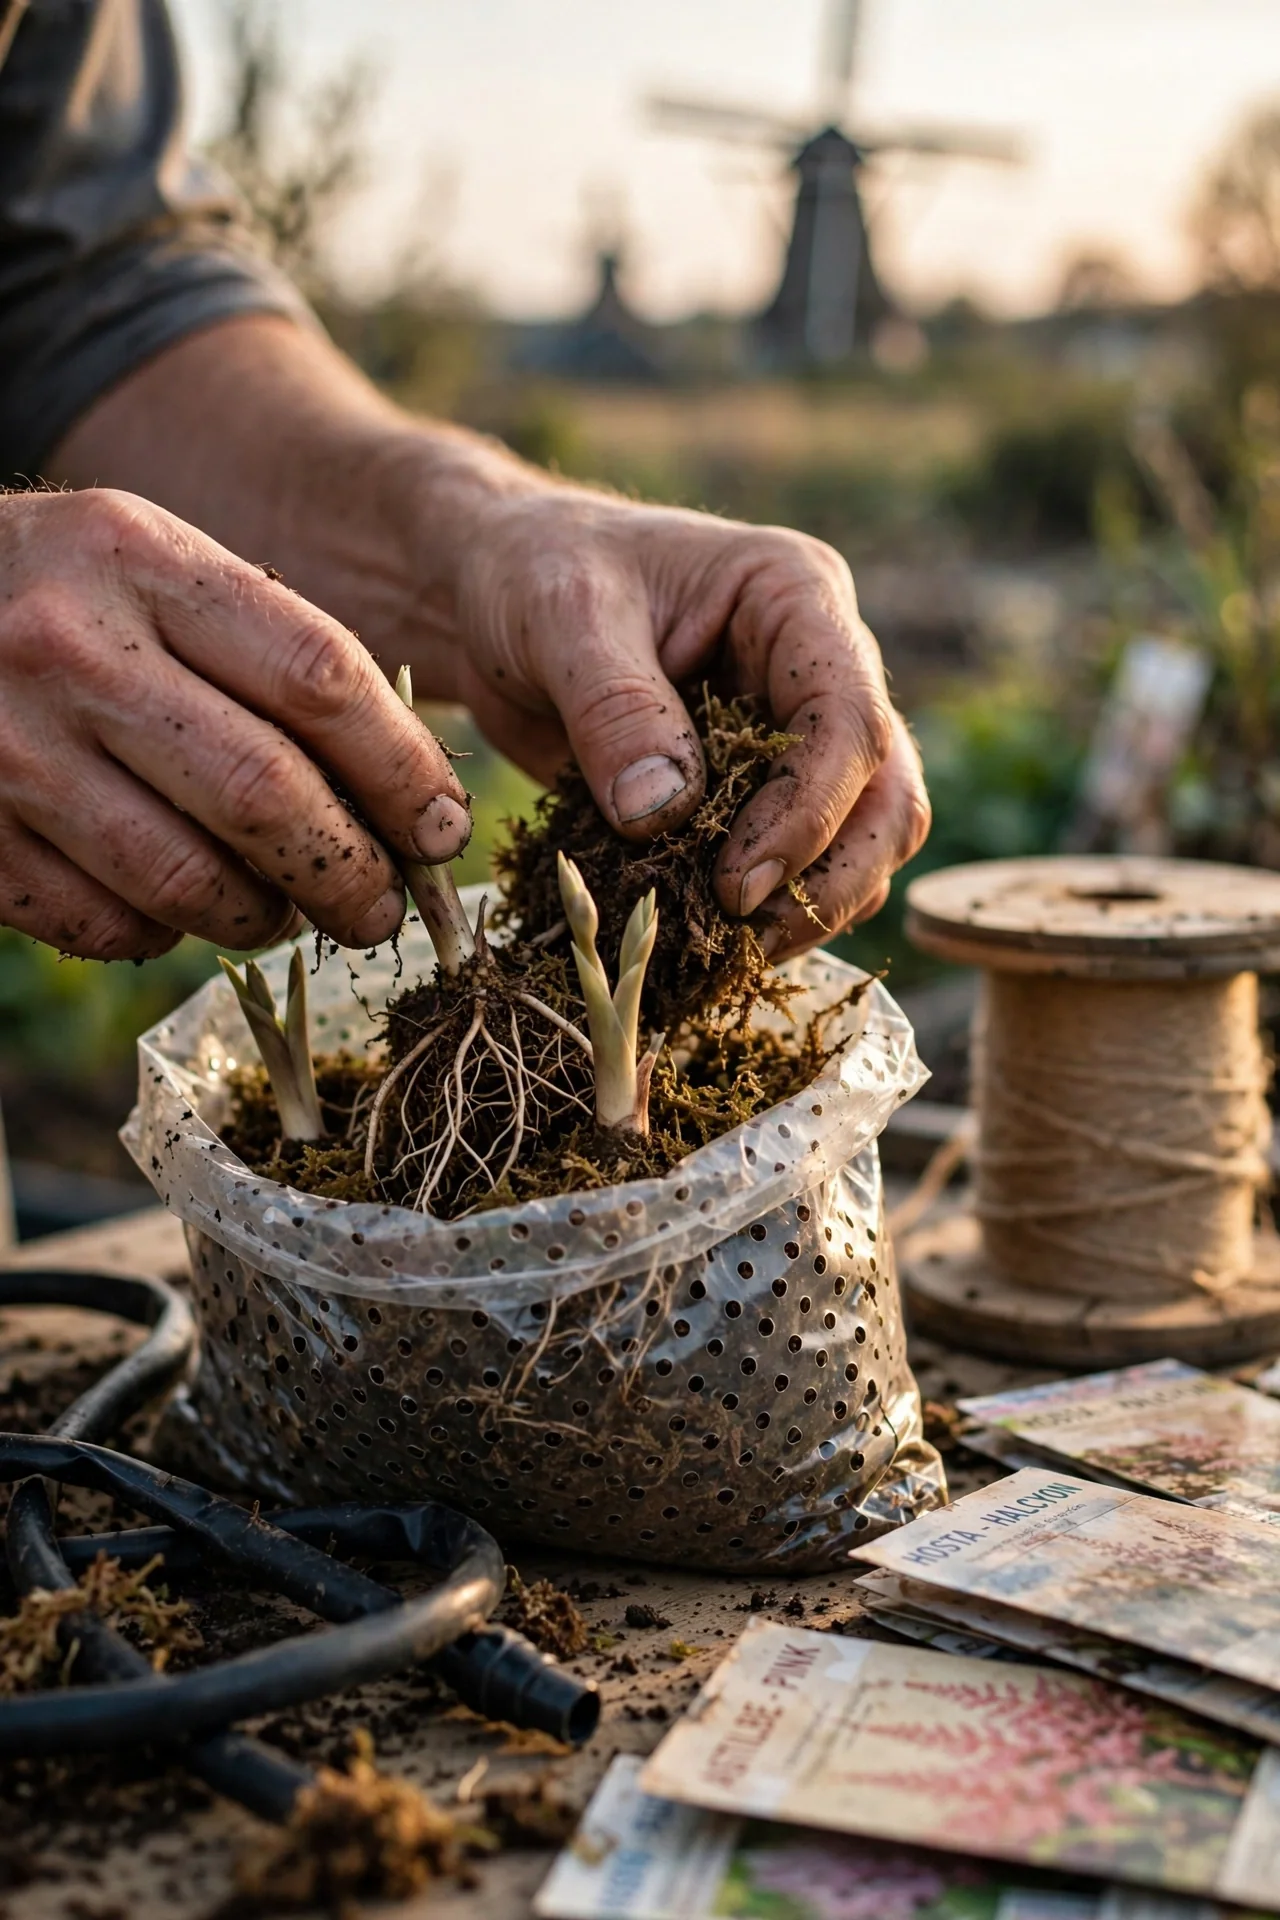
Best for: Branch 1 (Multiply Your Stock)
When you need it: You divided the plant but weather, travel, or unfinished bed preparation prevents immediate replanting. Bare-root storage bridges the gap. After dividing, rinse all soil from the roots and trim any damaged, mushy, or excessively long roots with clean shears. Wrap the roots in barely damp (not wet) sphagnum peat moss or coir, place in a perforated plastic bag, and store at 35 to 41°F (2 to 5°C). A refrigerator crisper drawer works if no ethylene-producing produce is present.
Limit: Storage beyond 4 weeks risks crown desiccation. Check weekly; if roots appear shriveled, mist the wrapping lightly. Plant out as soon as soil temperatures reach 50°F (10°C). For a different propagation approach that bypasses division entirely, read our guide on propagating hydrangea cuttings.
Starter Stack (What to Choose First)
If You Fall Under Branch 1 (Multiply Your Stock)
Start with Item 1 (Spring Full-Clump Division) and Item 3 (Wedge Removal). Together, these let you produce divisions from the main dig while also taking a lower-risk wedge from a second plant for comparison. Budget 45 to 75 minutes total. Cost is zero beyond basic tools if you already own a sharp spade and garden fork. If the full-clump divisions thrive, graduate to Item 7 (Rossizing) next season.
If You Fall Under Branch 2 (Revive a Declining Clump)
Start with Item 4 (Two-Fork Lever Split) and Item 8 (Post-Bloom Summer Division). Use the two-fork method on the largest, healthiest section of the clump and discard the dead center. If the plant declines further during the season, the summer protocol provides a backup rescue window. Expect to spend 60 to 90 minutes on a large clump, including soil amendment with compost. No purchased inputs required beyond mulch.
If You Fall Under Branch 3 (Downsize Without Major Disruption)
Start with Item 3 (Wedge Removal) and Item 6 (Container Hosta Division). The wedge technique handles in-ground plants with minimal disturbance; the container method addresses potted specimens. Together they cover most size-control scenarios. Time investment runs 20 to 40 minutes per plant. A bag of fresh potting mix for container divisions costs roughly $5 to $12 depending on brand and volume.
When This Won’t Work
Condition 1: Soil is frozen or waterlogged. Dividing hostas in frozen ground is physically impractical and shatters frozen roots. In waterlogged soil, cut surfaces stay wet, inviting bacterial soft rot. The alternative: wait until soil drains and temperatures moderate. If you must act, lift the plant bare-root and pot it temporarily in a sheltered location. Monitor soil moisture by feel, not by calendar. If the ground squelches underfoot, postpone.
Condition 2: The plant is actively blooming or in peak summer leaf. A hosta at full leaf expansion in July is pumping water through its foliage at maximum transpiration rate. Cutting the root system by half while leaves demand full water delivery almost guarantees severe wilt. The alternative: if division cannot wait (for example, construction or a move), cut all foliage back to 4 inches, move the plant to full shade, and water twice daily for 10 days. Accept that the following year’s display will be reduced. For general plant care guidance during recovery, see our guide on pruning houseplants, where similar stress-reduction principles apply.
Choosing the Right Option for Your Situation
Budget Threshold
All methods except container division can be done with tools you likely own: a spade, a garden fork, and a sharp knife. If you need to purchase a garden fork, expect to spend $25 to $45 for a forged steel model. Container division adds the cost of fresh potting mix. Bare-root storage requires sphagnum peat moss or coir, roughly $8 to $15 per bale that will last multiple projects. No method requires ongoing purchases beyond mulch.
Time Threshold
Hand teasing a miniature hosta takes under 5 minutes. Rossizing a mature clump with 30 eyes can consume 2 hours including potting. Most gardeners will spend 30 to 45 minutes per plant for a standard spring full-clump division, from first spade cut to final watering. Factor in an additional 15 minutes per division for daily watering checks during the first two weeks after replanting.
Technical Constraint: Crown Hardness
Some hosta cultivars, particularly large blue-leaved types like ‘Big Daddy’ and ‘Blue Angel,’ develop crowns hard enough to resist a standard spade cut. If the spade bounces rather than penetrates, do not force it. Switch to the two-fork method or use a serrated pruning saw. Forcing a blunt spade through a hard crown risks slipping and injuring hands or damaging neighboring plants.
Quick Yes/No Checklist:
- Is the soil workable, not frozen and not dripping wet? Yes → proceed. No → wait.
- Does the plant have at least 3 visible eyes? Yes → viable for division. No → let it mature another year.
- Do you have the new planting location prepared before digging? Yes → proceed. No → prepare first.
- Is the forecast free of extreme heat (above 90°F) for the next 7 days? Yes → safe window. No → postpone or provide shade.
Expert Q&A
Can I divide a hosta while it is flowering?
Technically yes, but it is inadvisable. Flowering draws significant energy from the crown. Cutting roots during bloom forces the plant to support flowers and heal wounds simultaneously. If unavoidable, remove all flower stalks first and cut foliage back by one-third. Expect slower recovery than spring or fall divisions.
Why did my divided hosta not grow larger the following year?
Over-dividing is the most common cause. Separating a clump into single-eye divisions produces many plants, but each one needs 2 to 3 full seasons to regain mature dimensions. A division with fewer than 3 eyes may not bloom for 2 years. Patience, not fertilizer, is the remedy.
Do I need to treat cut surfaces with fungicide or charcoal?
Not routinely. Hostas produce suberin, a natural wound-sealing compound, within hours of cutting when left in open air. Let cut surfaces dry for 1 to 2 hours in shade before replanting. If your garden has a history of crown rot, dusting cut faces with horticultural charcoal provides an extra barrier against fungal entry.
Are there any hosta varieties that should not be divided?
Slow-growing cultivars, particularly some tokudama types and certain gold-centered varieties, can take 5 to 7 years to form a meaningful clump. Dividing them early sets them back severely. Check the cultivar’s mature width and growth rate before dividing; if the expected spread at 5 years is under 18 inches, delay division.
What is the ideal division size for the fastest display next year?
Aim for divisions with 5 to 7 eyes and a root mass roughly the size of a football. This size retains enough stored energy to push full-sized leaves the following spring. Smaller divisions survive but produce smaller foliage for one to two seasons while they rebuild carbohydrate reserves.
Conclusion
The single mistake that costs gardeners the most divided hostas is not poor technique: it is dividing without a defined outcome in mind. Multiplying stock demands aggressive cutting and patience for small plants. Rejuvenation requires cutting out dead centers and keeping only viable outer sections. Downsizing calls for minimal intervention so the parent plant barely notices.
Choose your branch first, then pick the method that serves it. If you can only remember one rule, let it be this: never divide into pieces smaller than 3 eyes unless you are prepared to wait for a display. For a deeper look at timing decisions across the garden calendar, see our fruit tree pruning calendar, which uses a similar decision-branch framework.