
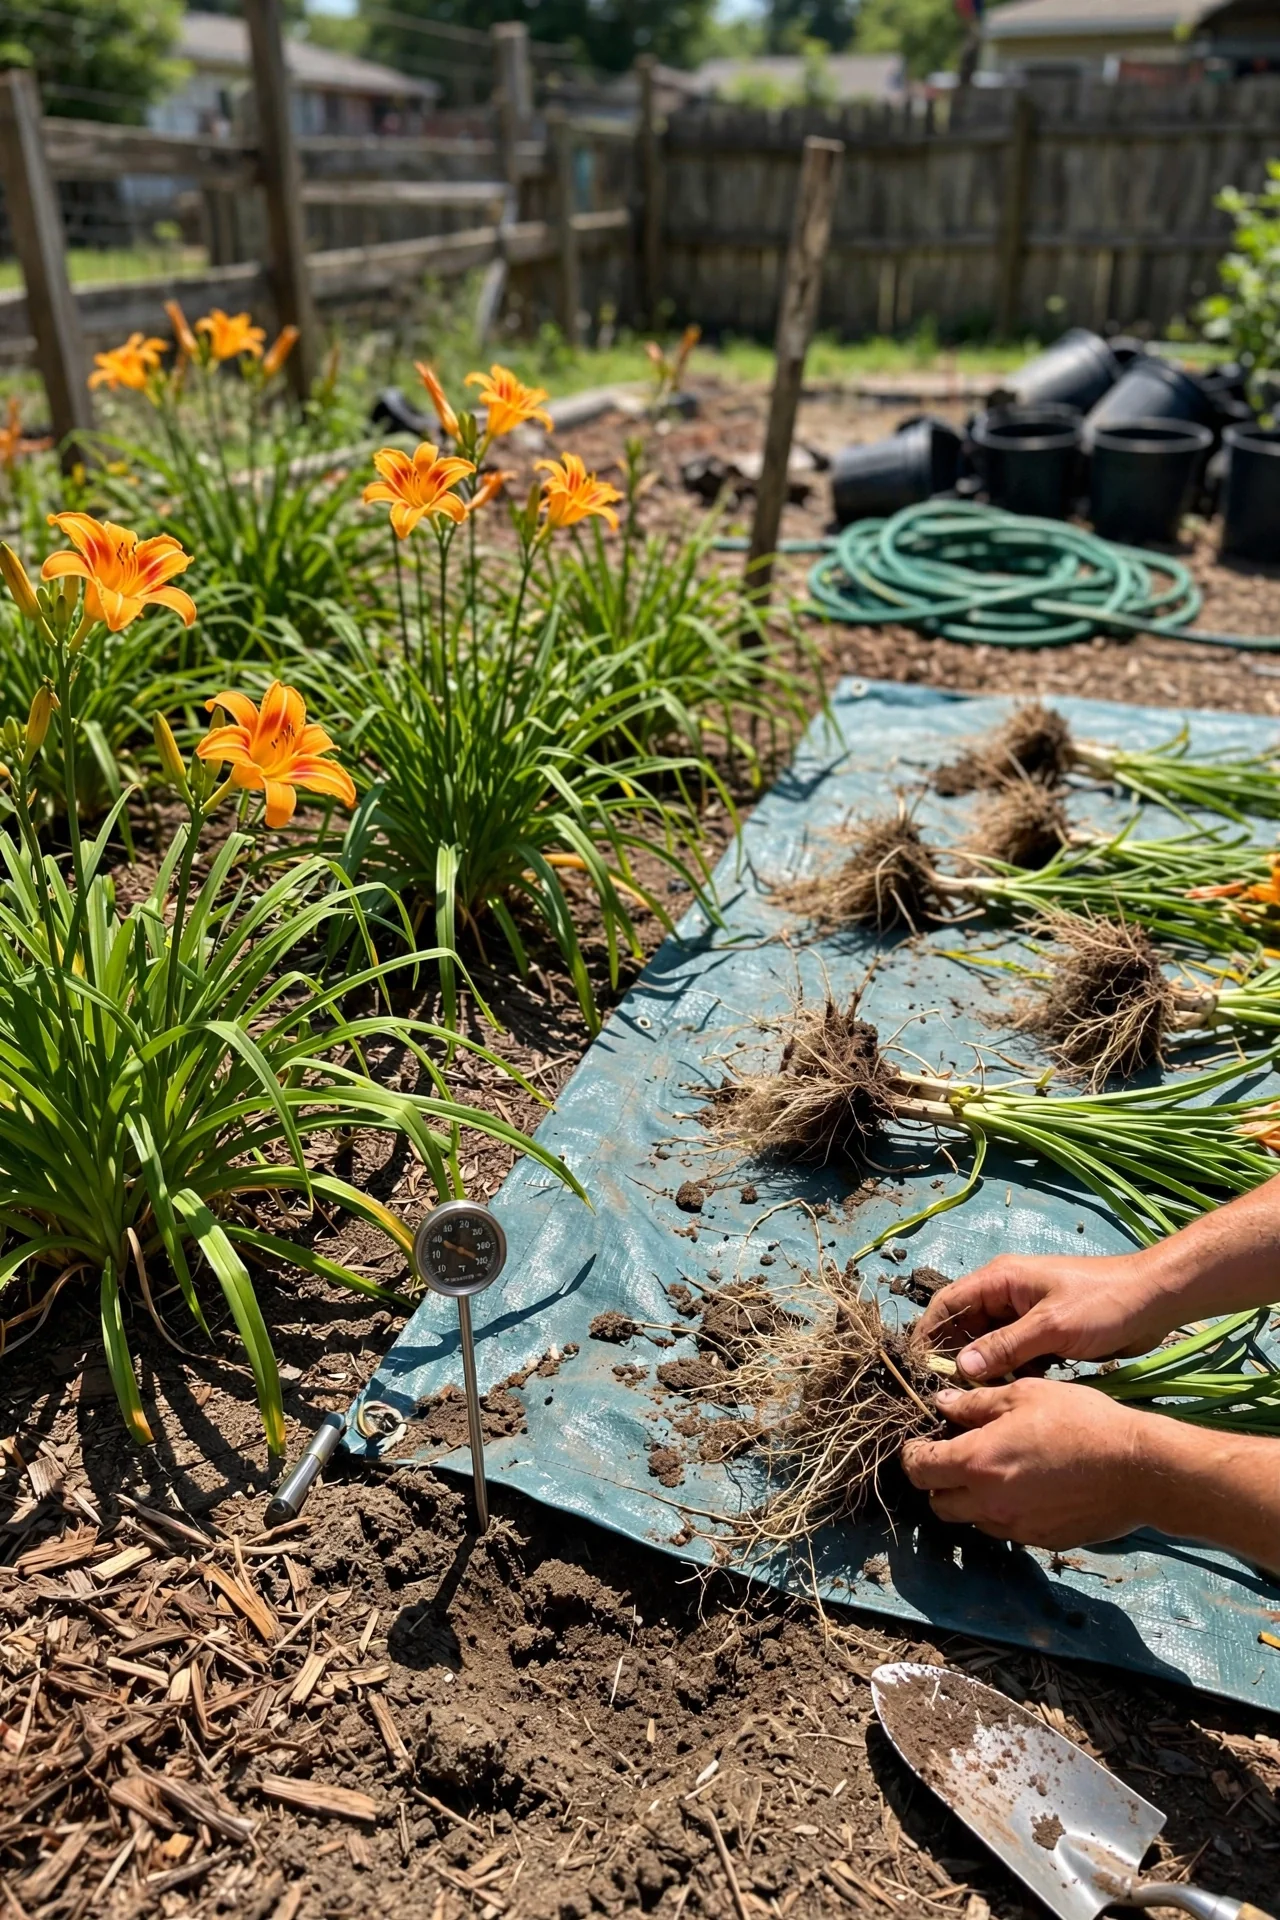
Generic advice says divide daylilies in spring or fall. That collapses two radically different strategies into one sentence. A gardener in Minneapolis dividing in October faces frozen soil within weeks; a gardener in Atlanta doing the same gives roots months to establish. The calendar is the wrong compass. The right one is your USDA hardiness zone, the overnight low temperature expected within 6 weeks of your division date, and the specific condition of the clump you are lifting.
This guide covers in-ground daylily division for garden rejuvenation and plant multiplication. It excludes seed propagation, proliferation (tiny plantlets on spent scapes), tissue culture, and container-grown divisions sold as bare-root stock. The focus is on the decision points most articles skip: whether to use a spade or two forks based on root mass density, when to cut foliage back versus leave it standing, and how to calibrate aftercare to the season you are dividing in.
By the end, you will know which of three division branches fits your climate, how to pick the right tool method for your clump age, what spacing and depth prevent the most common post-division failure (crown rot from planting too deep), and how to handle extra divisions you cannot plant immediately. Every recommendation ties to a measurable condition: a temperature threshold, a root type, a soil moisture level, or a 6-week frost-free window.
Bottom line: Match your division window to the 6-week forecast after planting, not to a month on the calendar, and always check that the overnight low trend stays above 28°F (-2°C) for at least six weeks after you replant.
The Yield Grid Decision Grid
Daylily division splits into three branches, each triggered by a different set of conditions. Pick the branch that matches your situation; each points to specific items below.
Branch 1: Cold-Winter Spring Division (USDA Zones 3–6)
Trigger: Your average first frost arrives by mid-October, and winter lows routinely drop below 0°F (-18°C). In these zones, fall-planted divisions often heave out of the ground during freeze-thaw cycles before roots anchor. Spring division, as soon as new shoots reach 3 to 5 inches tall and the soil is workable, gives plants a full growing season to establish before winter. The trade-off: you may sacrifice that season’s blooms on divided plants.
Recommended: Items 1, 4, and 7 below.
Branch 2: Mild-Winter Late-Summer Division (USDA Zones 7–9)
Trigger: Winter lows rarely stay below 20°F (-7°C) for extended periods. The soil cools gradually and rarely freezes solid. Dividing in late August to mid-September, after peak bloom but while soil temperatures remain above 55°F (13°C), lets root regeneration continue into December. Spring division here risks exposing fresh divisions to early summer heat before roots have rebuilt.
Recommended: Items 2, 6, and 9 below.
Branch 3: Emergency Any-Season Division
Trigger: The clump is so congested it is pushing itself out of the soil, the center has died out entirely, bloom count has collapsed to fewer than 5 scapes from what was once a 20-scape clump, or construction forces an unplanned move. You divide now regardless of season but apply the extra-cautious aftercare in Items 3 and 8. For guidance on dividing similarly structured clumping perennials, see our hosta division guide, which covers the back-to-back fork technique in detail.
Recommended: Items 3, 5, and 8 below.
Quick Comparison Table
| Option | Key Mechanism | Best For | Decision Grid Branch | Effort Score (1–5) |
|---|---|---|---|---|
| Spring Spade Division | Lift entire clump, quarter with sharp spade, replant 3-fan sections | Zones 3–6, dormant varieties | Branch 1 | 3 |
| Fall Two-Fork Split | Back-to-back forks lever root mass apart, minimal root loss | Zones 7–9, evergreen varieties | Branch 2 | 2 |
| Hand-Tease Small Clumps | Wash soil off, wiggle fans apart by hand, trim damaged roots | 3–4 year old clumps under 12 inches diameter | Branch 1 or 2 | 2 |
| Emergency Summer Division | Cut foliage to 4–6 inches, divide fast, shade for 7 days | Construction, relocation, severe overcrowding | Branch 3 | 5 |
| Dead-Center Clump Salvage | Discard woody center core, keep outer 6-inch ring only | Clumps older than 6 years with hollow centers | Branch 3 | 3 |
| Bare-Root Holding Method | Heel into damp sand or pot temporarily, plant within 14 days | Divisions that cannot be replanted immediately | Any | 4 |
| Deep Soil Prep Replant | Amend 12-inch depth, set crown 1 inch below surface, 24-inch spacing | Permanent home for divisions, long-term vigor | Branch 1 | 2 |
| Minimalist Replant | Replant at same depth, water in, mulch 2 inches, walk away | Excess divisions, filler planting, shared plants | Branch 2 | 1 |
| Container Grow-Out | Pot divisions in 1-gallon nursery pots for 6–12 months before garden planting | Uncertain final location, gift plants, weak divisions | Branch 2 or 3 | 4 |
1. Spring Spade Division: The Cool-Climate Standard
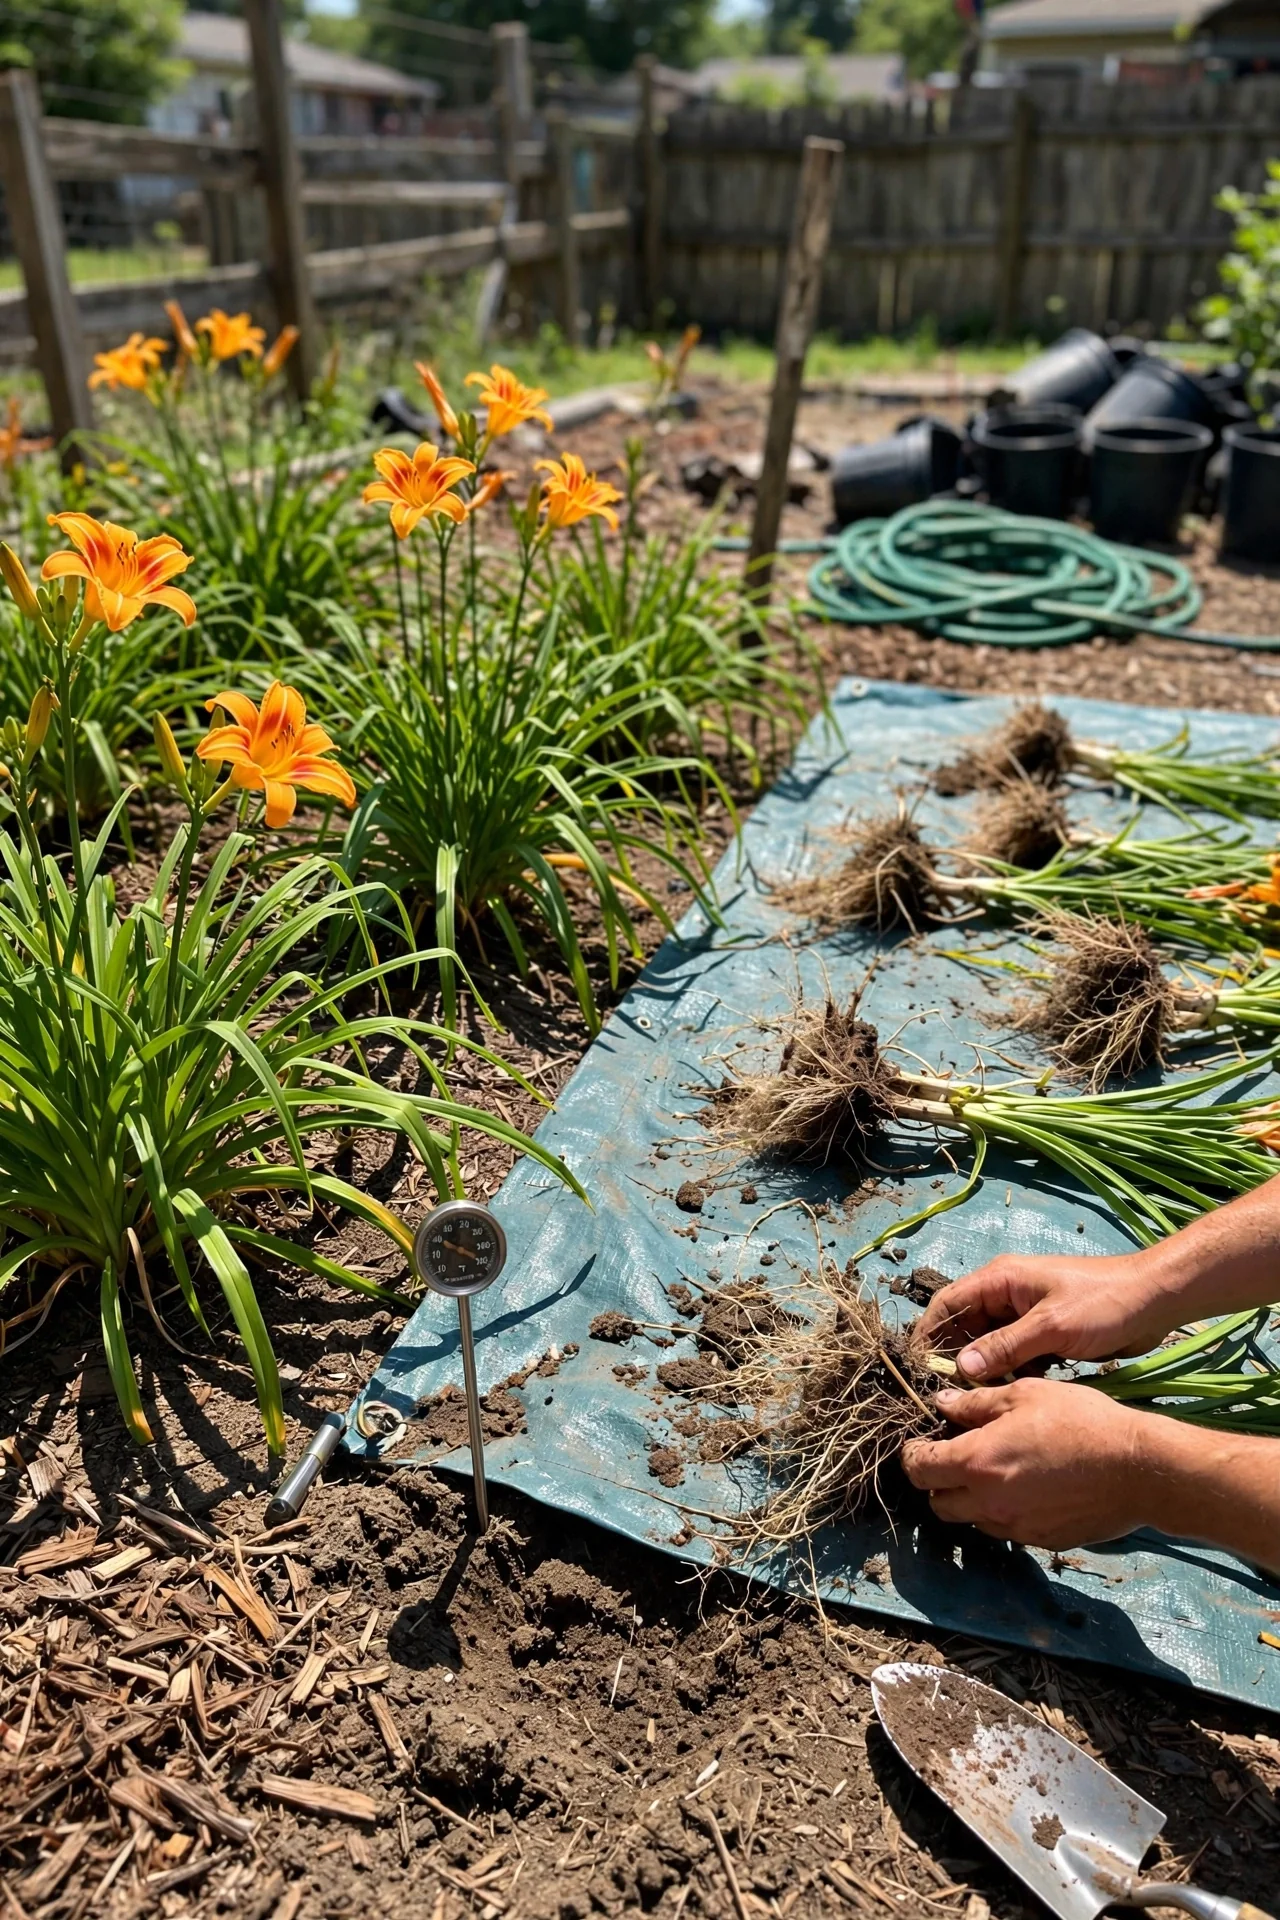
Best for: Branch 1 (USDA Zones 3–6, dormant-type daylilies)
What it is: Lifting an entire clump with a sharp nursery spade in early spring, quartering it with one clean downward cut, and replanting each section as a new plant. This is the fastest method for large clumps over 18 inches in diameter. The spade severs through both the fibrous root mat and the tuberous storage roots in a single motion, which sounds brutal but works because daylily crowns regenerate feeder roots within 2 to 3 weeks when soil temperatures reach 50°F (10°C).
When to use it: New shoots are 3 to 5 inches tall, soil is dry enough that a handful squeezed in your fist crumbles when you open your hand. If the soil balls up, wait 2 to 3 days. The ground must not be frozen 4 inches down.
Steps: (1) Water the clump deeply 24 hours before digging; this hydrates the tuberous roots and makes them less brittle during the cut. (2) Insert the spade vertically 8 to 10 inches from the clump edge, work around the full circumference, then lever the root ball up. (3) Lay the clump on its side on a tarp. Position the spade blade across the center and drive it through with one firm step. Repeat to quarter. (4) Trim any torn roots cleanly with bypass pruners. For guidance on keeping your spade and pruners sharp enough for clean cuts that heal faster, review our tool sharpening guide. (5) Cut foliage back to 6 to 8 inches so the reduced root system is not supporting full leaf mass. (6) Replant immediately with the crown at exactly 1 inch below the soil surface.
Common mistake: Planting divisions too deep. When the crown sits below 2 inches, daylilies in cool spring soils develop crown rot before new roots form. Measure with a finger, not by eye.
2. Signs a Clump Needs Dividing: The Pre-Decision Checklist
Best for: Branch 2 (mild climates where signs appear gradually)
Skip division this year if: Your clump still produces at least 8 to 10 scapes per season, the center has green shoots, and fans are not visibly pushing each other out of the soil. Division reduces bloom count for 1 to 2 seasons afterward.
Divide now if: Bloom count has dropped by more than half compared to 3 years ago, the clump center shows brown, woody material with zero green shoots, or individual fans are literally lifting out of the soil surface. These indicate root competition has passed the point where fertilizer alone can compensate.
3. Fall Two-Fork Split: The Root-Sparing Method for Established Clumps
Best for: Branch 2 (Zones 7–9, late August through mid-September)
Threshold rule: Begin only when daytime highs have dropped below 85°F (29°C) for at least 5 consecutive days. In Zone 8, this typically occurs by the second week of September. Soil temperature at 4-inch depth should read between 60°F and 75°F (16°C–24°C). If soil is warmer than 78°F (26°C), new root initiation slows significantly. Wait. The 6-week frost-free window after replanting is non-negotiable; count forward from your average first frost date on the USDA zone map for your county.
The two-fork method preserves significantly more of the fibrous feeder root network compared to spade-quartering. Insert two garden forks back-to-back into the center of the lifted clump, then pull the handles in opposite directions. The root mass separates along natural fault lines between fans rather than through them. This matters because feeder roots are where water and phosphorus uptake happen in the first 4 weeks after transplanting. For a similar mechanical division approach on a different plant type, see our snake plant division guide, which explains the back-to-back lever principle in a different root context.
4. Emergency Summer Division: When You Cannot Wait for the Right Season
Best for: Branch 3 (any zone, any season, when delay means losing the plant)
What it is: Dividing during the plant’s active growth and bloom period, typically June through early August, when air temperatures exceed 85°F (29°C) and transpiration stress is at its peak. This is the highest-risk division window, but daylilies are among the few perennials that can survive it if you follow two non-negotiable rules: radical foliage reduction and temporary shade.
When to use it: A construction project is starting next week and the clump is in the path. Or the clump has heaved so far out of the ground that half the root mass is exposed to air. Or you are moving houses in July. This is not a “convenience” option; it is a salvage operation.
Steps: (1) Cut all foliage to 4 inches, no taller. This slashes the leaf surface area demanding water from the severed root system. (2) Dig in the early morning when the plant is fully turgid. (3) Divide quickly using the spade-quarter method; do not spend time teasing roots apart by hand, as root desiccation accelerates once exposed to summer air. (4) Replant immediately into pre-watered holes. (5) Erect a 40–50 percent shade cloth cover over the divisions for the first 7 days. If shade cloth is unavailable, a lawn chair or inverted nursery flat works for small groupings. (6) Water every 48 hours for the first 2 weeks, checking that soil at 3-inch depth stays moist but never saturated.
Common mistake: Skipping the shade step. Unshaded summer divisions lose water through leaves faster than damaged roots can replace it. The foliage collapses within 72 hours, and while the crown often survives, the plant loses the rest of the growing season. For more on propagation spaces and holding setups, our propagation station ideas article covers temporary holding configurations that work for divisions waiting on a permanent home.
5. Salvaging the Dead-Center Clump: Keep the Ring, Discard the Core
Best for: Branch 3 (clumps older than 6 years with hollow or woody centers)
The edge case most advice misses: A daylily clump that has outgrown itself does not need to be divided into equal quarters. The center is dead, woody, and sterile. Lift the entire clump, wash the soil off with a hose, and you will see a distinct ring of white, firm roots and green fans surrounding a brown, hardened core.
What to do: Cut away and discard the entire center core. Keep only the outer 6-inch ring where young fans with thick white roots are located. These outer fans are the genetically vigorous material; the center will never regrow productive shoots. Break the ring into 2–3 fan sections and replant.
6. The 10-Minute Hand-Tease Workflow for Small Clumps
Best for: Branch 1 or 2 (clumps under 12 inches diameter, divided within the last 4 years)
Steps (10 minutes per clump): (1) Water 24 hours prior. (2) Lift the clump with a spading fork, not a shovel; the fork tines slide between roots rather than cutting through them. (3) Spray the root ball with a garden hose on jet setting to expose the fan junctions. (4) Grasp 2 adjacent fans and wiggle them apart with a gentle side-to-side motion. If they resist, do not force them; use a soil knife to tease apart the tangle at the crown junction. (5) Trim any roots longer than 8 inches back by half to stimulate new feeder root branching. (6) Replant within 30 minutes of lifting.
Upgrade option: If you find the fans separated easily, consider potting 2 of them into 1-gallon containers for 6 to 8 weeks before planting out. Container-grown divisions develop denser root balls and establish faster when finally placed in garden soil. This is the same principle used for softwood cuttings; early root confinement encourages a more branched root architecture.
7. Replanting Depth, Spacing, and Soil Preparation: The 3 Numbers That Prevent Most Failures
Best for: Branch 1 (permanent home for divisions where long-term vigor matters)
What it is: A specific replanting protocol with three measurable parameters. The most common post-division failure is not the division itself but what happens in the first 4 weeks after the division goes back into soil. Crown rot from excessive planting depth is the leading cause of first-year division loss, and it is entirely preventable.
The three critical numbers:
Crown depth: 1 inch below soil surface. This is measured from the point where white root tissue transitions to green shoot tissue. If you cannot see a clear color transition, aim for the point where roots begin branching. In heavy clay soils, err slightly shallower (0.75 inch). In sandy soils, 1 inch exactly. A crown planted at 2 inches or deeper stays wet and begins rotting within 14 to 21 days in soil temperatures above 55°F (13°C).
Fan spacing: 24 to 30 inches center-to-center. This feels absurdly wide when you are holding a tiny 3-fan division. It is correct. A healthy daylily fan expands to a 12-inch diameter within 2 years. Spacing at 18 inches means you will be dividing again in year 3. Spacing at 24 inches gives you a 4–5 year interval. Commercial growers use 30 inches for exhibition-quality bloom counts.
Soil amendment depth: 12 inches. Daylily roots penetrate deeper than most gardeners assume. Loosen the soil to a full 12-inch depth across the planting area, not just in the hole. Mix in 2 to 3 inches of well-rotted compost across the top and fork it in. Avoid high-nitrogen fertilizer at planting time; nitrogen pushes leaf growth at the expense of the root regeneration that matters most in weeks 1 through 6.
Common mistake after replanting: Overwatering. The division’s root system is reduced and cannot take up the volume of water a full plant could. Soil that stays saturated at a 3-inch depth for more than 48 hours after watering signals poor drainage. Daylily roots in saturated soil stop producing new root hairs and begin to die back within 5 to 7 days.
8. The First-4-Weeks Watering Protocol
Best for: Branch 3 (any division that needs careful establishment)
Threshold rule: Keep soil moisture at a 3-inch depth consistently damp but never wet. Test by inserting a finger; if soil sticks to your skin without dripping water when you remove your finger, moisture is correct. In temperatures above 80°F (27°C), this means watering every 48 hours for the first 2 weeks, then shifting to every 72 hours for weeks 3 and 4. In cool weather below 65°F (18°C), water once at planting and then only when the top 2 inches are dry.
Adjustment for clay soils: Cut frequency by one-third. Clay holds water longer than loam, and the #1 error in clay is watering on a schedule rather than checking soil moisture first.
9. Extra Divisions: Share, Pot, or Hold
Best for: Branch 2 (when you end up with more divisions than planting spaces)
Use (share immediately): Wrap divisions in damp newspaper or burlap, place in a plastic bag with air holes, and deliver to a neighbor within 24 hours. Roots must not dry out. If gifting, include a note specifying the 1-inch crown depth rule; most gift-plant failures trace to deep planting by the recipient.
Skip (pot up for later): If you cannot give divisions away immediately, pot them into 1-gallon nursery containers with standard potting mix, water thoroughly, and place in partial shade. Potted divisions can hold for 6 to 12 months before garden planting. Fertilize lightly with a dilute liquid feed (half the label rate) starting 4 weeks after potting. For more approaches to handling surplus propagated plants, our rosemary cuttings guide covers holding strategies that apply equally to potted divisions.
Starter Stack (What to Choose First)
Branch 1 Starter: Cold-Climate Spring Division Setup
Begin with Item 1 (Spring Spade Division) as your primary technique, paired with Item 7 (Replanting Depth, Spacing, and Soil Preparation). The spade-quarter method handles the heavy root mass of mature cold-climate clumps efficiently, while the precise replanting protocol prevents the crown rot that cold, wet spring soils can trigger. Budget approximately 30 to 45 minutes per large clump from first dig to final watering. A sharp spade and bypass pruners are your only essential tools; a spading fork is optional but helpful for the initial lift.
Branch 2 Starter: Mild-Climate Fall Division Setup
Combine Item 3 (Fall Two-Fork Split) with Item 9 (Extra Divisions). The two-fork method preserves the feeder roots that continue growing in warm autumn soil, and mild-climate gardeners tend to accumulate more divisions because the longer growing season produces larger clumps. Budget about 20 to 30 minutes per clump for the division itself, plus an additional 15 minutes per batch for potting or wrapping extras. Two garden forks of equal size are required; mismatched forks make the lever action harder to control.
Branch 3 Starter: Emergency Division Survival Kit
Pair Item 4 (Emergency Summer Division) with Item 8 (First-4-Weeks Watering Protocol). When you divide outside the ideal windows, the two things that determine survival are radical foliage reduction and disciplined watering. Budget an extra 10 minutes per clump for the shade cloth setup, and plan to check soil moisture every 48 hours without fail for the full 4-week establishment period. A 40 percent shade cloth and a soil moisture meter are worthwhile investments if emergency division becomes necessary for multiple clumps.
When This Won’t Work
Failure condition 1: Dividing into unamended, compacted subsoil. If you lift a healthy clump, divide it correctly, and replant into soil that has not been loosened below 4 inches, the divisions will stall. Daylily contractile roots pull the crown downward over time, and when they hit a compacted layer, the crown cannot settle to its correct depth. The plant slowly weakens over 2 to 3 seasons, producing progressively shorter scapes and smaller blooms. The alternative: if the planting site has never been deep-loosened, spend the 20 minutes per 10 square feet to fork the soil to a 12-inch depth and incorporate organic matter before replanting. If that workload is not feasible right now, pot the divisions and improve the soil over the next season.
Failure condition 2: Dividing evergreen daylily varieties in Zone 6 or colder during fall. Evergreen types (often labeled as such on the plant tag) retain foliage through winter in mild climates, but in cold zones that foliage collapses into a wet, rotting mass on the crown after the first hard freeze. This mat holds moisture against the crown all winter and fungal rot frequently develops by March. The alternative: identify whether your daylily is dormant or evergreen. If the tag is lost, observe whether the foliage dies back completely after the first fall frost. If any green tissue persists into November, it is likely semi-evergreen or evergreen. In Zones 3 through 6, divide evergreen types in spring only, regardless of what the calendar month says. For guidance on pruning other perennials where timing by variety matters equally, see our peony pruning guide.
Choosing the Right Option for Your Situation
Budget Threshold
Daylily division costs almost nothing if you already own a spade or garden fork. The budget constraint is not tools; it is time. If you have more than 5 large clumps to divide, using the spade-quarter method (Items 1, 4) instead of the slower hand-tease method (Item 6) saves 10 to 15 minutes per clump. The only potential purchase is a second garden fork if you choose the two-fork method (Item 3), typically $25 to $45 at garden supply stores in the US, £20 to £35 in the UK, or $30 to $55 CAD in Canada.
Time Threshold
One clump of 18-inch diameter, from first dig to final watering, takes 20 to 45 minutes depending on method choice and soil conditions. If you have only 60 minutes total, prioritize the clumps showing the clearest signs of decline (dead centers, fewer than 5 bloom scapes). Leave healthy, younger clumps for another season. Dividing is not an annual chore; even fast-growing varieties in warm climates need it only every 3 to 4 years.
Technical Constraint: Soil Moisture at Dig Time
The single technical constraint that overrides all timing advice is soil moisture. If the soil is waterlogged from recent heavy rain, do not dig. Walking on saturated soil compacts it, and the root ball will be a heavy, sticky mass that is nearly impossible to clean and divide cleanly. Wait 3 to 4 dry days. If the soil is bone-dry and hard, water deeply and wait 24 to 48 hours. The ideal digging condition: soil that holds together when squeezed but crumbles when poked, and roots that pull free of the ground with a firm tug rather than snapping.
Yes/No Checklist:
- Can I provide consistent moisture (not saturation) for 4 weeks after replanting?
- Is there a 6-week window before the first expected hard freeze (soil temperature below 28°F/-2°C at 4-inch depth)?
- Is the planting site prepared to a 12-inch depth with organic matter incorporated?
- Do I know whether my variety is dormant or evergreen, and have I matched the season accordingly?
Expert Q&A
Can I divide daylilies while they are still blooming?
Technically yes, but you will lose the current blooms and likely the next flush. The plant prioritizes root recovery over flower production. If you need the blooms for an event in the next 2 weeks, wait. If bloom count has already collapsed to trivial levels, the blooms are not worth delaying the division.
Why do some divided daylilies skip blooming for 2 full years?
Divisions made too small (single fan with minimal root mass) need that long to rebuild carbohydrate reserves in their tuberous roots. Using 3 to 5 fans per division shortens the bloom gap to one season or less. Tiny divisions survive but enter a juvenile-like phase where vegetative growth monopolizes energy.
What is the difference between dividing dormant versus evergreen daylilies?
Dormant varieties die back completely after frost; you divide them anytime the soil is workable and they are not in active bloom. Evergreen varieties retain foliage year-round in mild climates and never fully go dormant. Divide evergreens only in early fall in Zones 7–9, or in spring for Zones 6 and colder, because their persistent foliage makes them more vulnerable to winter crown rot when divided late.
Should I soak bare-root divisions before replanting?
Only if roots have dried during storage. Soak in room-temperature water for 1 to 2 hours, no longer. Extended soaking leaches soluble carbohydrates from the root tissue. If you are replanting within 30 minutes of lifting, skip the soak entirely; roots are still hydrated from soil moisture.
How do I know if a division has failed, and when should I give up on it?
A failing division shows yellowing that starts at leaf tips and progresses inward within the first 2 weeks, followed by complete leaf collapse. The crown may still be alive below the soil. Wait 4 to 6 weeks. If no new shoots emerge from the crown by week 6, gently dig it up. A healthy crown feels firm and shows white tissue when scratched; a dead crown is soft, brown, and may smell sour.
Conclusion
The choice that matters most is not which tool you use but which season you pick for your climate zone and variety type. Cold-climate gardeners with dormant daylilies get the widest margin for error by dividing in spring. Mild-climate gardeners with evergreens benefit most from fall division when soil stays warm and rains return. The one mistake that crosses all zones is burying the crown too deep; measure the 1-inch depth with your finger every time you replant.
If you are dividing daylilies to expand your garden, the extra divisions you generate can be handled with the same holding and potting strategies used for other propagated plants. For a broader look at how divisions fit into a larger propagation workflow, our rose propagation from cuttings guide covers the principles of root establishment timing that apply across many perennials. Start with one clump this season, apply the 1-inch crown depth rule, and scale up next year once you see how your specific varieties respond.